apnea-comp-manual
Apnea Comp — User Manual
AIDA Competition Management System
Manual 1.1.0 · Last updated 2026-09-16 · App version 1.2.1
Languages: English · 한국어 · 日本語 · 简体中文 · 繁體中文
Apnea Comp runs an AIDA apnea competition from a phone: the start list comes down from AIDA, and check-in, judging, protests, records and results are handled in the app and sent back up. This manual is written for the people running the day — Organizers, Main Judges, Judges, Staff, Safety and Photo — and for the athletes competing in it.
Contents
- About this manual
- Before you start
- Signing in
- Quick Start
- Roles and what each can do
- Creating an event (Organizer)
- Joining an event (Staff)
- Joining as an athlete
- Documents (consent forms)
- Setup: days, lines and OTs
- Break Times
- Team competitions
- Check-in
- Start List & Speaker Mode
- Apple Watch companion
- Judging results
- Judge Calculator
- Penalties (Rulebook 17.8)
- Blackout follow-up and medical clearance
- Protests
- Re-swim & Opener
- Schedule adjustments (OT Delay)
- Results, Rewards and records
- Push notifications
- Board and Dispatch
- Safety and venue tools
- Multi-day events
- Offline operation
- AIDA integration
- Display, language and accessibility
- Your profile and account
- FAQ
- Troubleshooting
- Privacy and data
- Contact
About this manual
This manual describes how to run an apnea competition with Apnea Comp, from creating the event to publishing the results. It covers the current version of the app. Where something needs a recent release, the text says so.
If you only have five minutes, read Quick Start. It is the shortest path from signing in to a published start list. The FAQ and Troubleshooting chapters at the end answer the questions that come up on competition day.
This manual and the in-app Help. The app carries a short Help of its own, and it is not the same for staff and for athletes.
- Staff open it from More → Help inside an event, or from the Help icon in the top-right corner of the screen that asks
How will you use Apnea Comp today?right after you sign in. The staff Help is a quick reference, and it links out to this manual when you need the full explanation. - Athletes have no More menu. They open Help from the avatar menu on their My Events screen. The athlete Help has six topics — In the Event, Activation Code, Documents, Medical Certificate, Profile & Settings, and Sign-in & Notifications — and each topic is self-contained, because the athlete Help does not link to this manual.
Languages and terminology. This manual is published in English, 한국어, 日本語, 简体中文 and 繁體中文. Use the language links at the top of the page to switch. All five versions share the same chapters, the same order and the same screenshots.
Competition vocabulary stays in English in every language, exactly as it appears in the app: role names (Organizer, Main Judge, Judge, Staff, Safety, Photo, Athlete), tab names, OT / AP / RP / PB / DT, discipline codes, WHITE / YELLOW / RED, DNS, Late Check-in, Pool / Depth / Lane and AIDA.
Before you start
Devices. Apnea Comp runs on phones, with an optional Apple Watch companion:
| Device | Requirement |
|---|---|
| iPhone | iOS 15.6 or newer |
| Android | Android 7.0 or newer |
| Apple Watch | watchOS 26.5 or newer, paired with an iPhone — an optional companion, not a requirement |
Tablets work, but every screen is laid out for a phone, so a phone is the better tool at the pool deck or on the boat.
You also need an internet connection to set the event up and to sync results. During the day the app keeps working without one — see Offline operation.
Each person needs their own account. Every judge, check-in official and organizer needs their own account, not simply their own device. An account can be signed in on one device at a time: signing the same account in somewhere else signs the first device out. See One device at a time before you plan the day, because sharing one account between the judging desk, the check-in desk and the PA phone will sign each of them out in turn.
Several people can work on the same event at the same time. Results, check-ins and schedule changes sync between devices live.
Set the device clock automatically. Turn on automatic date & time on every device you will use. The Start List countdown corrects itself against the server clock, but check-in, the automatic Late Check-in and the Judge screen read the device clock. A phone running ten minutes fast will start marking athletes Late ten minutes early.
For officially scored events. The Organizer needs the competition’s AIDA Event ID and AIDA API key from the AIDA admin panel. You can create and run an event without them, but nothing is read from or written back to AIDA — the event simply stays unconnected, with no start list to load and no results to sync. See Connect to AIDA.
If you want to practise rather than run a real competition, do not create an empty event for it. Use the built-in demo competitions instead — see Try it first — demo competitions.
Signing in
Apnea Comp needs an account so that your role, your events and your results stay with you.
Ways to sign in
There are three ways in, and they are shown on the same screen:
- Email and password — tap Sign Up and fill in
YOUR NAME,EMAILandPASSWORD. The app then shows anEnter codedialog: type the code emailed to you (it is 6 to 8 digits long) and tapConfirm.Resend codesends a new one. Once confirmed you are signed in straight away. Use Sign In if you already have an account. - Continue with Apple — on iPhone this opens the standard Apple sheet. On Android it opens your browser and returns to the app when Apple has finished. Hidden-email relay addresses work normally. The name Apple gives the app is saved as your display name only if you do not already have one.
- Continue with Google — signs you in with your Google account.
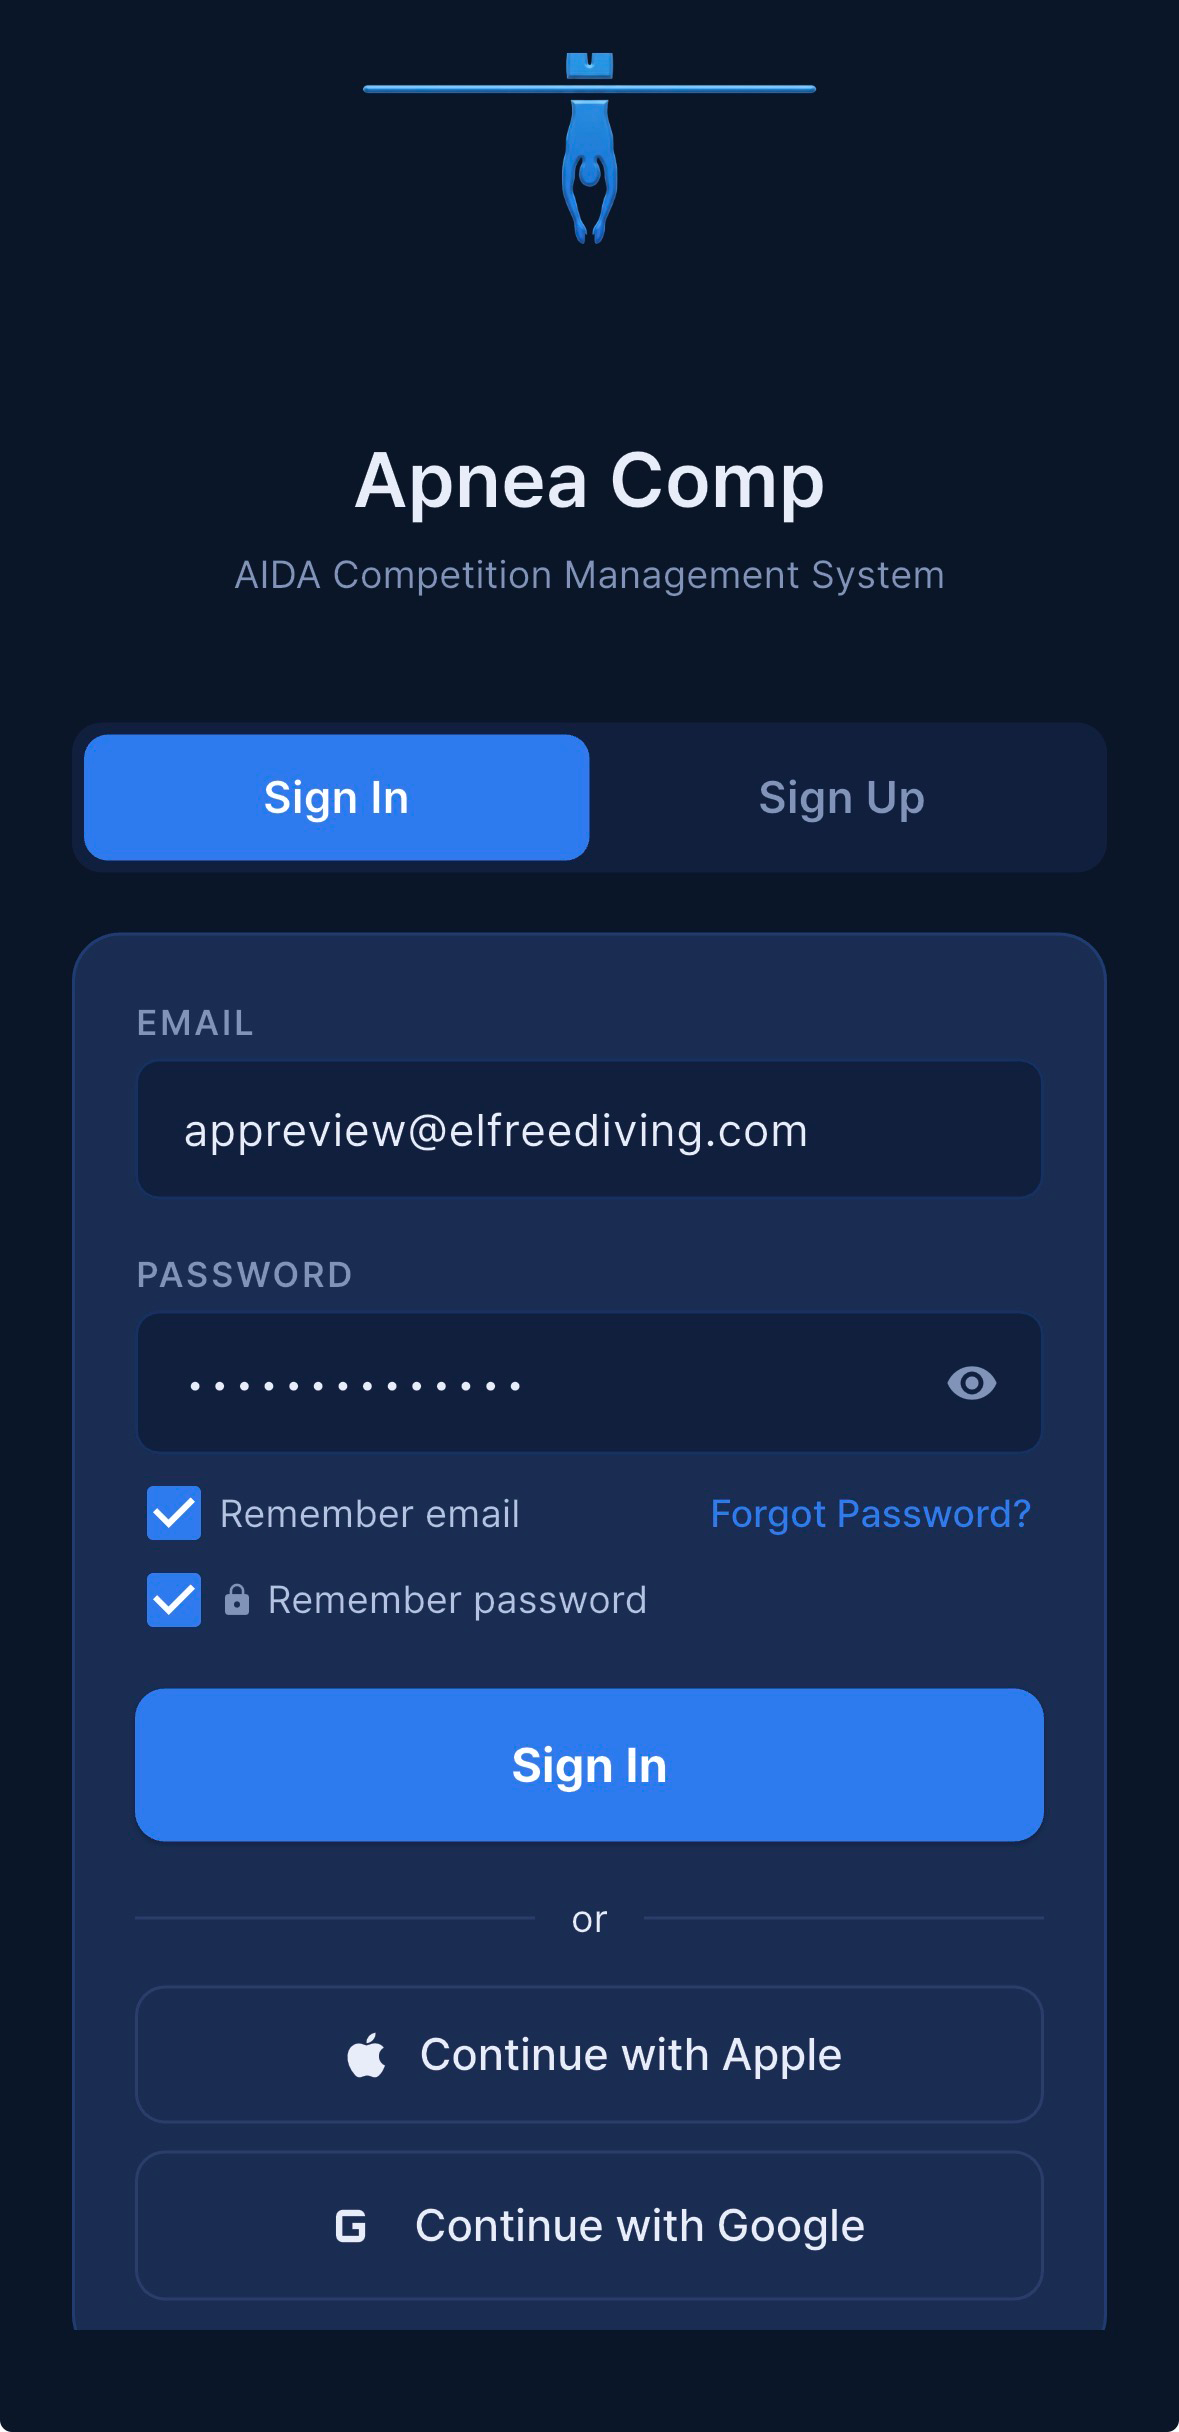
Whichever method you use the first time is the one to keep using. Signing in a different way creates a separate, empty account — the events you joined will not be in it.
The sign-in screen and the screen that follows it have no language selector; they follow your device language. Language is chosen from the avatar menu after you are signed in (see Display, language and accessibility). “Apnea Comp”, “AIDA Competition Management System”, “Continue with Apple”, “Continue with Google” and the Staff / Athlete card titles stay in English in every language.
Staying signed in
How the app behaves on the next launch depends on how you signed in.
- Email and password accounts stay signed in only if you tick
Remember password. Without it, the app shows the sign-in form every time it starts. This is the single most common reason for “the app logged me out”. - Apple and Google accounts always restore automatically. There is no tick box for them, and none is needed.
Remember emailonly pre-fills your address. TickingRemember passwordturnsRemember emailon as well.- A remembered password is stored in the device’s secure keystore — iOS Keychain or Android EncryptedSharedPreferences. It is never stored on our servers.
Signing out does not clear everything everywhere, so it is worth knowing where you sign out from:
| Where you sign out | Remembered email | Remembered password |
|---|---|---|
| My Events screen (staff), avatar menu | kept | cleared |
| My Events screen (athlete), avatar menu | kept | cleared |
| Avatar menu inside an event | kept | kept |
| Deleting your account | kept | kept |
To clear a stored password on a shared or borrowed phone, sign out from the My Events screen, or uninstall the app.
One device at a time
One account can be actively signed in on one device only — the last device that signed in.
When you sign in somewhere else, the new device shows Signed in here — your other device has been signed out. and the old device drops to the sign-in screen with a red Logged out — your account signed in on another device. This happens immediately, or as soon as the old device comes back to the foreground.
There is one exception. A device that is running Speaker Mode is not kicked out; the new device shows Signed in here. Your other device stays signed in because it is in Speaker Mode. That is what lets one account drive both a PA phone and a working phone. See Speaker Mode.
Plan your accounts before the event. Do not share a single account between the judging desk, the check-in desk and the PA phone — each sign-in throws the previous device out, usually in the middle of a performance. Create an account per person and approve each one in More → Users.
Choosing Staff or Athlete mode
After every sign-in and sign-up the app asks How will you use Apnea Comp today? with two cards:
Staff—Organizer, Judge, or other event staffAthlete—I'm competing in events
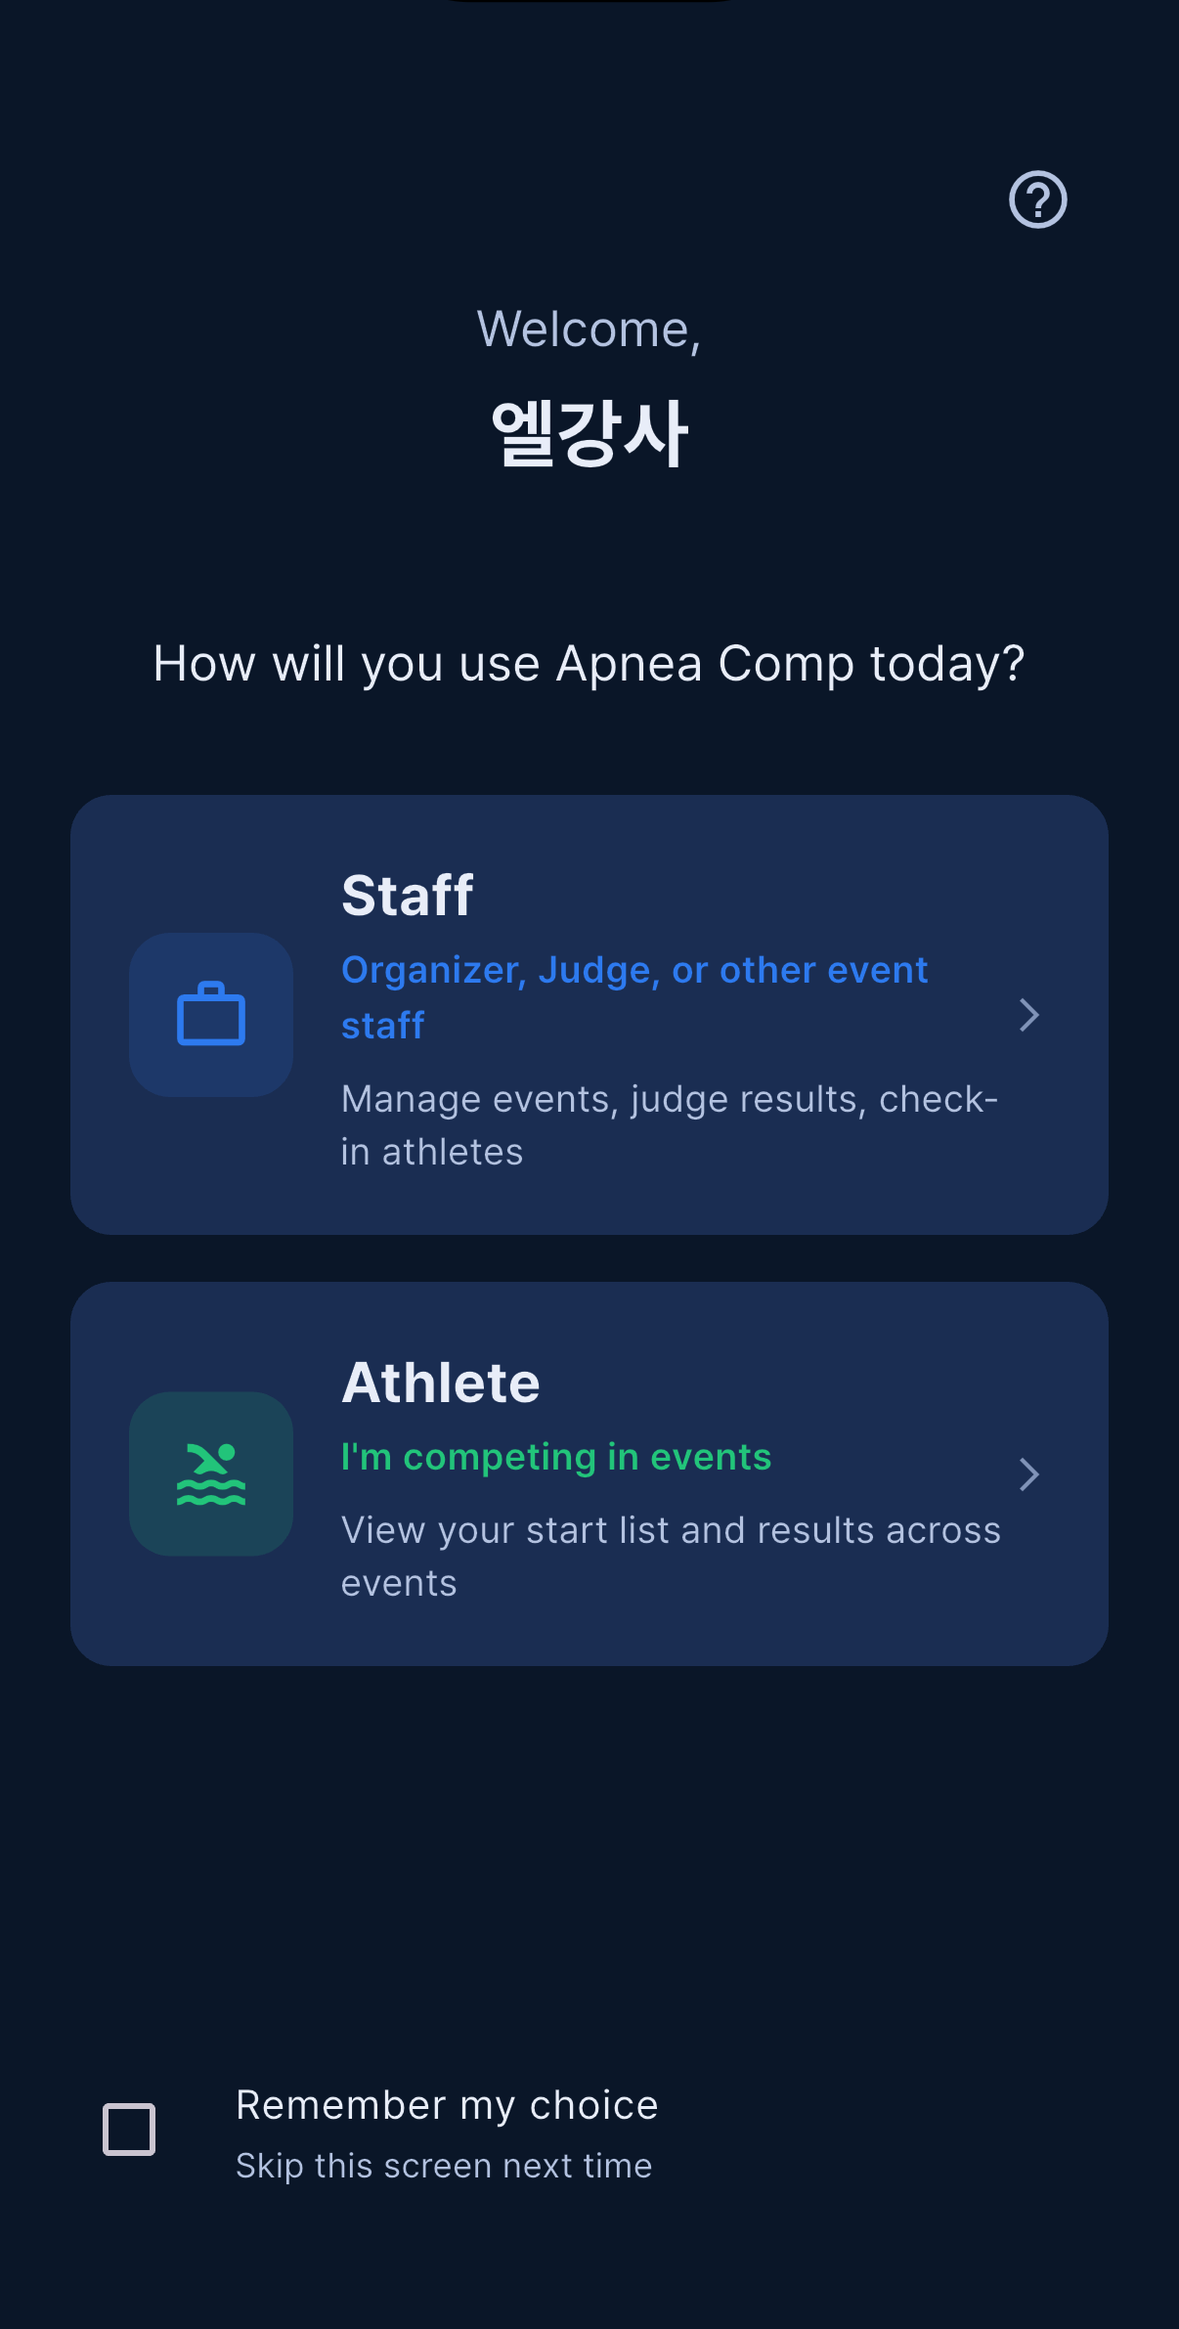
Tick Remember my choice and the screen is skipped from then on, on this device and on any other device you sign in to, because the choice is stored with your account. The Help icon in the top-right corner opens the in-app Help before you enter any event.
Choosing Athlete for the first time takes you to Athlete Setup — see Athlete Setup and automatic matching.
You can change your mind later. Switch to Athlete Mode in the staff avatar menu and Switch to Staff Mode in the athlete avatar menu both bring you back to this screen rather than switching directly. Note that switching from athlete to staff only clears the preference on this device — if you ticked Remember my choice as an athlete, the next sign-in may go straight back into Athlete mode.
Turning on notifications
The operating system’s notification prompt no longer appears when the app launches. Instead, right after you pick a role card (or on the launch where the app skips that screen for you), Apnea Comp shows its own dialog first:
Get competition alerts explains that start lists, results and OT time changes arrive as notifications. Only Turn on notifications opens the operating system prompt and registers this device. Not now is not remembered — you will be asked again the next time you open the app.
If you have already allowed or already denied notifications at the operating system level, the dialog does not appear at all. If you denied them, turn them back on in your device settings; the app cannot ask again.
Notifications go to the last device that signed in with your account. Two consequences follow from that:
- Signing out releases this device’s registration, so a signed-out phone stops receiving that account’s alerts.
- Signing in with a different account on the same phone transfers the registration to that account, so the previous account’s alerts no longer arrive there either.
Athletes who tap Not now or deny the permission will not receive start list, results or OT delay notifications.
Forgot password
Forgot Password? sits on the Sign In tab. Enter your email address, wait for the code, then enter the code and a new password. This applies to email accounts only — Apple and Google accounts are managed by Apple and Google.
“Update required”
If the installed app is older than the minimum version the event requires, an Update required screen appears before sign-in and back navigation is blocked. Update now opens the App Store or Play Store; I've updated — retry re-checks and lets you straight through once the new version is installed.
Quick Start
Three short paths: one for the person creating the competition, one for the staff joining it, one for athletes. If you would rather practise first, jump to Try it first — demo competitions at the end of this chapter.
For the Organizer
Eight steps take you from an empty account to a start list your athletes can see.
- Sign in, then choose
StaffonHow will you use Apnea Comp today? - On My Events tap + in the top bar (or
+ Createwhen the list is empty) and fill in theCreate Eventsheet: Event Name, Location,Competition Type(Pool / Depth / Team — this is fixed once the event is created),Pool Length (m)for Pool and Team events,Max AP above PB (m)for events with depth,Record Attempts, and a singleDate.AIDA Registration URL (optional)is for athletes who still have to register. - The
Connect to AIDAsheet opens by itself as soon as the event is created. Enter yourAIDA Event IDandAIDA API keyand tapConnect— that one button validates, saves and refreshes. TapSkipto do it later from Setup →Connect. - Open Setup, tap
Load Days, choose the Day, then tapLoad Listto pull that Day’s athletes from AIDA. - Still in Setup, set the number of Lines, the First OT and the interval, then tap
Save Configurationat the bottom. Nothing in Setup is stored until you do. - Share the
Invite Code:shown at the top of Setup with your staff (the copy icon confirms withInvite code copied!). Just below it, tapGenerateto create theAthlete codefor athletes. - Open More → Users and approve the people waiting under
Pending Approval. - When the day’s schedule is final, open More → Send Push and send
Publish Start List. Until you do, athletes cannot see the start list, their check-in or their OT.
Chapters Creating an event (Organizer) and Setup: days, lines and OTs go through all of this in detail.
For Staff
- Sign in and choose
Staff. - On My Events, tap the person icon in the top bar — or the
Joinbutton when your list is empty. - In the
Join an Eventsheet, type the 6-character invite code the organizer gave you. - Pick your own role under
Your role (organizer will confirm): Staff, Judge, Safety or Photo. Organizer and Main Judge cannot be requested; the organizer assigns those. - Tap
Join Event. You will see✅ Joined! Waiting for approval.
The event card stays visible and you can tap it, but until the organizer approves you it opens a Pending Approval notice instead of the event.
For Athletes
- Sign up with any of the three methods — there is no “I am an athlete” option on the sign-up form.
- Choose the
Athletecard onHow will you use Apnea Comp today? - In Athlete Setup, tap
Find me on AIDAand pick yourself from the search results, or type your first name, last name, gender and nationality exactly as they are registered with AIDA. - Events you are entered in appear on My Events by themselves.
If more than one athlete shares your name, you pick yourself from the list and the entry waits for the organizer to confirm it (Multiple athletes match — pending organizer approval.). If the organizer has given you an athlete code or a personal activation code, enter it instead — see Joining as an athlete.
Try it first — demo competitions
Demo competitions let you learn the app without touching a real event.
The first time a staff account opens My Events, the app offers Try a demo competition once; tap Set up demos. The purple 🧪 Set up demo competitions button is always available at the bottom of the list. Either way you get a 🧪 Demo / Sandbox section with a sample Pool, Depth and Team competition, each with an Enter demo button.
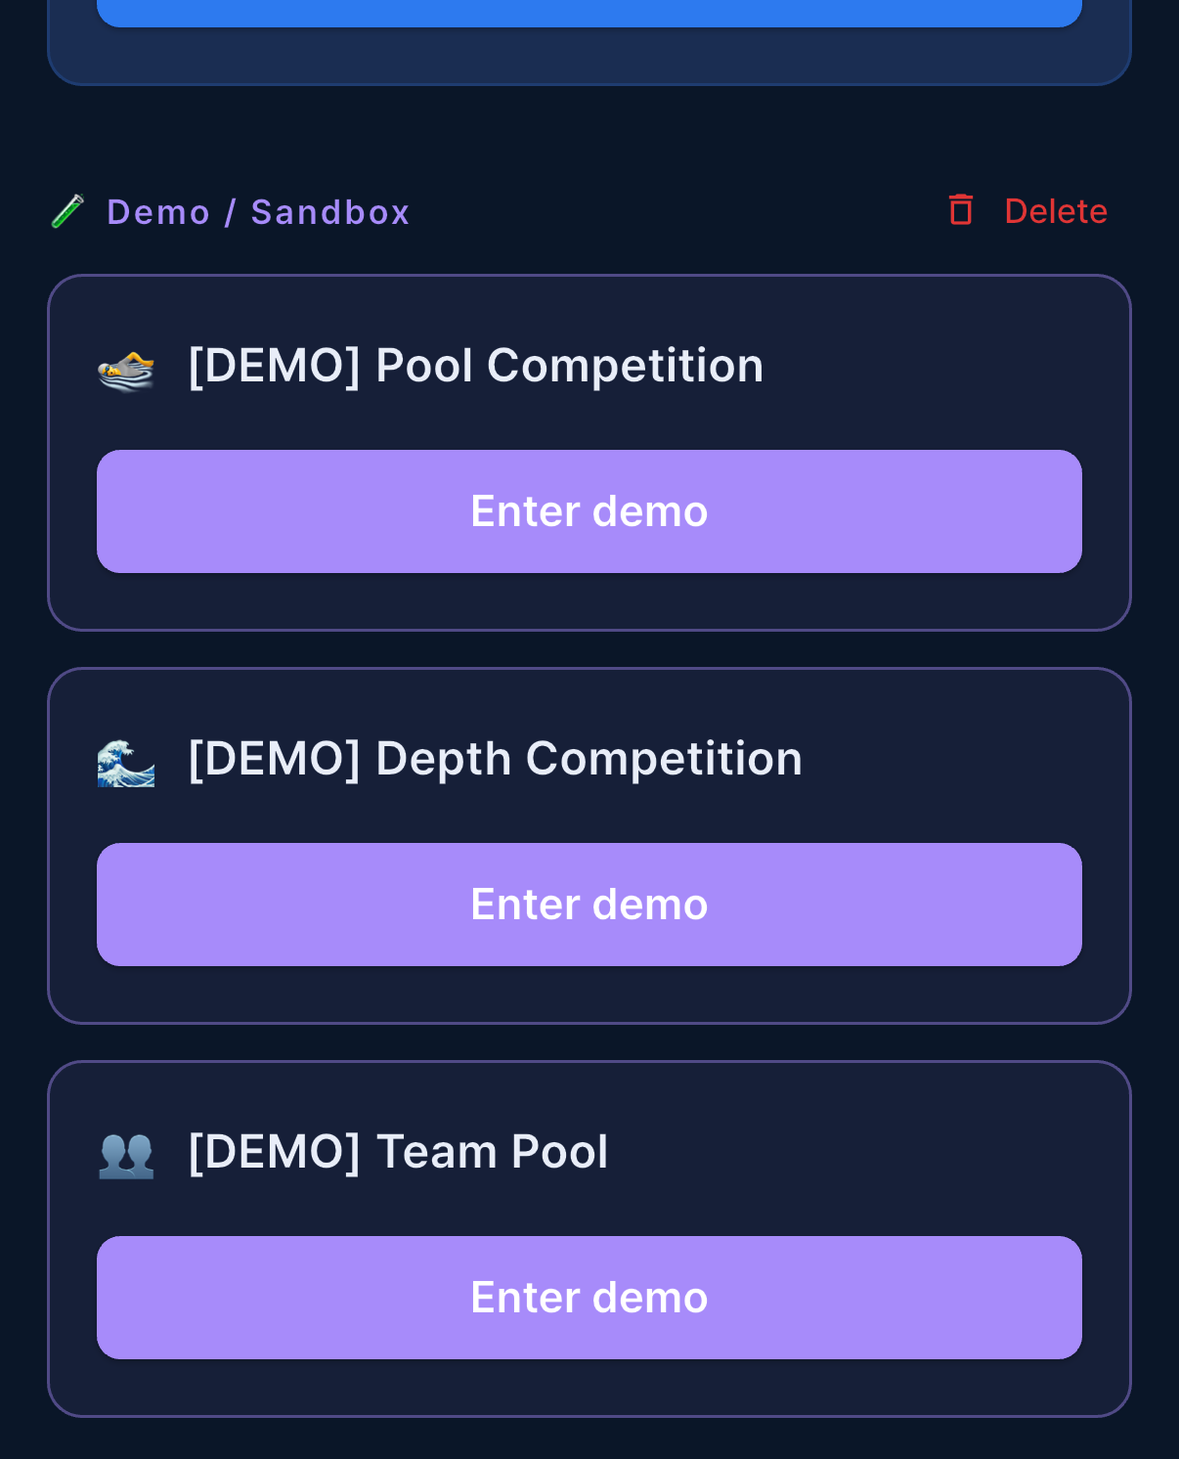
Two things to know about demos:
- They run entirely on your device. Nothing is saved to the server, and everything resets to its starting state every time you enter. They also ignore the real date, so countdowns and Speaker Mode work immediately.
- Features that need the server are blocked with a
Not available in demonotice:Users,Send Push,Dispatch,Protests,DocumentsandBO Follow-up. Board opens, but empty.
Inside a demo, the lightbulb icon in the top bar toggles the coach marks (Guide); each bubble also has a Turn guide off button. The Delete button on the section header removes the demo competitions again.
Athletes have their own version: the Explore as a demo athlete card at the bottom of the athlete My Events screen opens a sample Pool competition as “Demo Diver”.
Roles and what each can do
The seven roles
| Role | Who it is for |
|---|---|
| Organizer | The person who created the event, plus anyone the organizer promotes. Full access. |
| Main Judge | The same permissions as Organizer, including editing and deleting the event. Assigned in Users. |
| Judge | Judges performances and takes part in protest votes. No Setup. |
| Staff | Check-in desk, general help. No Judge tab. |
| Safety | Safety supervisor. Start List, Results and More, with Risk Marking, Rope Calibration, Equipment and Check-in. No Setup and no Judge tab, and no access to judging or protests. |
| Photo | Photographers. Start List and More only, with Photo Marking for assigning athletes to photographers. |
| Athlete | Competitors. A separate set of screens — see Joining as an athlete. |
Anyone who joins with the invite code is Pending until an Organizer or Main Judge approves them.
Tabs and More menu by role
The bottom tab bar changes with your role:
| Role | Setup | Start List | Judge | Results | More |
|---|---|---|---|---|---|
| Organizer / Main Judge | ✅ | ✅ | ✅ | ✅ | ✅ |
| Judge | — | ✅ | ✅ | ✅ | ✅ |
| Staff / Safety | — | ✅ | — | ✅ | ✅ |
| Photo | — | ✅ | — | — | ✅ |
More is not a menu that slides out; it is a tab that fills the body with a four-column grid of icons. The bottom tabs stay where they are.
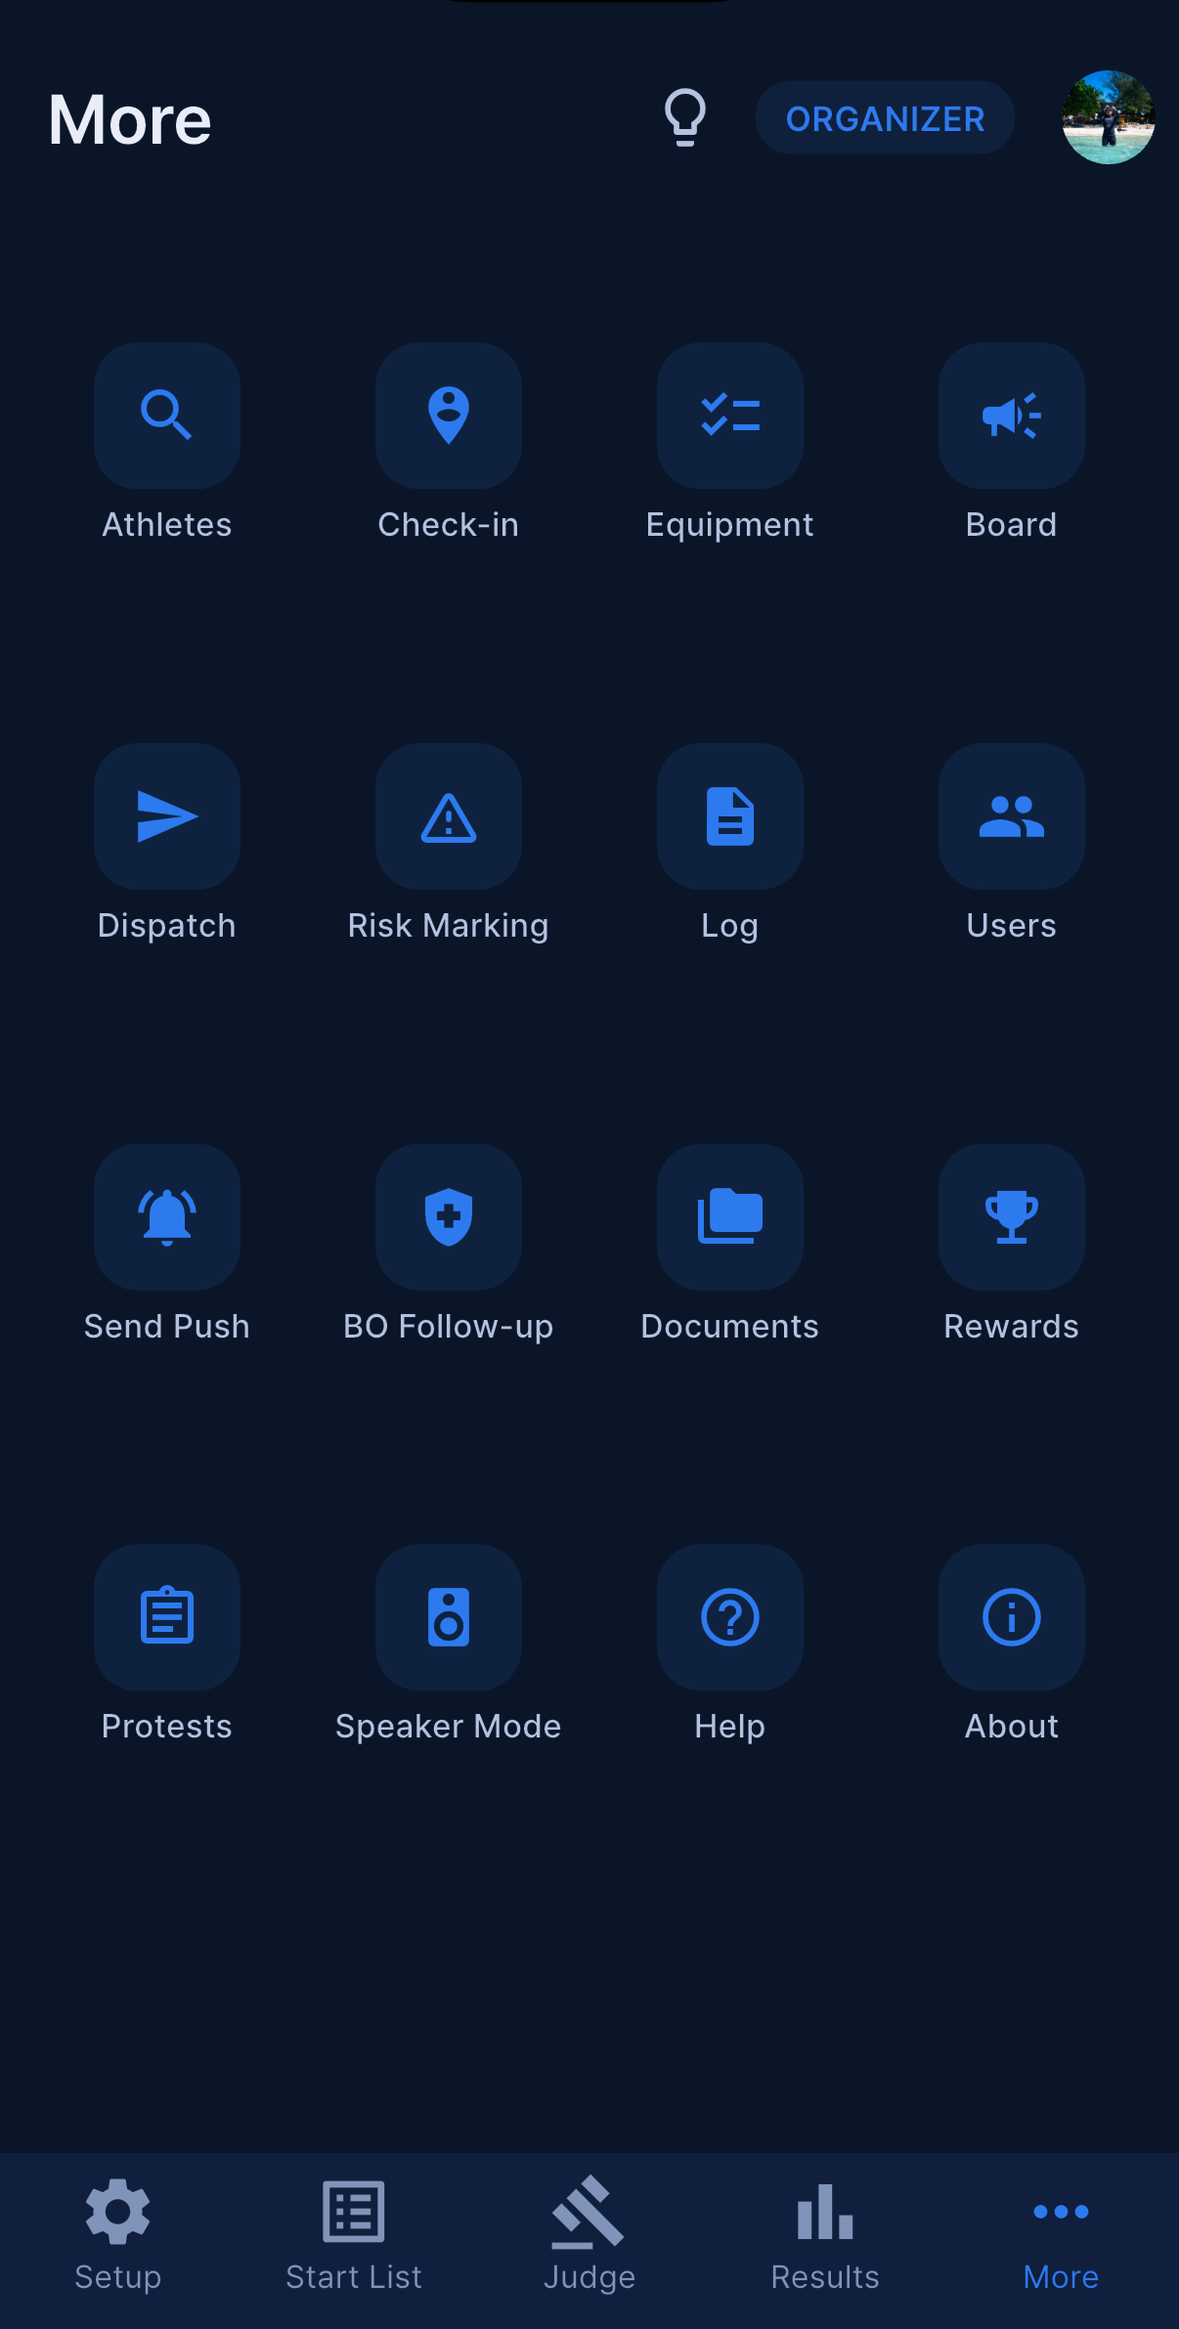
Which tiles appear depends on your role:
| Tile | Who sees it |
|---|---|
Athletes, Board, Dispatch, Help, About |
everyone |
Check-in, Equipment, Rewards, Speaker Mode |
everyone except Photo |
Risk Marking |
Organizer, Main Judge, Judge, Safety |
Rope Calibration |
the same roles as Risk Marking, and only on depth events or Days that have depth athletes |
Photo Marking |
Photo only |
Log, Users, Send Push, BO Follow-up, Documents |
Organizer, Main Judge |
Protests (with a count badge) |
Organizer, Main Judge, Judge |
Two more role-dependent details: the 🕒 OT Delay icon appears only on the Start List tab, and only for Organizer and Main Judge. The badge at the top of the event screen shows your role in capitals.
Pending members and approval
Open More → Users. The list has three sections: Pending Approval, staff and judges, and athletes.
Approvekeeps the role the person asked for when they joined. If it is wrong, useChange Roleto switch them between Main Judge, Organizer, Judge, Staff, Safety and Photo.- A pending athlete can only be approved after you have loaded the start list — until then there is nothing to match them to, and the
Approvebutton is hidden. Remove from Eventis permanent. It is not a reset: see If an organizer removes you before you use it on an athlete.Invite Athleteat the top issues a personal activation code — see Activation code and invite code.
Two points that are often misunderstood: Main Judge can delete the event, exactly like the Organizer; and athletes who redeem a personal activation code are approved immediately. Only the staff invite code, the shared Athlete code and ambiguous name matches leave someone in the pending state.
Creating an event (Organizer)
Create Event
On My Events, tap + in the top bar, or + Create when your list is empty.
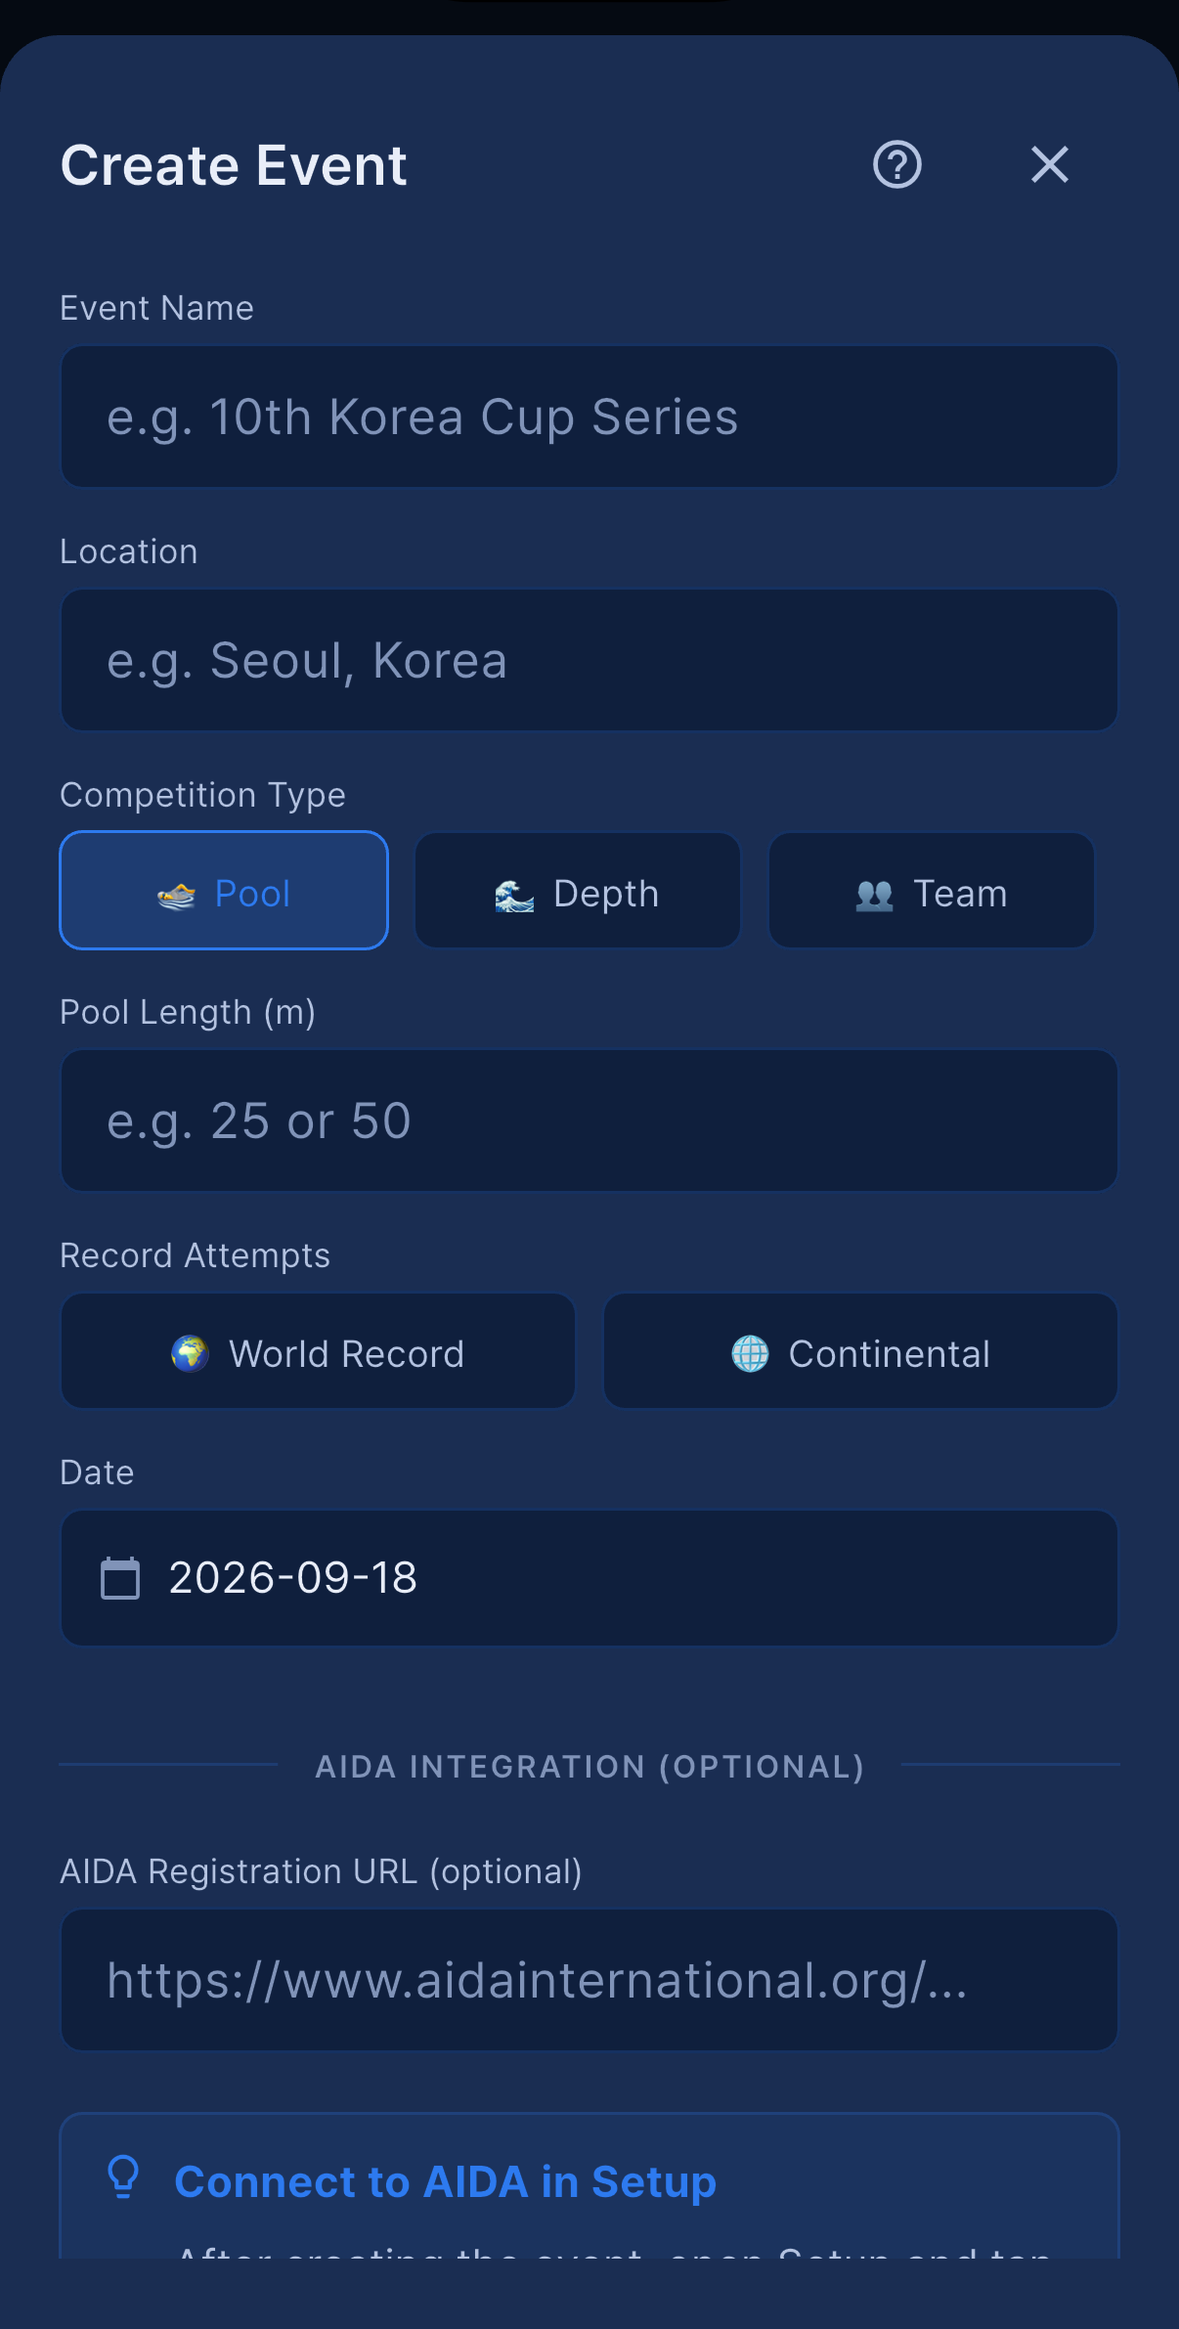
| Field | Notes |
|---|---|
| Event Name | Shown to your staff and athletes. The Create button stays disabled until this is filled in. |
| Location | Free text. |
Competition Type |
🏊 Pool, 🌊 Depth or 👥 Team. Locked once the event is created — it cannot be changed afterwards. |
Team event disciplines |
Team events only: Pool only or Includes depth. Decides whether Max AP above PB (m) and the Competition Form form apply. |
Pool Length (m) |
Pool and Team events. Used by the Judge Calculator for DYN / DYNB / DNF. |
Max AP above PB (m) |
Depth events and Team events that include depth. Hint: 0–5 (blank = no limit). |
Record Attempts |
🌍 World record and 🌐 Continental record. Independent toggles. |
Date |
One date, not a range. You can only choose from today up to one year ahead. Multi-day competitions get their extra Days from AIDA — see Load Days and Load List. |
AIDA Registration URL (optional) |
If you fill this in, athletes who are not yet on the start list see an AIDA Athlete Registration button that opens this link. |
There are no AIDA Event ID or token fields on this sheet. The blue note at the bottom points you at the next step instead.
Connect to AIDA
The Connect to AIDA sheet opens automatically as soon as Event created! appears. You can also reach it any time from Setup → AIDA card → Connect, and reopening it pre-fills the values you saved last — that is where an expired token is replaced.
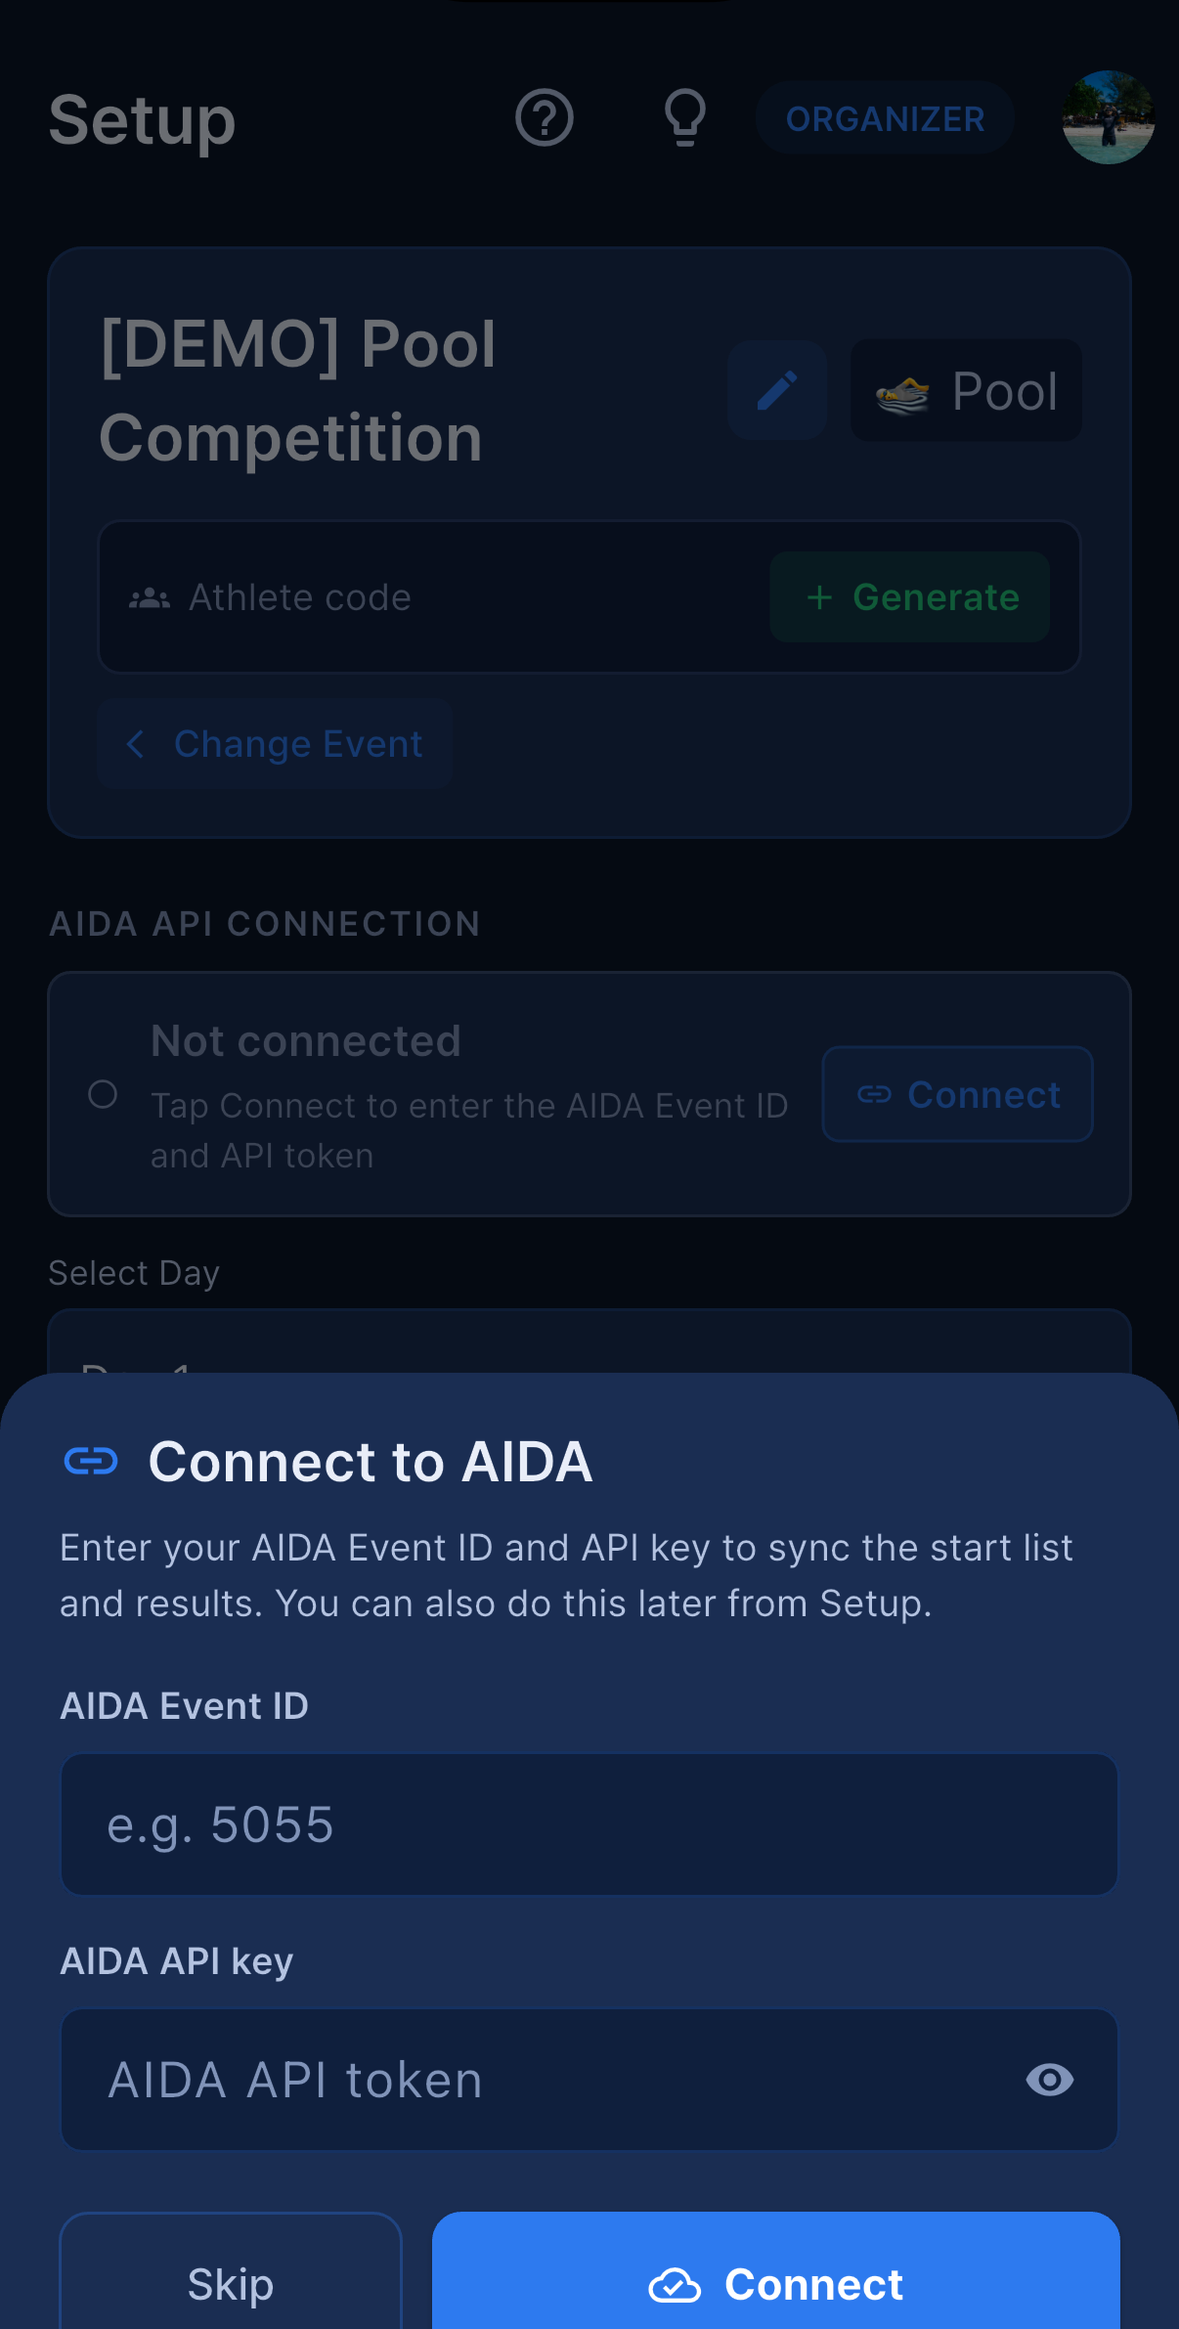
Enter the AIDA Event ID and the AIDA API key (the eye icon reveals the key) and tap Connect. That single button validates the credentials, saves them and refreshes the cache; a success shows Connected to AIDA ✓. A failure shows Could not connect. Check the Event ID and API key. There is no Test Connection button and no separate Save step. Skip closes the sheet and leaves the event unconnected.
Once connected, the Setup card changes from Not connected to Connected, and the same place now offers Load Days and then Load List. AIDA integration covers what is read and written, and what to do when a sync fails.
Leaving AIDA blank does not start a practice mode. An event with no credentials simply shows
Not connected, with no load buttons and no athletes. The app’s internal mock data only runs if the token you type into this sheet is literallytestordemo. For practice, use the demo competitions instead — see Try it first — demo competitions.
One side effect is worth planning for: connecting, or tapping Load Days, overwrites the event date with AIDA’s first competition day. The date on the event card changes with it, and if that date has already passed, the event becomes read-only for everyone except Organizer and Main Judge. This is also the only way to change the date after the event has been created.
Editing an event later
Open Setup, then tap the pencil icon on the event card at the top. It is available to Organizer and Main Judge, on events that have not finished.
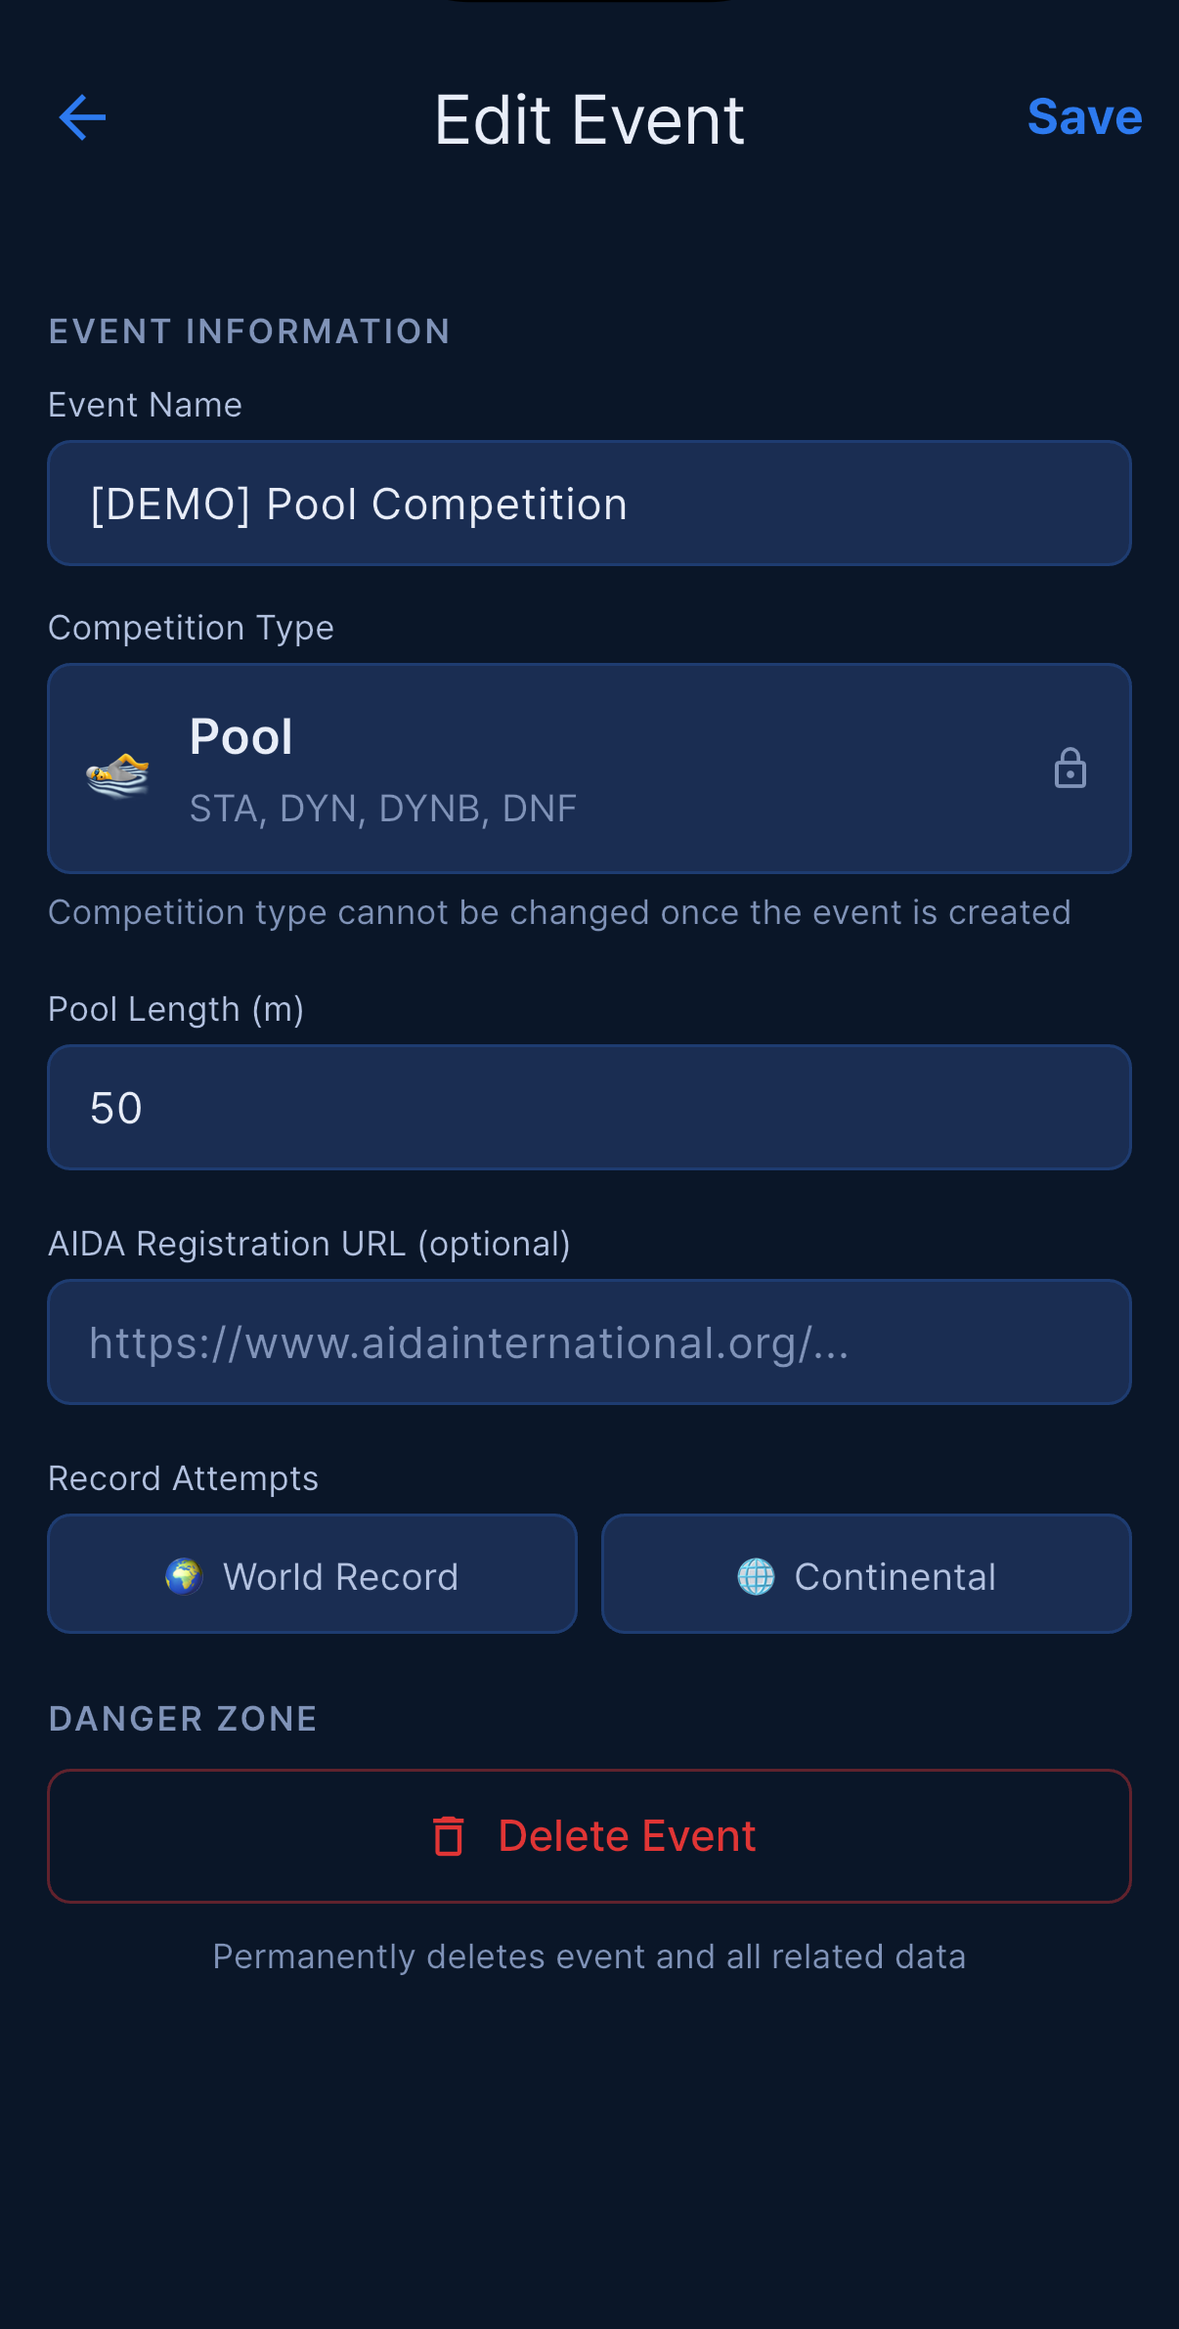
You can change: Event Name, Pool Length (m), Team event disciplines, Max AP above PB (m), AIDA Registration URL (optional) and Record Attempts.
You cannot change: Competition Type (shown with a lock icon) or the date. There are no AIDA fields here — AIDA lives in the Connect sheet above — and no invite code either. The Danger Zone at the bottom deletes the event.
Invite code (staff) and Athlete code (athletes)
Both codes live at the top of Setup, on the event card, and nowhere else.
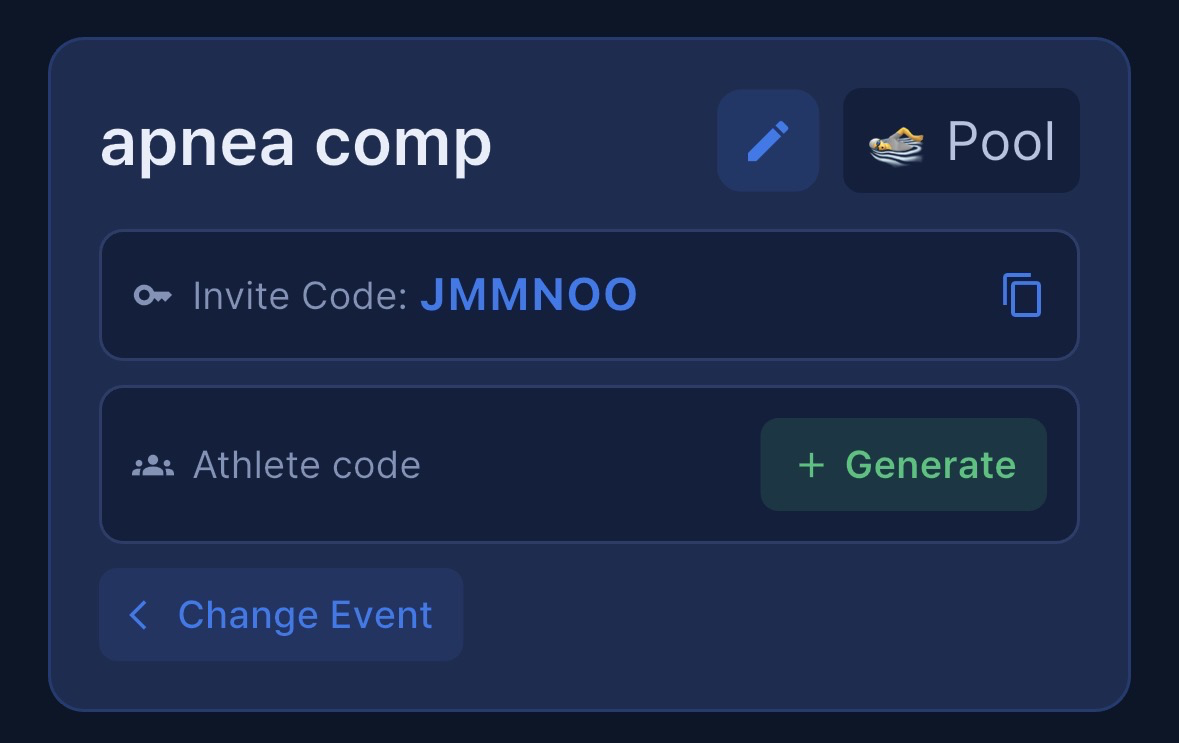
Invite Code:is for staff. The copy icon next to it confirms withInvite code copied!. Share it through your usual channel and have staff use it as described in Joining an event (Staff). If you created the event, it also appears as a key badge on your My Events card.Athlete codesits just below it, for athletes. TapGenerateto create one, the copy icon to copy it (Athlete code copied!), and the power icon to switch it off again (Athlete code turned off). It is a single shared code that any athlete can use — useful when the AIDA start list does not exist yet.
Treat both like passwords. Neither code can be rotated; only the Athlete code can be turned off and generated again.
Deleting an event
Setup → pencil icon → Danger Zone → Delete. Both Organizer and Main Judge can do this.
Past events can also be deleted by swiping the card in avatar menu → Post Events, again as Organizer or Main Judge. The main My Events list has no swipe-to-delete.
Deleting is permanent and takes everything with it: athletes, results, judge logs, check-ins and protests. Protest PDFs that the app generated are removed automatically 30 days after they were created.
Joining an event (Staff)
- Sign in and choose
Staff. - On My Events, tap the person icon in the top bar, or the
Joinbutton when your list is empty. - Type the organizer’s 6-character invite code in the
Join an Eventsheet. - Choose your role under
Your role (organizer will confirm): Staff, Judge, Safety or Photo. - Tap
Join Event.
You will see ✅ Joined! Waiting for approval. The organizer now approves you in More → Users, keeping the role you asked for or changing it.
A few things to expect:
- Before approval the event card is visible and you can tap it, but it opens a
Pending Approvalnotice rather than the event. The card does not “become tappable” when you are approved — it simply lets you in. - Organizer and Main Judge cannot be requested here. The organizer assigns those roles with
Change Role. - If you are already a member, the sheet answers
You've already joined this event. - If you chose the wrong role, ask the organizer to fix it with
Change Role. Do not ask to be removed and re-added — removal is a permanent exclusion, not a reset. A staff member can request to join again, but an athlete cannot; see If an organizer removes you.
Joining as an athlete
Athlete Setup and automatic matching
Athlete Setup is reached from the Athlete card on the mode screen after you sign in, not from the sign-up form. There is no “I am an athlete” option when you create your account.
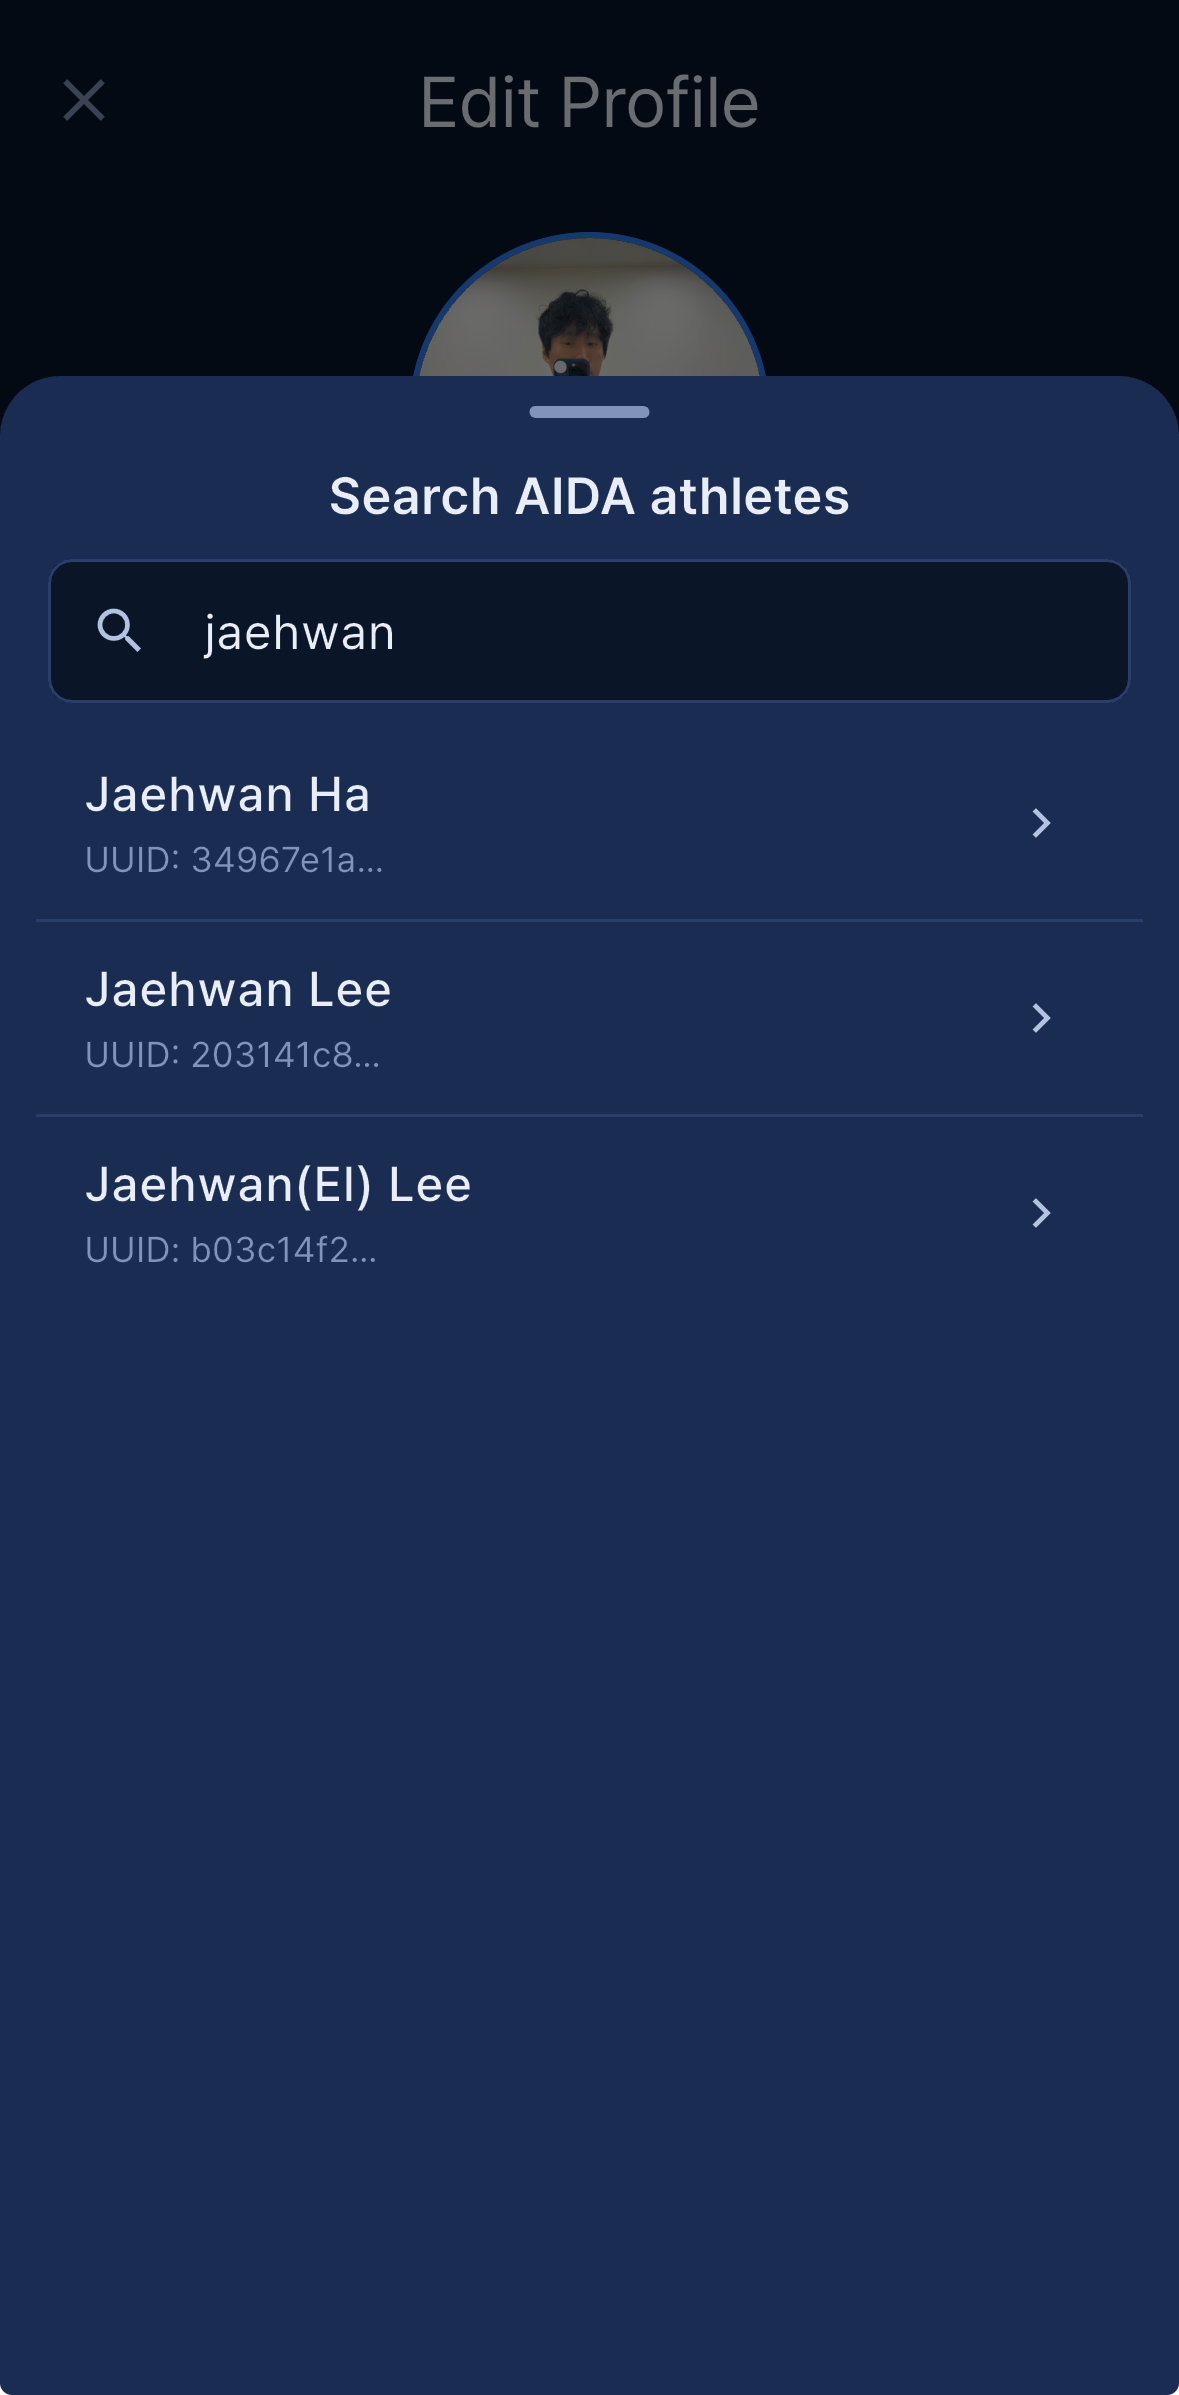
On the Athlete Setup screen you link your AIDA identity in one of two ways:
Find me on AIDAsearches the AIDA athlete directory and stores your AIDA athlete ID when you pick yourself. This is the reliable route. Athletes with no competition history may not appear in the search.- Or type your first name, last name, gender and nationality exactly as they are registered with AIDA.
The server then re-checks your name and nationality against the athletes organizers have loaded:
- Exactly one match — you are linked immediately and the event appears on My Events.
- Several matches — you choose yourself with
Select yourself, and the entry waits for the organizer:Multiple athletes match — pending organizer approval. - One AIDA athlete can belong to one account only. If someone else has already linked that athlete you see
This athlete is already linked to another account. If this is you, contact the event organizer for an activation code.
Continue (try matching later) lets you finish setup now and match later — useful if the organizer has not loaded the start list yet.
You can also change this information later in Edit Profile, which has the same Find me on AIDA button.
Activation code and invite code
There are two different codes, and they do different things.
| Athlete code | Personal activation code | |
|---|---|---|
| Who it is for | every athlete in the event | one named athlete |
| Where the organizer finds it | Setup → Athlete code → Generate |
More → Users → Invite Athlete |
| What it does | gets you into the event, then you wait to be matched or approved | confirms your name, nationality and gender and approves you immediately |
| Validity | until the organizer turns it off | 7 days |
The Invite Athlete list only contains athletes who are on the start list with an AIDA ID. Names that already have a code show Code exists.
Both codes are typed into the same field, which tries the personal code first and falls back to the shared one. You can open that field from any of these:
- the key icon in the top bar of My Events
- the
Enter Codebutton when your event list is empty Enter Activation Codeon the My Info screen of an event you have joined but are not matched in- during Athlete Setup
Redeeming a personal code takes effect at once — there is no need to sign out and back in.
Before you are matched
Joining with the shared Athlete code gets you in, but not all the way in. Until you are matched to an athlete on the start list you see a single My Info tab with no bottom tab bar, and only the megaphone (Board) icon at the top. The message when you join says so: Joined. Enter your athlete code to unlock full event info.
My Info then shows one of three states, and the difference matters:
| What you see | What it means | What to do |
|---|---|---|
The Organizer has not loaded the AIDA event data yet. with a cloud icon |
There is no start list yet. | Pull down to refresh later. There is no code button, because a code would not help. |
No athlete data found for you in this event |
The start list exists, but you are not matched to it. | Check your AIDA details in your profile, or tap Enter Activation Code. |
Checking event data… |
The check is still running. | Wait a moment. |
Below the message, a circular countdown shows the days, hours, minutes and seconds to the start of the competition, and switches to a “competition has started” message afterwards. If the organizer filled in the registration link, an AIDA Athlete Registration button opens it in your browser.
Notices posted by the organizer reach you even here: the megaphone icon opens the Board and carries an unread badge.
What athletes can see
Once you are matched, the event opens with four tabs: My Info, Start List, Results and Rewards. Past events drop Start List and show three.
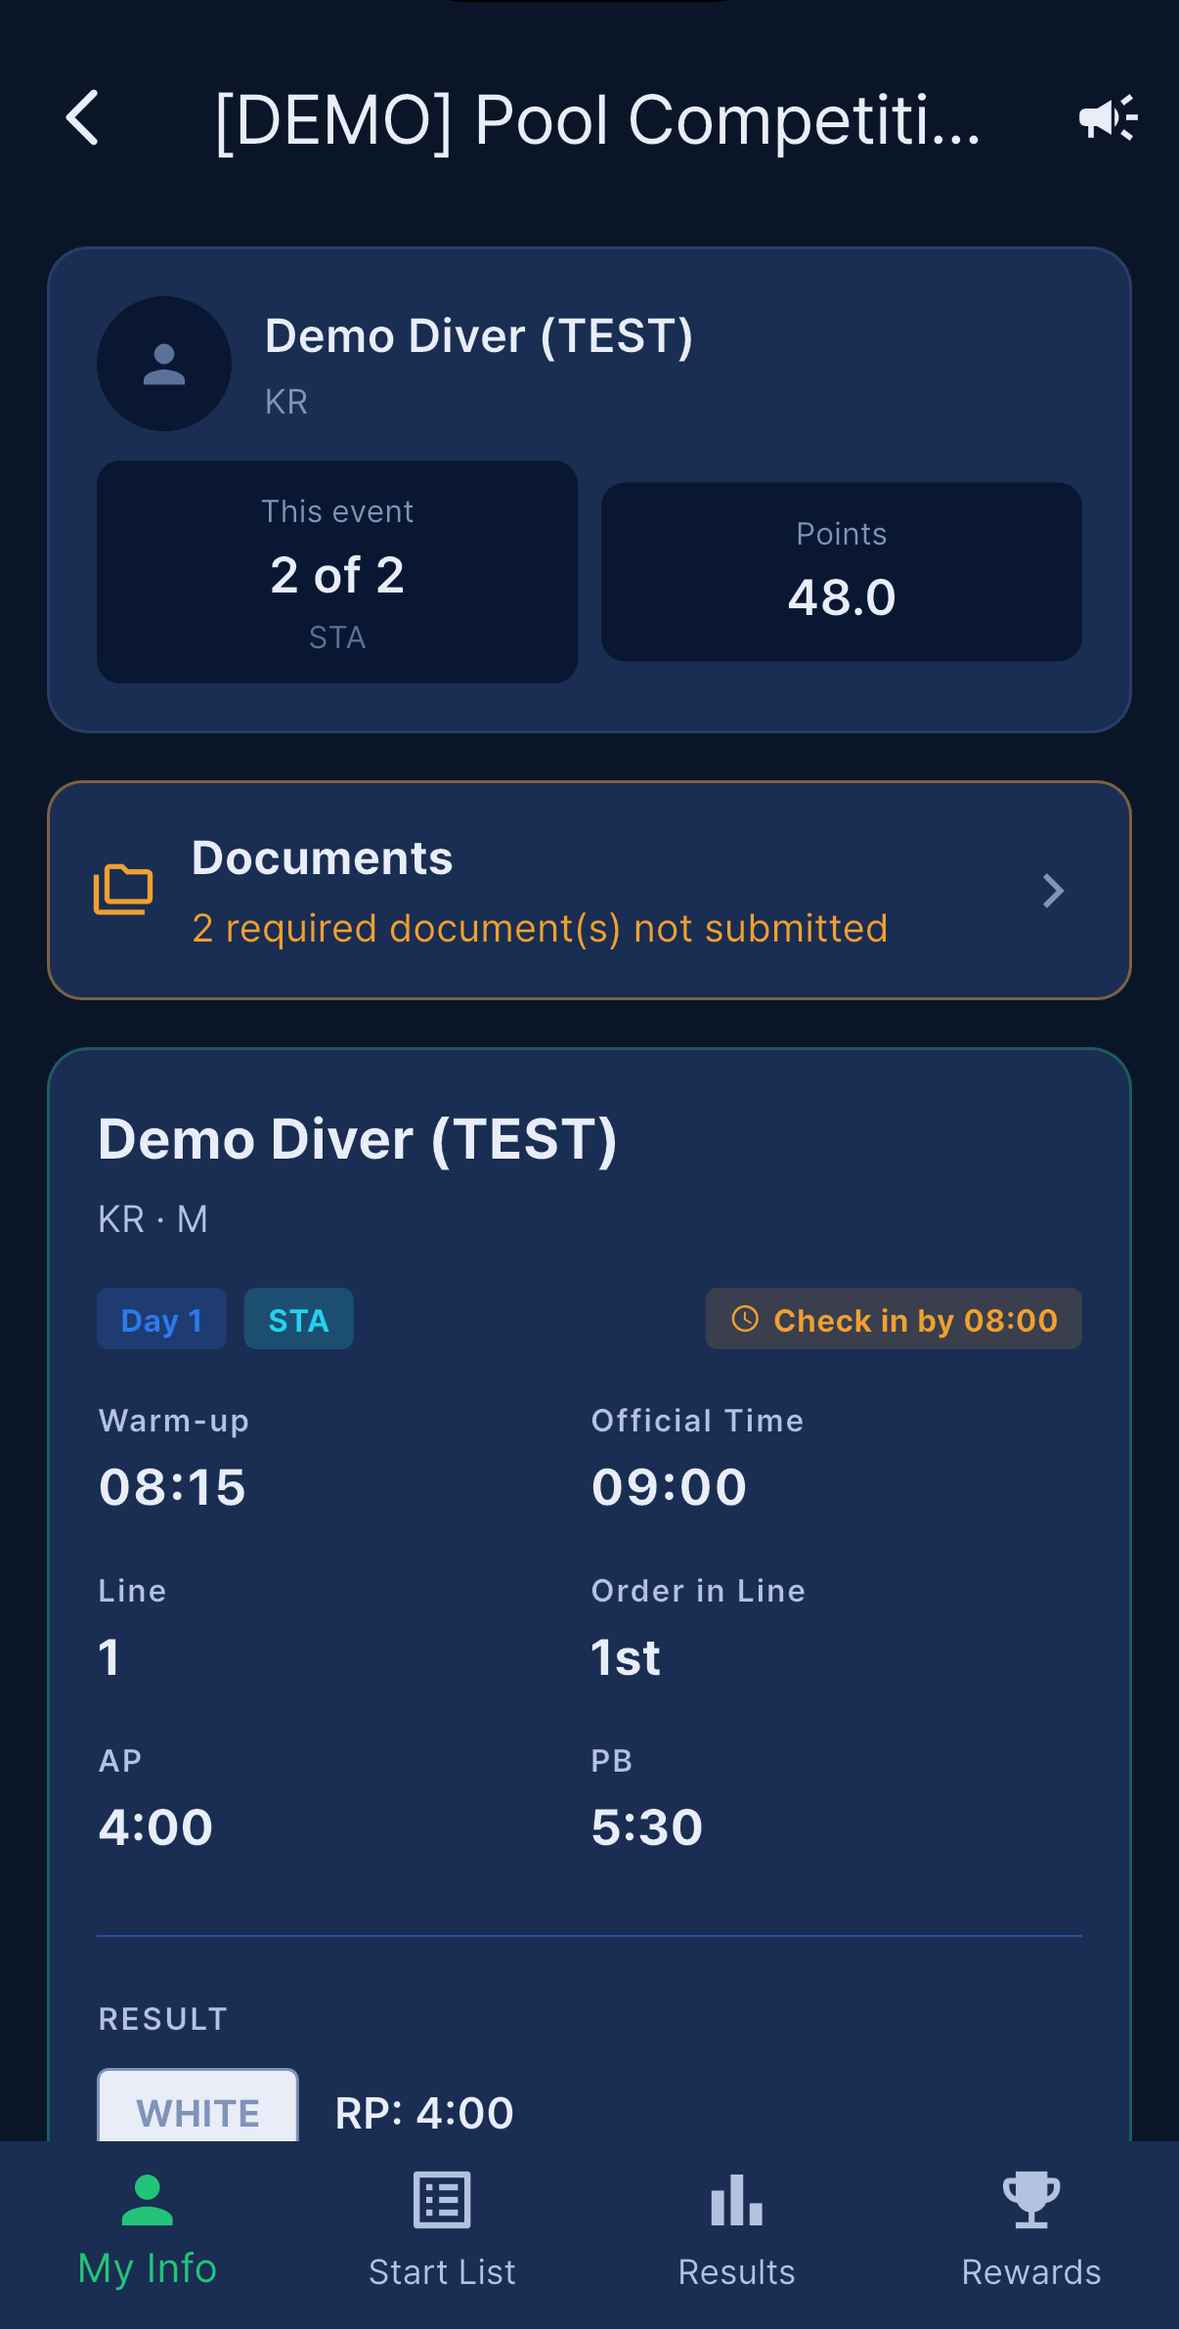
The publishing gate. Until the organizer sends the Start List push for a given Day, that Day is not visible to you:
- the Start List tab shows
Start list not published yet - My Info shows
Check-in, warm-up and OT will appear once the organizer publishes the start list. - only published Days appear in the Day chips
Publication is live. When the organizer sends the push, the screens fill in — you do not need to restart the app.
On the Start List you have two filters: Show my line only and Show my discipline only. On depth entries, a Descend field sits next to AP and PB and shows the descent time AIDA sent; it reads - when AIDA sent none.
Your athlete profile and AIDA career
My Info opens with a summary card: your avatar, name and nationality, a badge when you set a new personal best, your placing and points in this competition, your AIDA national, continental and world rankings for up to three disciplines, and a View full profile link.
Tapping any athlete’s row in Results — as an athlete or as staff — opens that athlete’s profile screen. It shows this competition’s AP → RP, card, points and placing, and then the AIDA public profile: photo, career bests across all eight disciplines, rankings, and competition history with medals. View full profile opens the athlete’s page on the AIDA website.
So athletes can see other athletes’ public AIDA profiles — that information is public on AIDA already. What stays hidden is everything private: contact details, judges’ notes and the event’s AIDA credentials. If an athlete has nothing linked you see No AIDA profile linked, and if AIDA cannot be reached, Could not load AIDA profile.
If an organizer removes you
Remove from Event is an exclusion, not a simple delete, and it is worth understanding before anyone uses it.
- The email address that was removed is blocked from rejoining with the shared Athlete code and from being registered automatically again.
- Another account using the same AIDA athlete ID, or the same name and nationality, can still register, but it stays pending and is never approved automatically. The organizer decides case by case.
- The only way back in is a personal activation code issued after the removal. Codes issued before it are refused with
Invalid or expired code. - Personal codes can only be issued to athletes who are on the AIDA start list. An athlete who joined with the shared Athlete code and is not on that list cannot be given one, so removing them is effectively final.
Organizers: use Change Role for mistakes and keep Remove from Event for people who genuinely should not be in the competition.
Documents (consent forms)
Most events collect the AIDA consent forms in the app. Athletes open them from My Info → Documents; staff review them in More → Documents.
Which forms are required
There are four forms:
| Form | When it applies |
|---|---|
| Competition Form | Only when the event has depth disciplines — depth events, and Team events set to Includes depth. |
| Image Rights | Always. |
| Liability Release | Always. |
| Medical Certificate | Optional in the app, but most organizers require it. Check-in can be blocked without a valid one. |
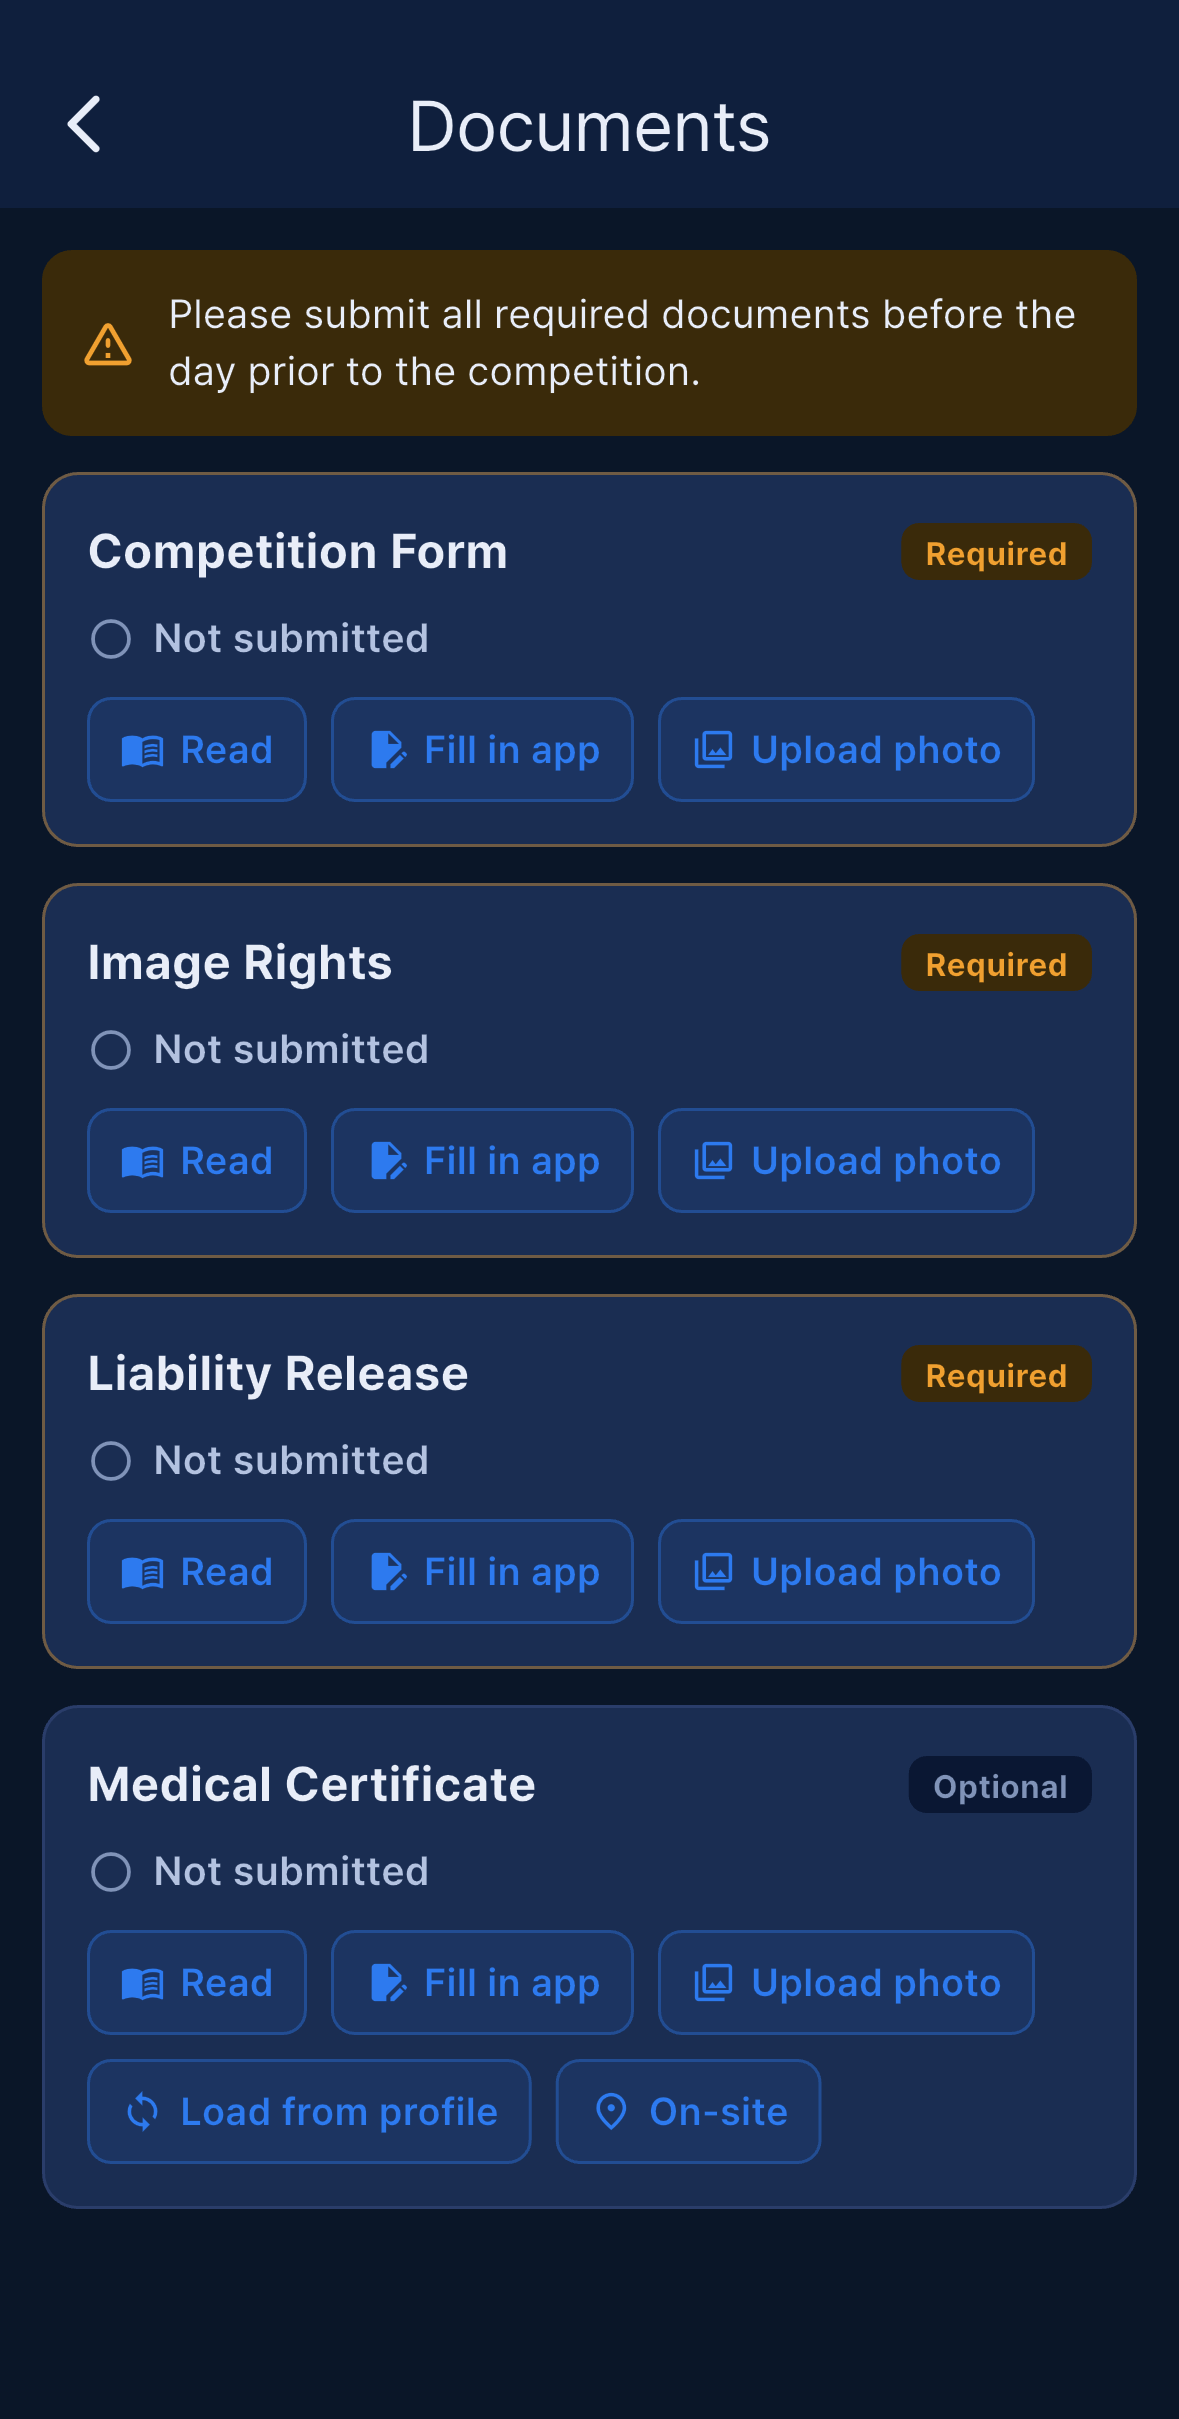
In Pool events and Pool-only Team events, Competition Form disappears everywhere: from the athlete’s list, from the organizer’s status screen, from the check-in icons, from My Info and from the reminder push. If an entry form was already submitted before the event type was settled, it stays viewable.
The name printed on forms the app generates is your AIDA registration name (first name + last name), not your profile display name. If the name on your PDF looks wrong, correct your AIDA information in Edit Profile.
Three ways to submit
Each form offers up to three routes:
Fill in app— type the fields, sign on screen, and the app generates the PDF for you.Upload photo— photograph or scan a signed paper copy. For the medical statement you also enter the issue date shown on the certificate.Load from profile— reuse the medical statement you already stored on your profile.
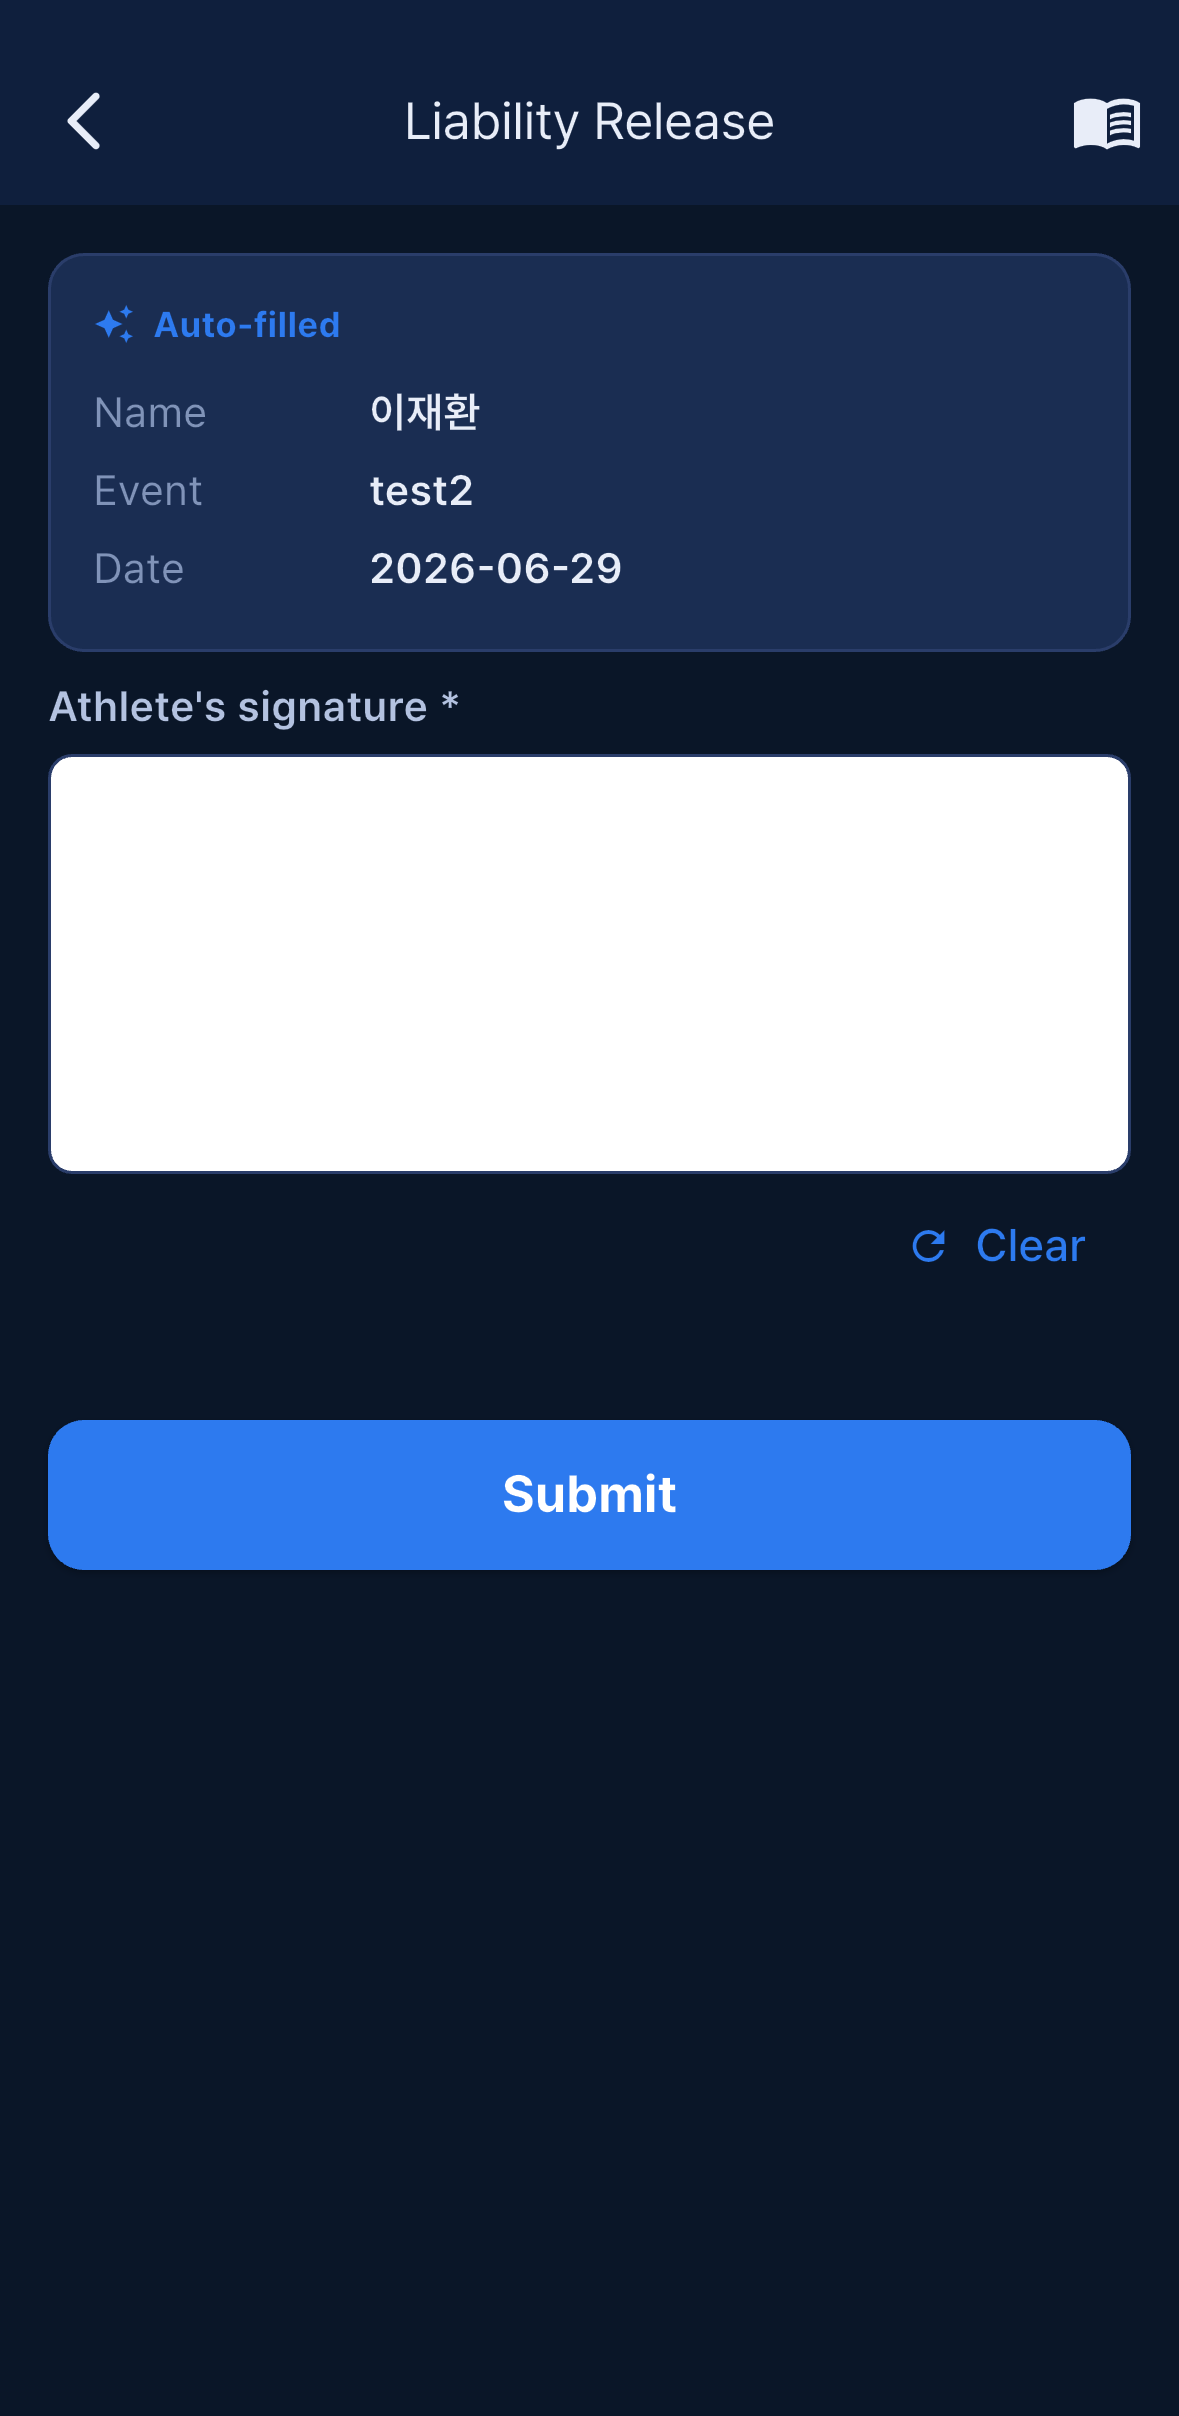
After submitting, View submitted opens the file inside the app in a zoomable PDF and image viewer; View saved does the same for a stored medical statement you have not submitted yet. Withdraw removes a submission so you can send a corrected one.
AP against PB. When a depth event has
Max AP above PB (m)set, the Competition Form is blocked if your announced performance on AIDA exceeds the PB on the form plus that limit:Announced performance exceeds the allowed limit above PB … Lower your AP on AIDA or correct your PB.CNF is always checked against PB + 3 m, even when the organizer left the limit blank. When the organizer runsLoad List, athletes in breach are listed in anAP exceeds PB limit (N)warning and each of them receives one push.
Medical Certificate
A medical statement is valid for one year from its issue date. Store it on your profile (Edit Profile → Medical Certificate) and reuse it across events with Load from profile.
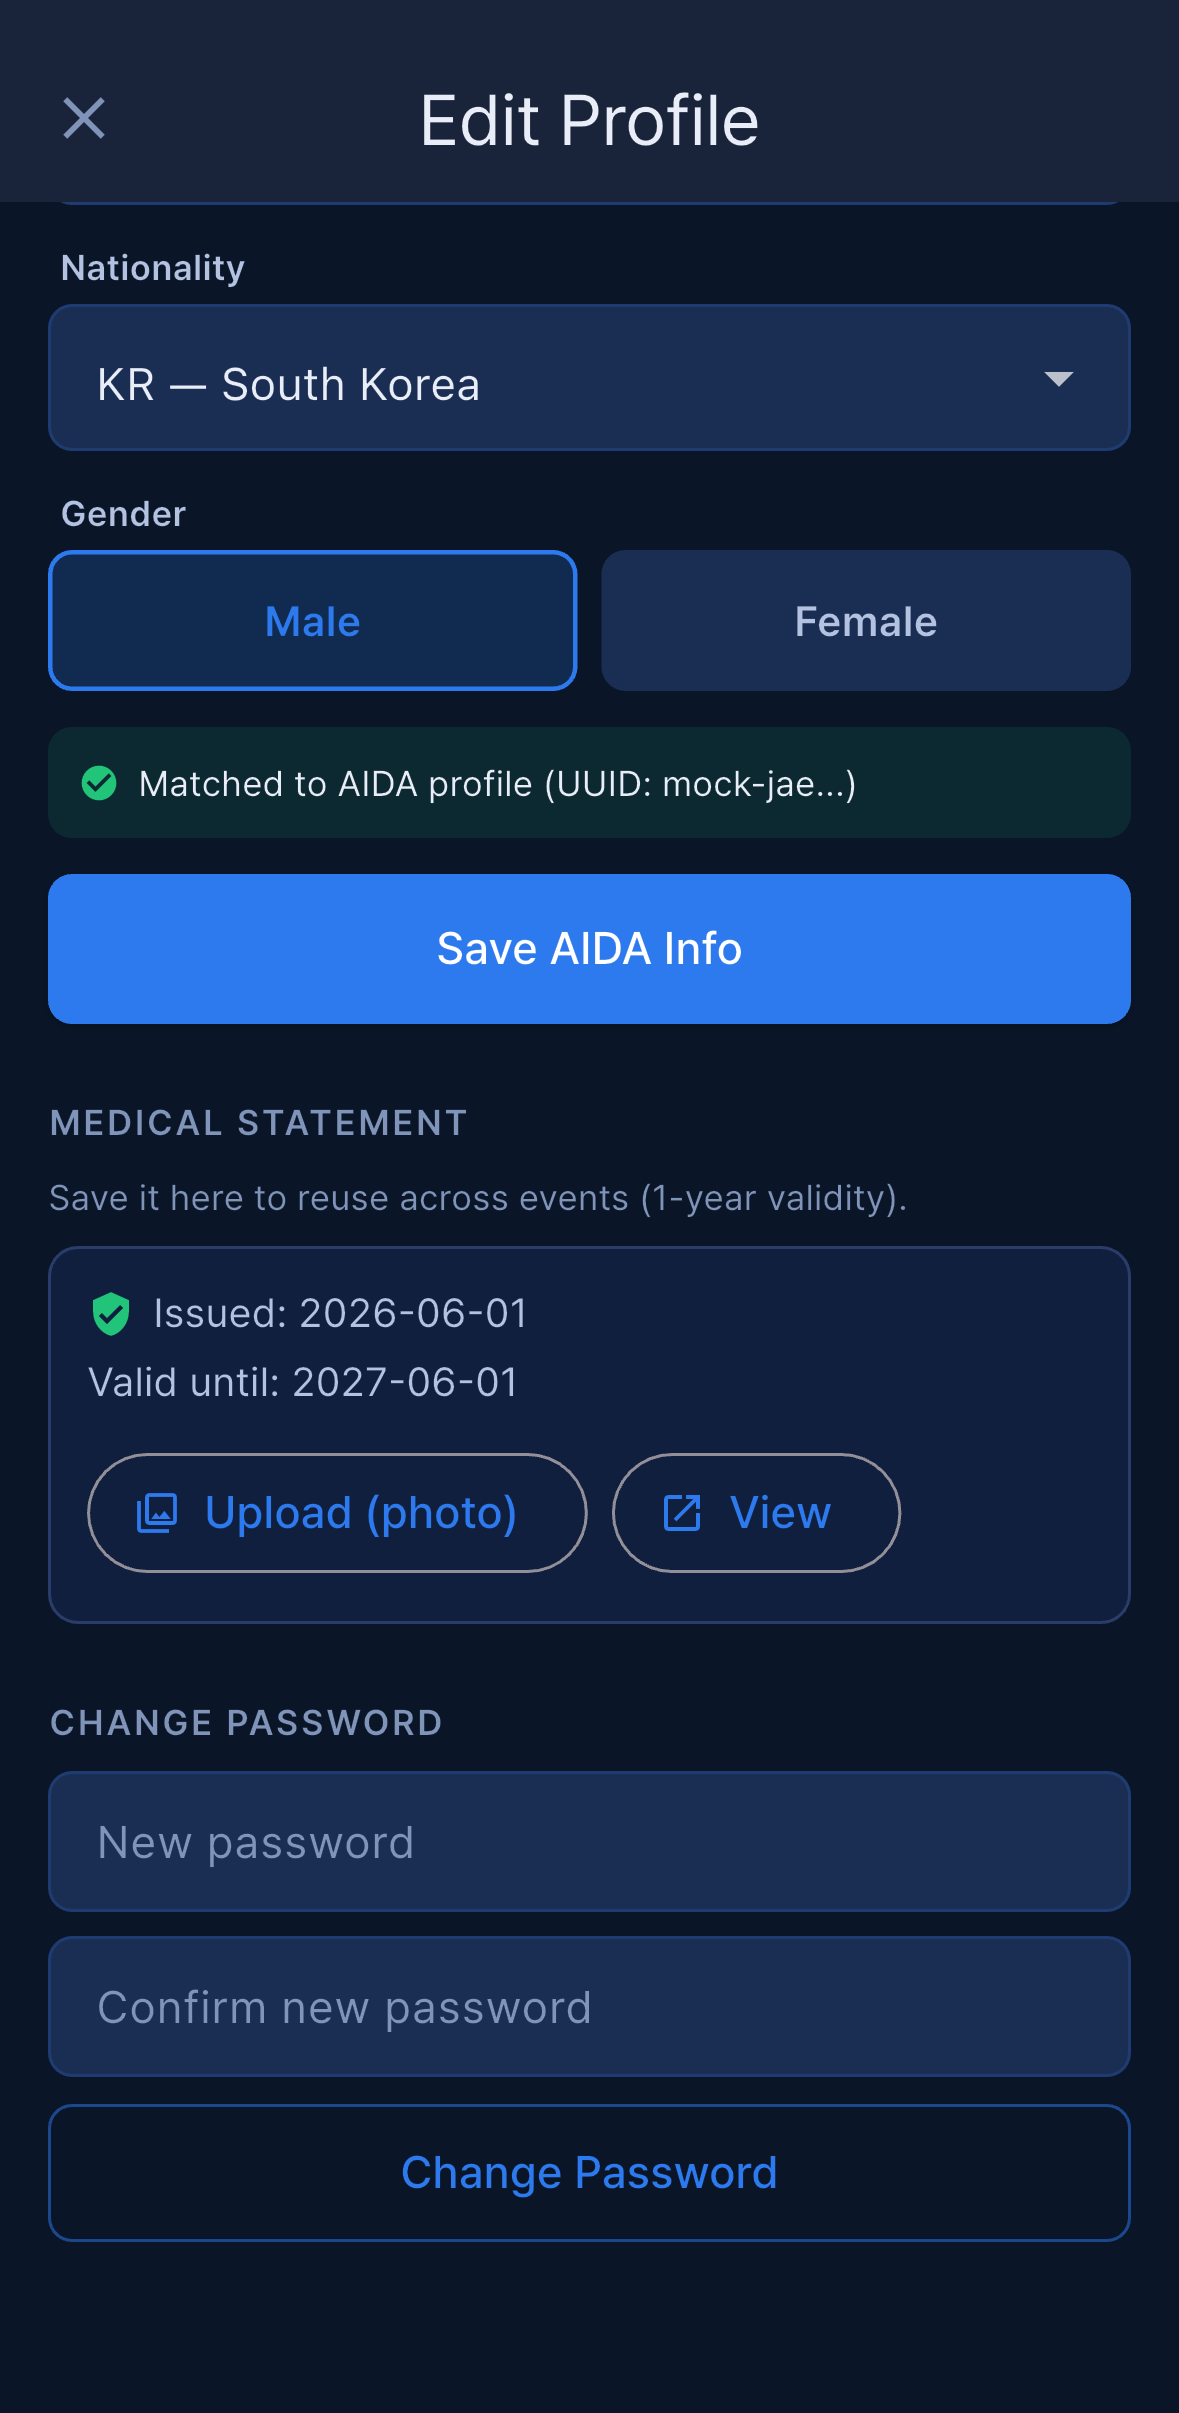
A pressure injury or a blackout after the issue date invalidates the certificate — submit a new one.
On-site handling. If the certificate will be dealt with at the venue, tap On-site and choose Submit on-site (you will hand in the paper) or Issued on-site (you will get it there). The submission counts as made even though there is no file, and the check-in desk confirms the physical document when you check in — see The five checks before the signature.
If the organizer revokes it. The Organizer or Main Judge can revoke a medical statement, usually after a blackout or a medical review. Revoking invalidates both this event’s submission and the reusable copy on your profile, blocks your check-in, and sends you a push — Medical statement revoked / Submit a new medical statement. Check-in is blocked until it is submitted. Your Documents screen and Edit Profile then show Revoked by the organizer — submit a new medical statement. Submitting a new statement clears it automatically. Revoked statements are left out of the staff download.
Submission window
Organizers can decide when athletes may submit. Open More → Documents → Submission window.
Switch on Always open (anytime), or switch it off and set an opening date-time, a closing date-time, or just one of the two. The header of the Documents screen then shows a green Open or an orange Closed, together with either Anytime or the window as MM/DD HH:mm ~ MM/DD HH:mm.
Outside the window, athletes see an orange banner and cannot submit. The block is enforced on the server as well as in the app, so it holds even if the screen was already open.
For staff — the Documents screen
More → Documents (Organizer and Main Judge) lists every athlete with the status of each form.
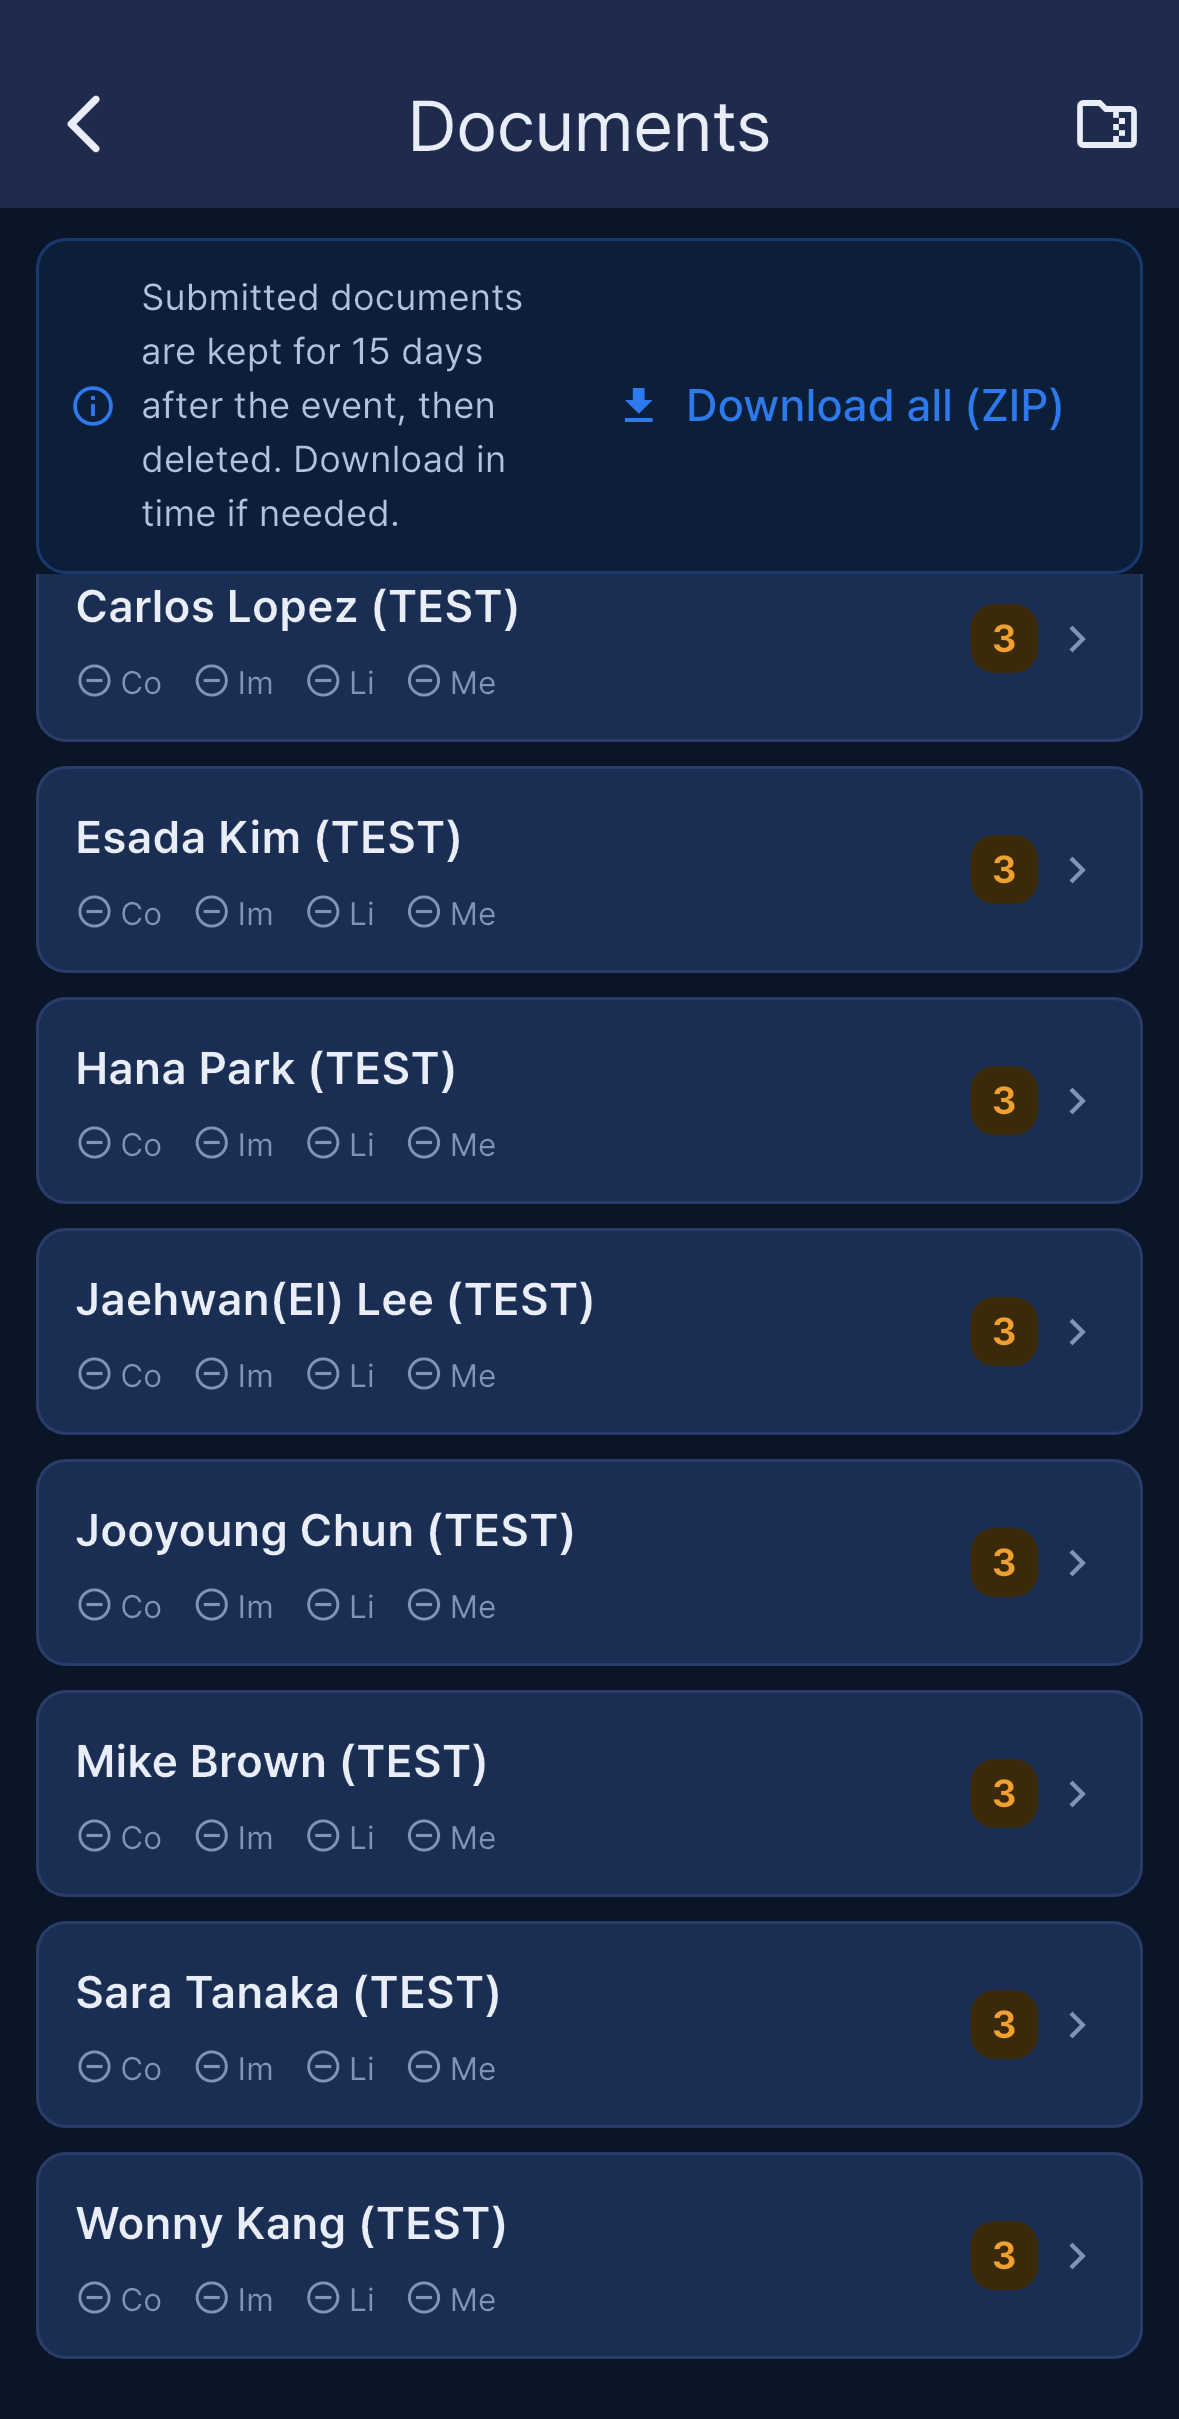
From here you can:
Opena submitted file to download it.Mark verifiedonce you have checked a document by hand (Undo verifyreverses it).Revoke medicalwith a reason, andUndo revocationif you revoked the wrong athlete — the restore brings back the original expiry date.Download all (ZIP)from the folder icon in the top bar.
Manual check. The red badge does not appear merely because an athlete declared an injury or a blackout. It appears only when the declared incident date is after the medical statement’s issue date, or when there is no statement or no issue date to compare against. When the statement was issued after the incident, the app treats it as the medical clearance and shows a grey information row instead of the red badge.
The ZIP. The archive is flat — no folders. Files are named CompetitionForm_<event>_<athlete>.pdf, ImageRights_<event>_<athlete>.…, LiabilityRelease_<event>_<athlete>.… and MedicalCertificate_<athlete>.…, with ` (2)` appended if two names collide. Revoked medical statements are excluded. If nothing has been submitted yet, the app tells you so before it tries to build the archive.
Retention and reminders. Submitted documents are kept for 15 days after the event and then deleted, so download anything you need to keep in time. The day before the event, athletes who are still missing a mandatory form receive one push reminder listing what is outstanding.
Setup: days, lines and OTs
Setup is where the Organizer or Main Judge builds the schedule: which Day of the competition you are working on, how many lines run at the same time, when the first athlete starts, how far apart the OTs are, and where the breaks go. Only Organizer and Main Judge have the Setup tab.
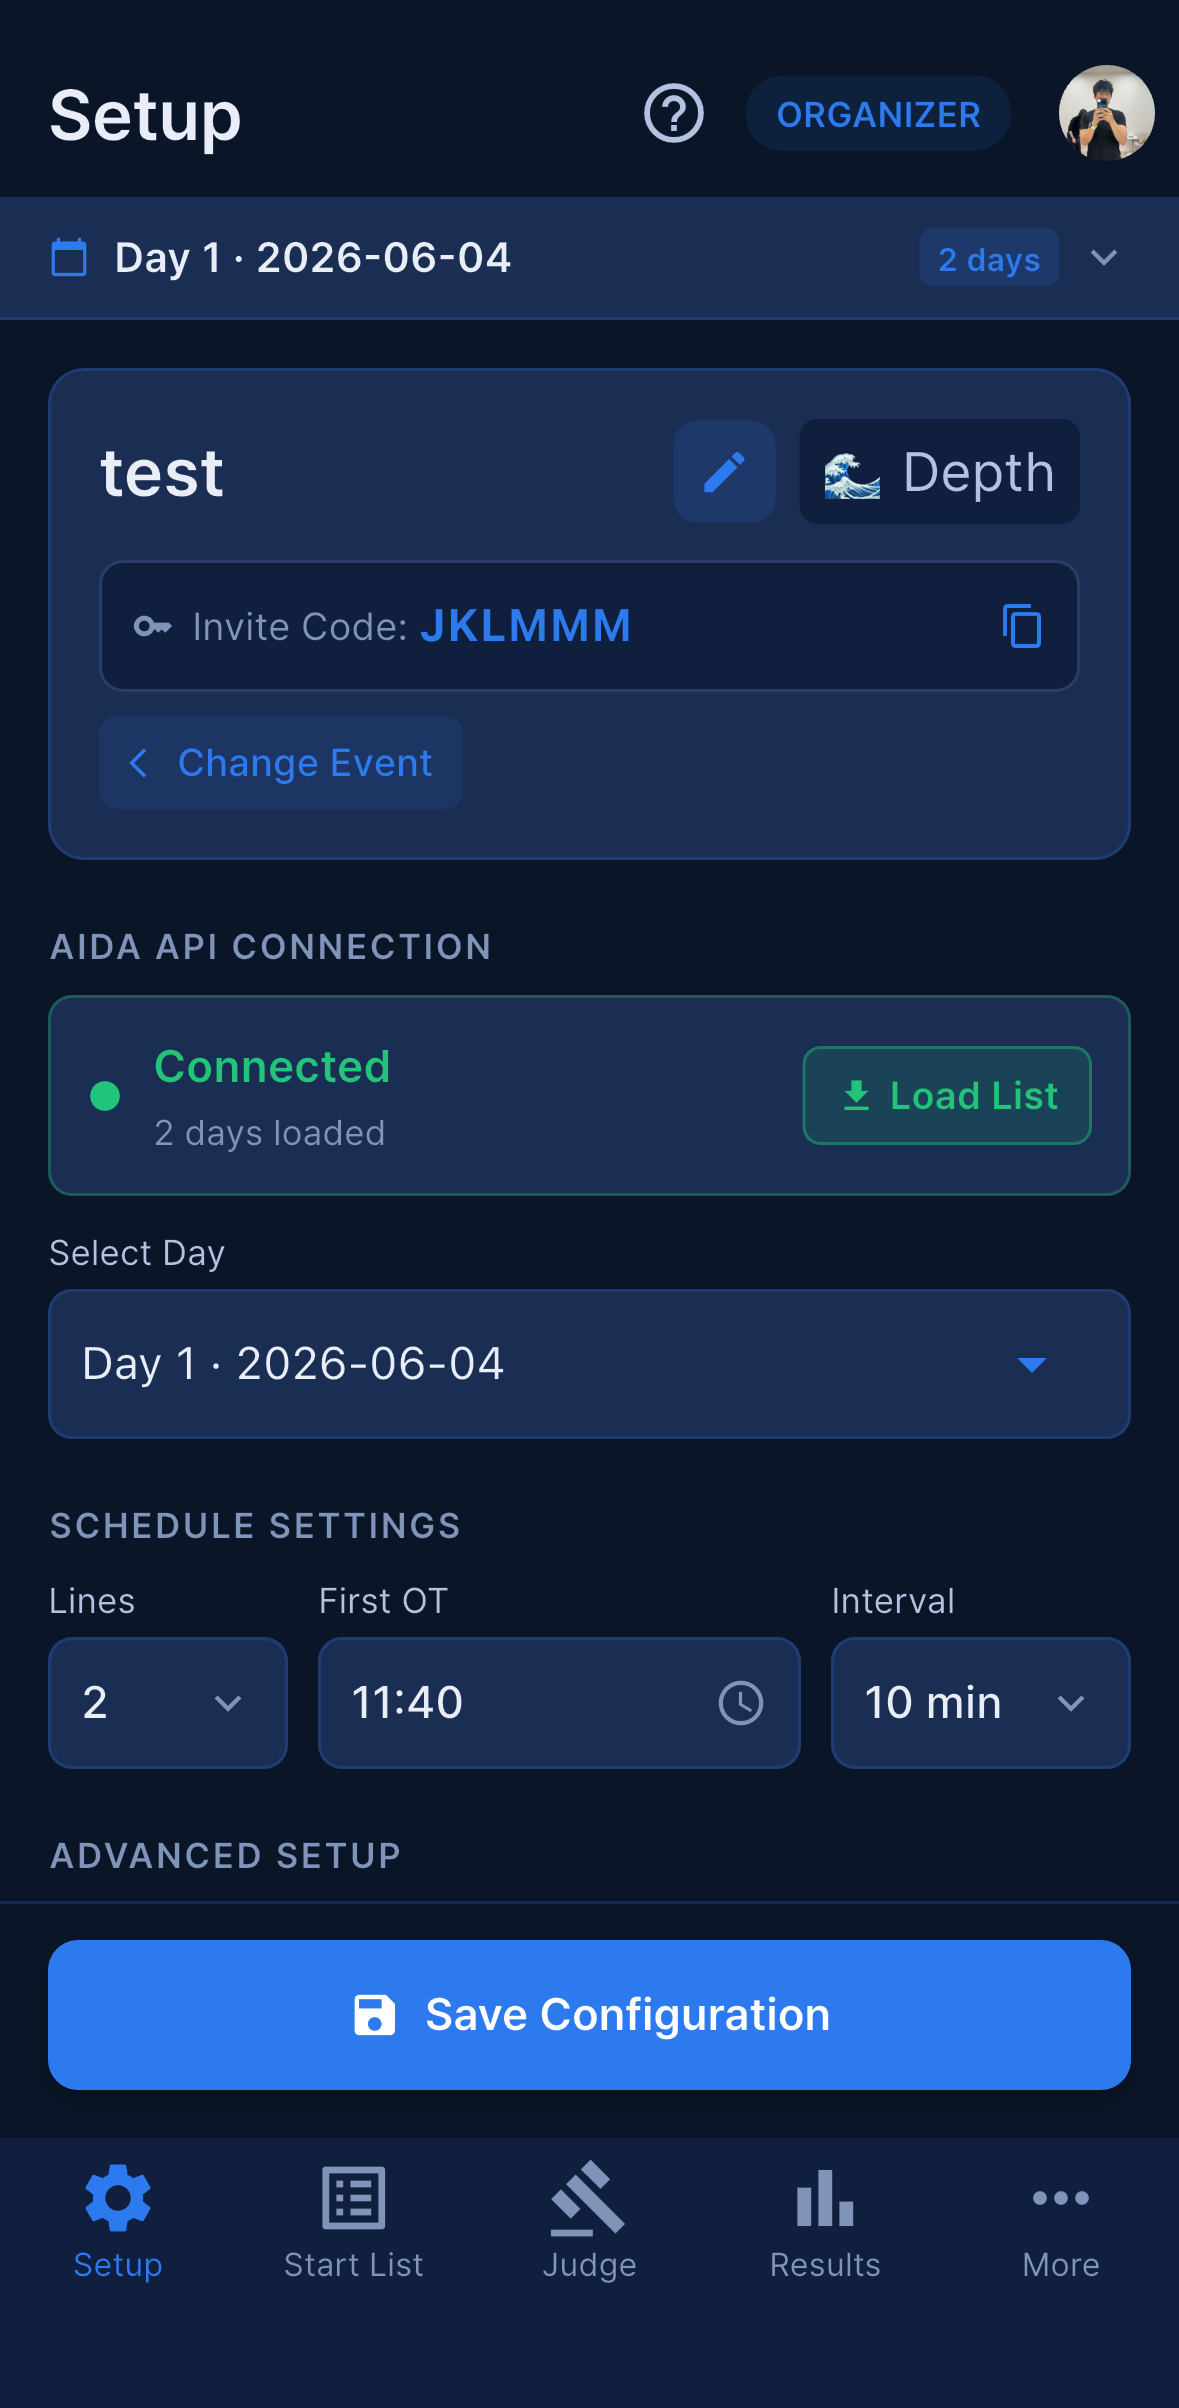
The screen is one long scrolling page. From top to bottom it holds the event header (with Invite Code:, the Athlete code block and the pencil that opens Edit Event), AIDA API Connection, Schedule Settings, Advanced Setup, Teams (Team events only), Day Settings, Break Times, Add Athlete, and a Save Configuration bar pinned to the bottom of the screen.
Load Days and Load List
The start list comes from AIDA, so the event has to be connected first — see Creating an event (Organizer). Until it is, the AIDA card reads Not connected with the hint Tap Connect to enter the AIDA Event ID and API token, and the Day area shows Connect to AIDA to load competition days.
Once the card shows Connected:
- Tap
Load Days. The app creates one Day block for every competition day in AIDA and labels each with its date. There is no “number of days” field to fill in — the day count comes from AIDA. - Long press a Day block to mark it a rest day (
Long press to mark a day as Rest Day). The block then showsREST. Long press again to undo. - Tap the Day you want to work on, then tap
Load List. If you skip the selection you getPlease load and select a Day first.
A few things to know about Load List:
- It replaces that Day’s start list: the existing entries are deleted and re-inserted from AIDA. Judged results are preserved across a normal reload, and saving the schedule can no longer overwrite a saved RP or card.
- If the Day already has a list, the app asks first (
Start List Already Loaded→Re-load (delete current)). - It is blocked when the Day has unresolved protests — reloading would delete the protest records along with the athlete rows — and when the Day contains re-swim entries. The message tells you which. Pull-to-refresh always works: drag down on Judge, Results or Check-in to re-read everything from the server without deleting anything.
- If AIDA regenerates its start list, Days that no longer exist in AIDA are cleaned up so the Day selector matches AIDA. Days that already carry results, openers or re-swims are never removed.
- On a depth event with
Max AP above PB (m)set, loading the list shows anAP exceeds PB limit (N)warning listing the athletes whose announced AP is above the allowed limit over their PB, and each of them receives one notification. See Documents (consent forms).
Lines, First OT and Interval
Schedule Settings holds the three values that drive every OT:
| Field | What it means |
|---|---|
Lines |
Number of lanes (Pool) or platform lines (Depth) running at the same time. |
First OT |
The time the first athlete starts, for example 09:00. |
Interval |
Minutes between consecutive athletes on the same line. |
An athlete’s OT is First OT + interval × their position in the line, with a per-line offset applied when Depth Line Interval is switched on (see Advanced Setup below).
Save Configuration — nothing saves by itself
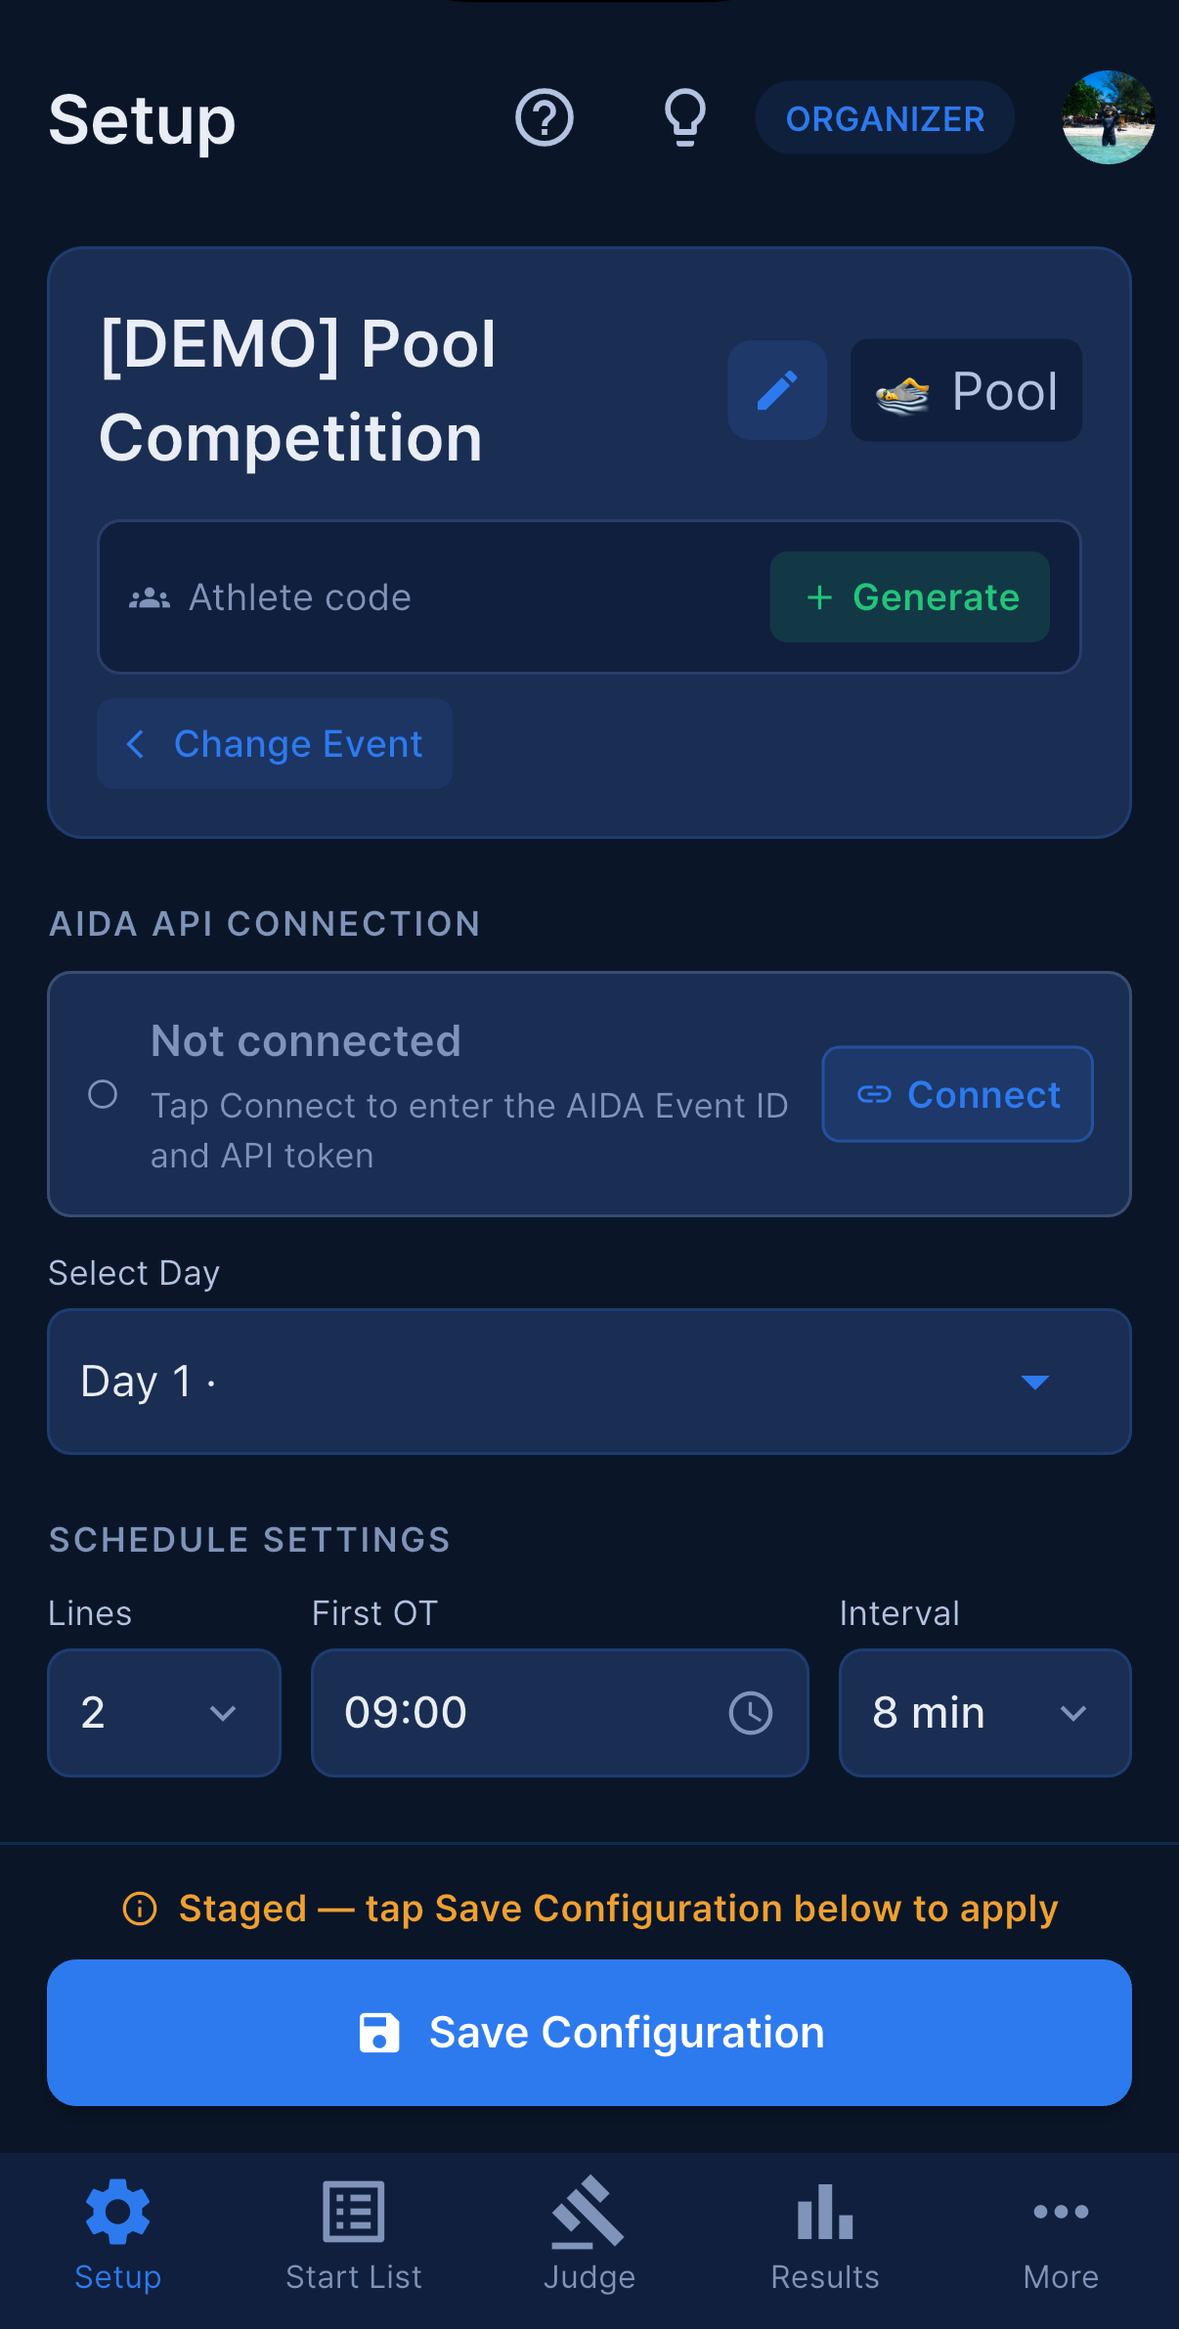
⚠️ Setup does not auto-save. Everything you change on this screen — lines, First OT, interval, order, break times, advanced options — is held on the screen only until you tap
Save Configurationat the bottom. That tap is what recalculates the OTs and stores them for everybody else.
- While unsaved changes are waiting, an orange line appears above the Save button:
Staged — tap Save Configuration below to apply. Some screens stage their work deliberately —Custom Intervalsand the order / line regeneration inConfigure Order & Disciplineboth return to Setup with the change staged rather than applied. - Break Times added or deleted are also only stored when you save.
- Tapping
Load Listauto-saves the current Setup first, so tidy your configuration before you load rather than after. - If the competition is already running, a
Competition in Progressdialog appears before the save. Saving only writes order, lane and OT — judge results are not changed.
After a successful save the app asks, once per Day, Publish to athletes? — “Saved. Athletes still can’t see the start list, check-in or OT yet — send the Start List push to publish it to them.” Choose Later to keep working, or Send Push to go straight to the push screen. Until that push goes out, athletes see nothing of this Day. See Push notifications.
Advanced Setup
Tap Advanced Setup to expand seven rows of finer control. Each row shows its current value underneath, so you can read the whole configuration without opening anything.
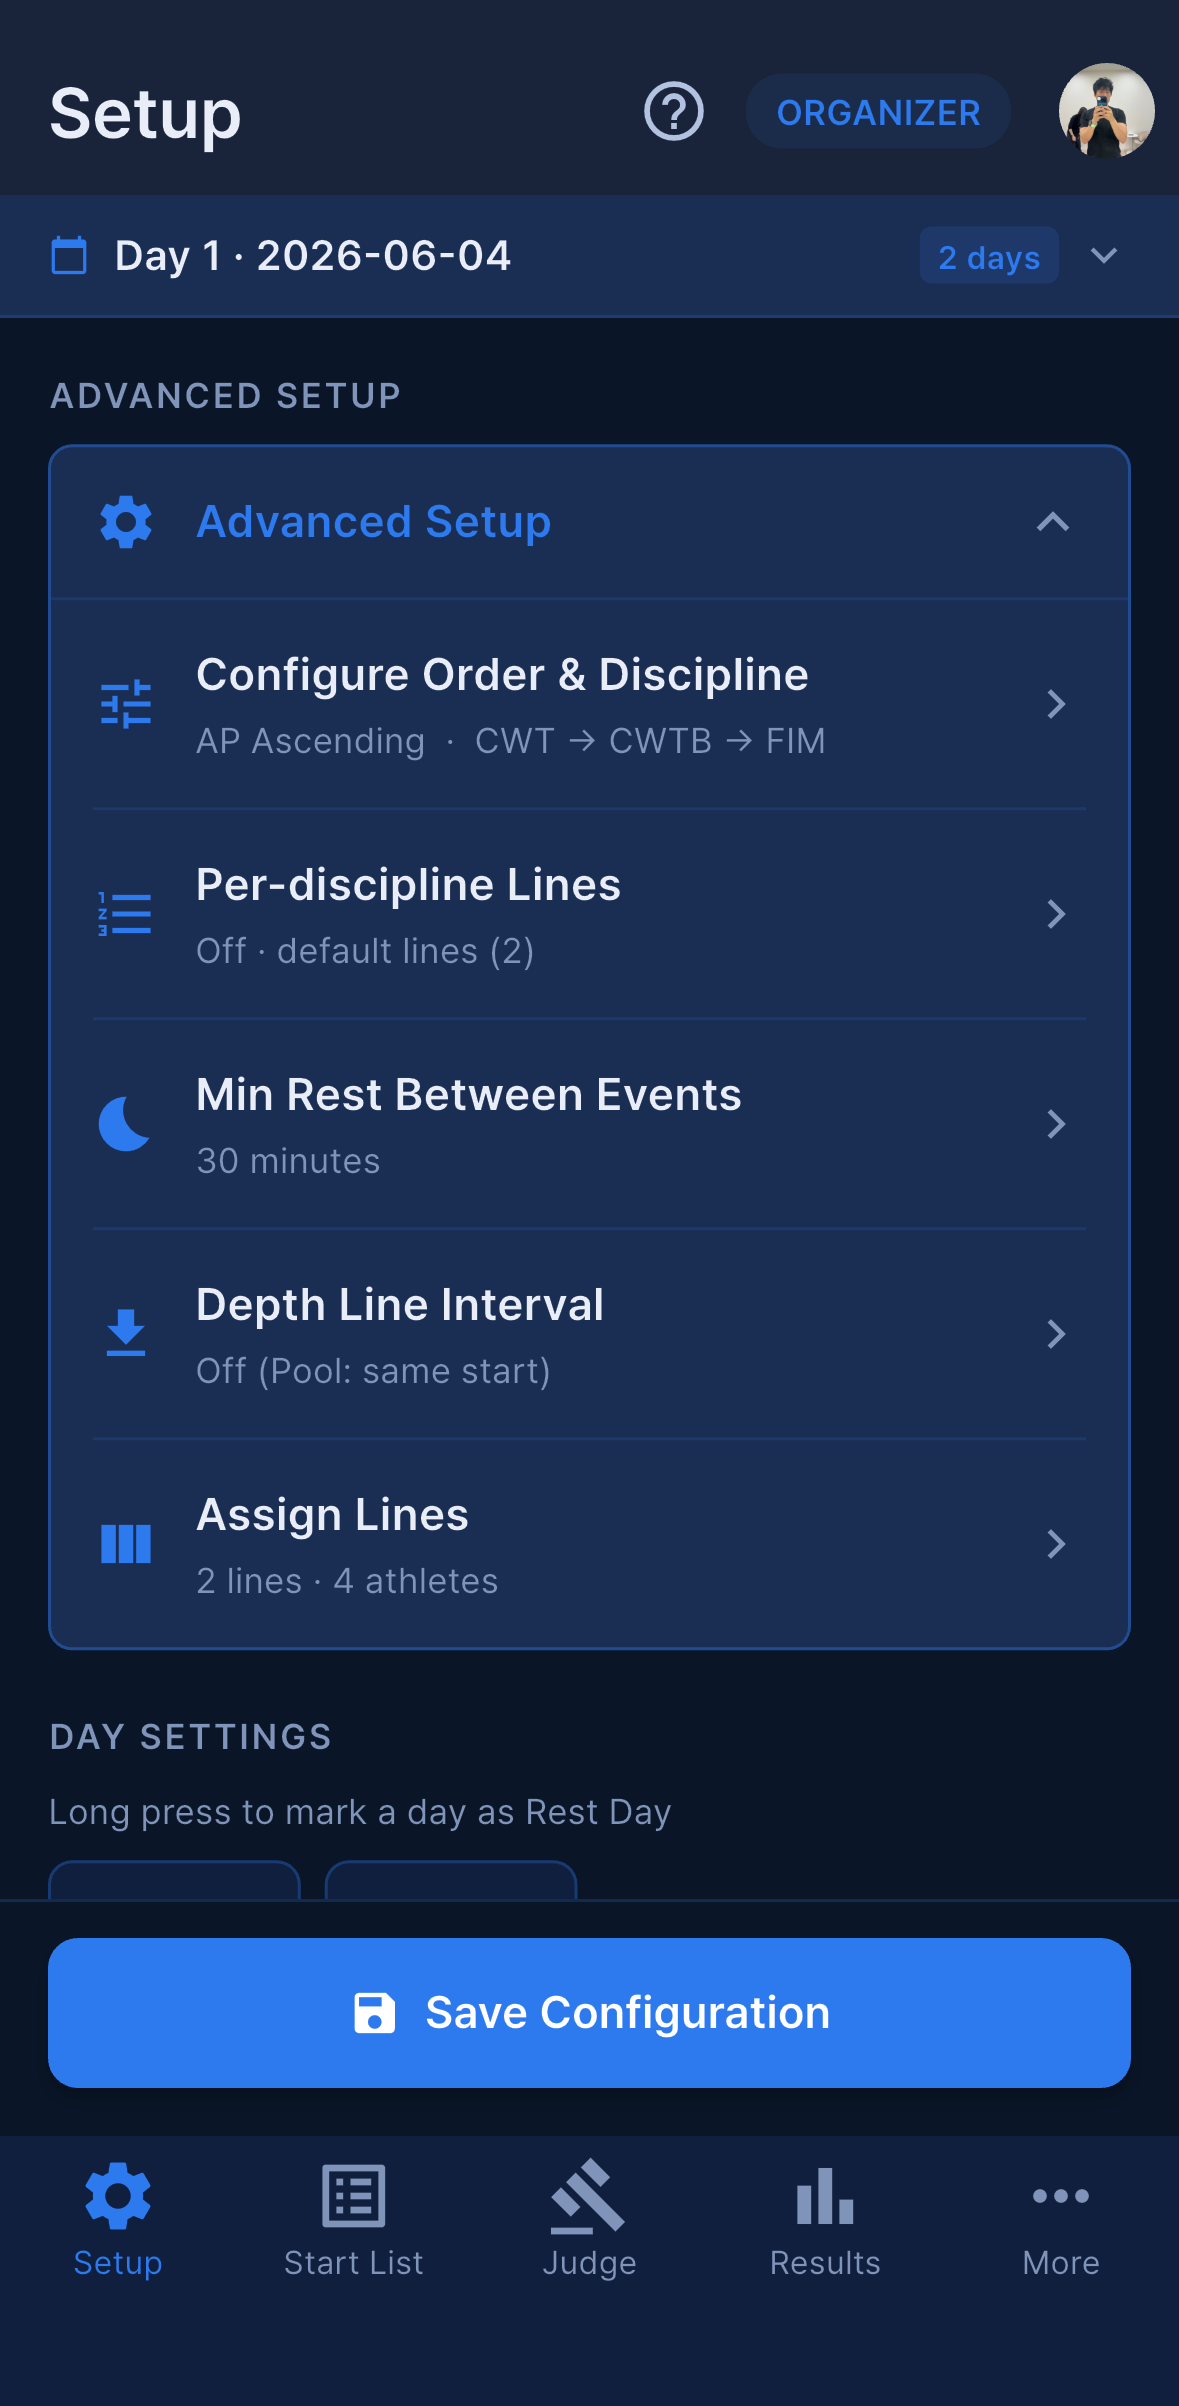
Configure Order & Discipline — set the order the disciplines run in on this Day (tap them 1, 2, 3 …), and the order the athletes start in: Manual / API Order (the order AIDA sent), AP Ascending (Low → High), AP Descending (High → Low) or Random. Mix the rest by AP merges every discipline you did not number and orders those athletes by AP. Regenerating the order here is staged — it applies on Save Configuration.
Per-discipline Lines (Pool) — give each discipline its own number of lanes; for example STA on 4 lanes but DYN and DNF on 2. The app builds a sub-schedule per discipline and stitches them together. Cross-discipline lane carry-over: when the previous discipline ends mid-line (STA finishes on lane 3 of 4), the next discipline can restart from lane 1 (default) or continue from lane 4 — useful when judges stay on the same lane all day.
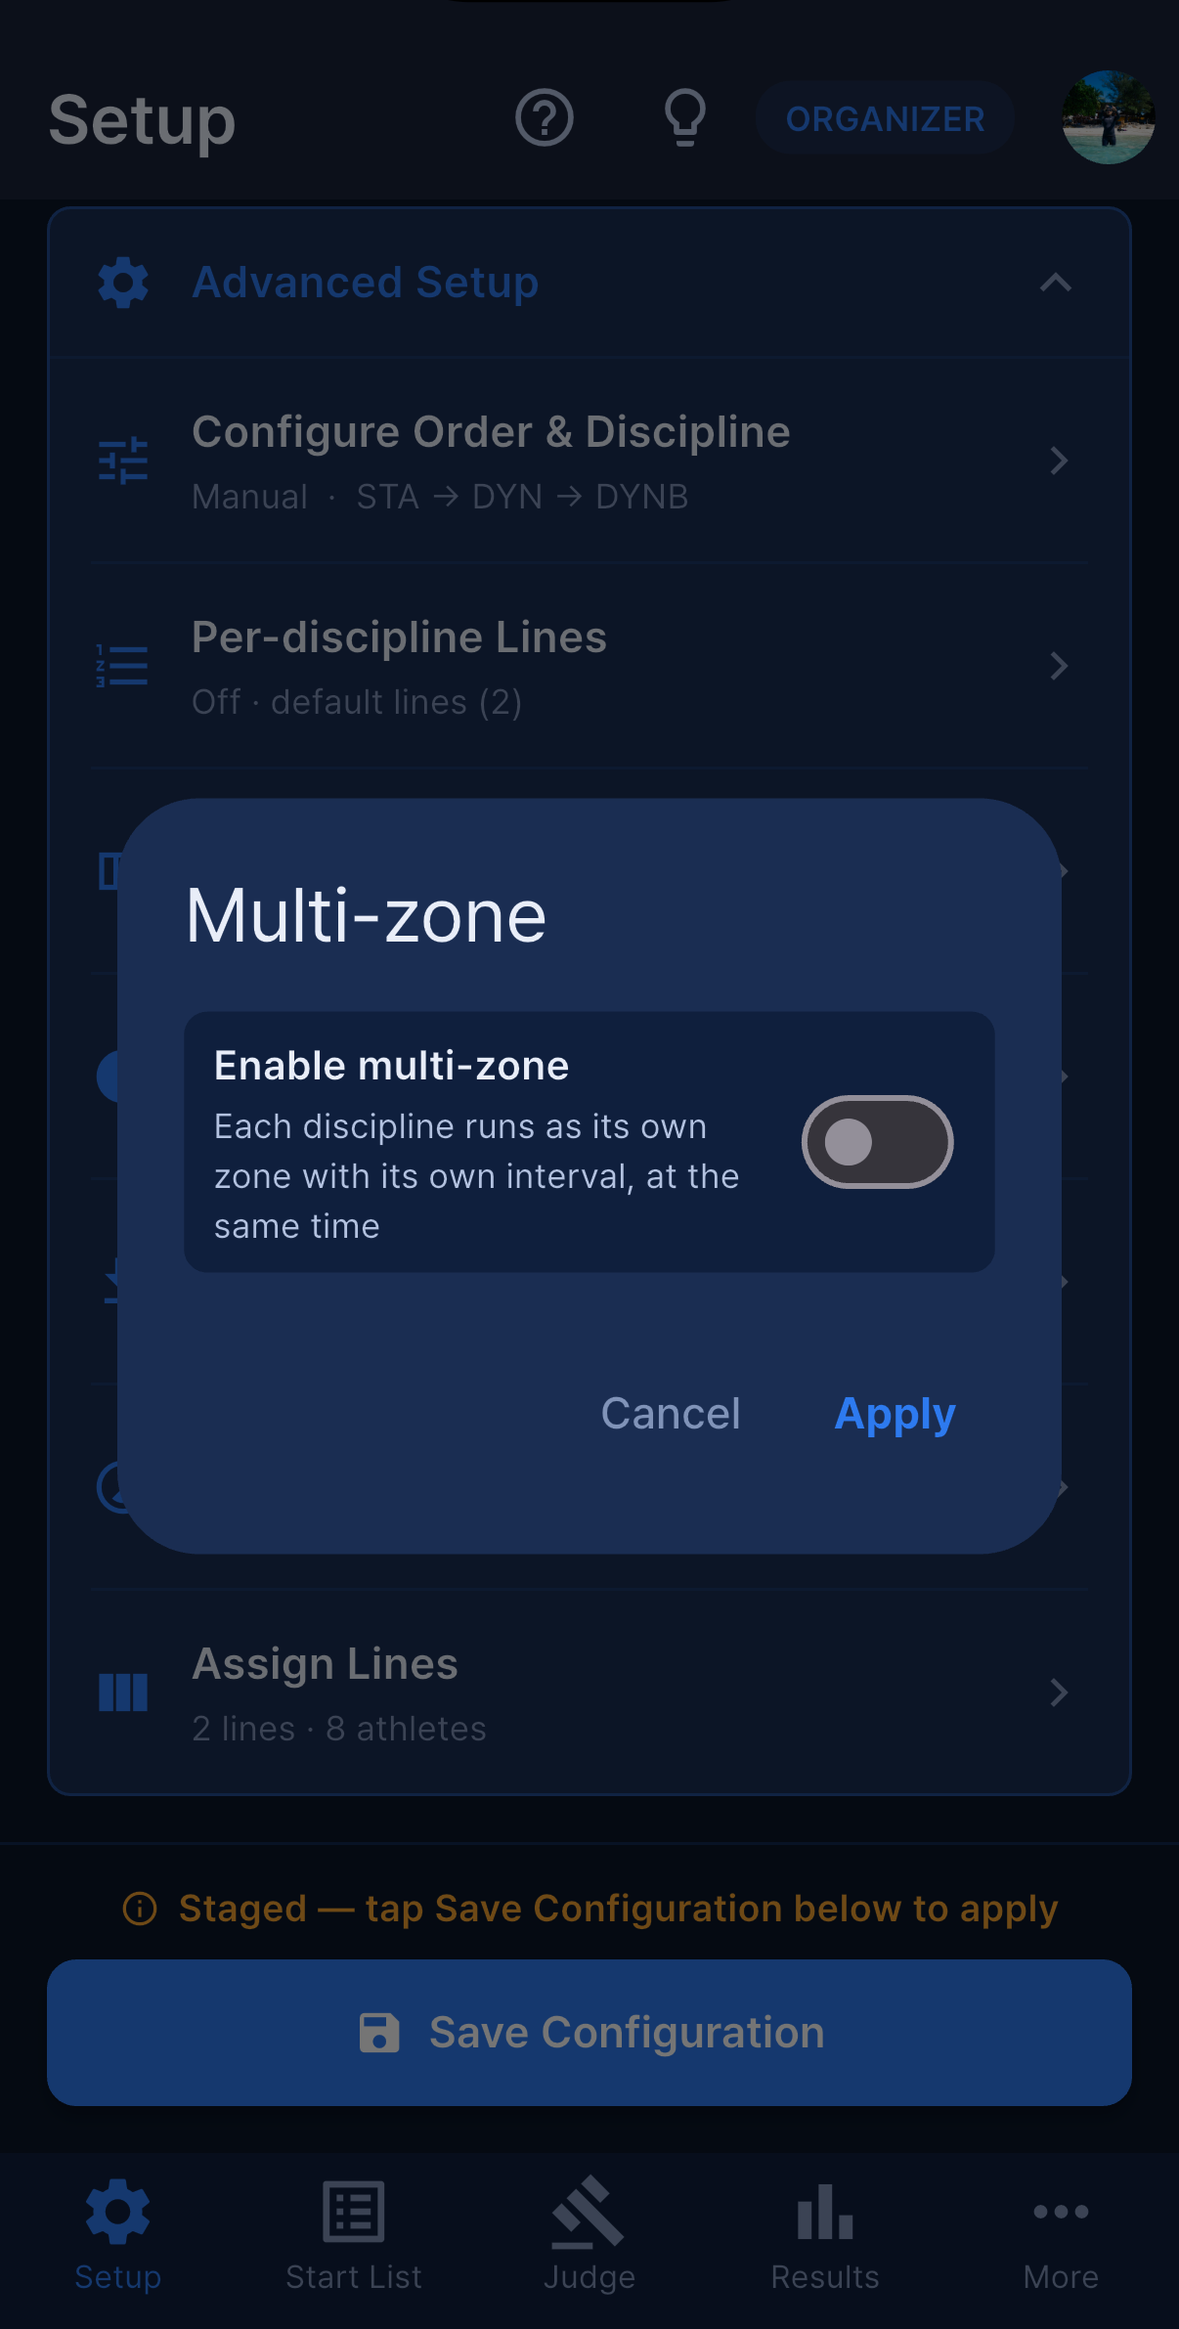
Multi-zone — “Each discipline runs as its own zone with its own interval, at the same time.” Switch on Enable multi-zone, choose the Number of zones, assign each discipline to a zone (ASSIGN DISCIPLINE TO ZONE) and give each zone its own ZONE INTERVAL (MIN). Every zone starts at the same First OT and then runs on its own clock. Once multi-zone is on, the Start List offers an All zones / per-zone filter, a time-based break can be aimed at All zones or one Zone N, and an OT Delay only moves the athletes in the same zone.
Min Rest Between Events — the minimum rest, in minutes, for an athlete entered in more than one discipline on the same Day (default 30). When the generated order cannot honour it you get a Setup Conflicts Detected dialog listing the athletes under Insufficient rest (minimum 30min required):, and you can either fix the order or choose Apply Anyway.
Depth Line Interval (Depth and Team) — when ON, the lines run sequentially: Line 1 starts, Line 2 a few minutes later, and so on, and the Start List shows a per-line countdown. The offset must satisfy (lines − 1) × Line Int. < Athlete Interval, otherwise the schedule cannot be generated and the app says so. When OFF, all lines run in parallel — the athletes in the same row share one OT, exactly like Pool.
Custom Intervals — give different intervals to ranges of athletes by start order, for example #1–#10 at 10 min, #11–#20 at 8 min, #21–#30 at 7 min. Ranges are per Day, must not overlap and must stay inside the athlete count; anyone outside a range keeps the base interval. Done stages the ranges — they are applied when you tap Save Configuration. If the Day already has a manual break, the OT recompute is skipped so that hand-adjusted OTs are not thrown away.
Assign Lines — see below.
Assign Lines
Open Assign Lines to move athletes between lines and reorder them. OTs are recalculated to match:
- Pool: round-robin assignment; the OT follows the athlete’s position within the line.
- Depth: one sequence cycling through the lines, respecting the depth line interval rule.
Direct placement — for special cases, such as reserving a line for a national record attempt, tap an athlete and then tap the target line and position. The schedule re-flows around your choice. This is also the manual route for placing a re-swim (see Re-swim & Opener); if you leave the screen with a re-swim still unplaced the app asks whether to Keep at end, Keep adjusting, or Cancel re-swim.
Save when you are done — Save Configuration is what finalises the start times for the Day.
Add Athlete and pending re-swims
At the bottom of Setup, the Add Athlete card reads “Add an opener or non-ranked athlete. Not included in rankings/AIDA.” It carries two buttons:
Add Athlete— add an opener or any other entry that is not part of the AIDA start list. You give a name, nationality, gender, discipline, AP and PB. For STA the AP and PB are entered on a mm:ss wheel; every other discipline takes a number. The entry appears in the Start List, Check-in and Judge like anyone else, but it is left out of the rankings and is never sent to AIDA.Re-place re-swim athletes— appears when re-swims are reserved for this Day but not yet placed (Pending re-swims). Use it to place them without reloading the list.
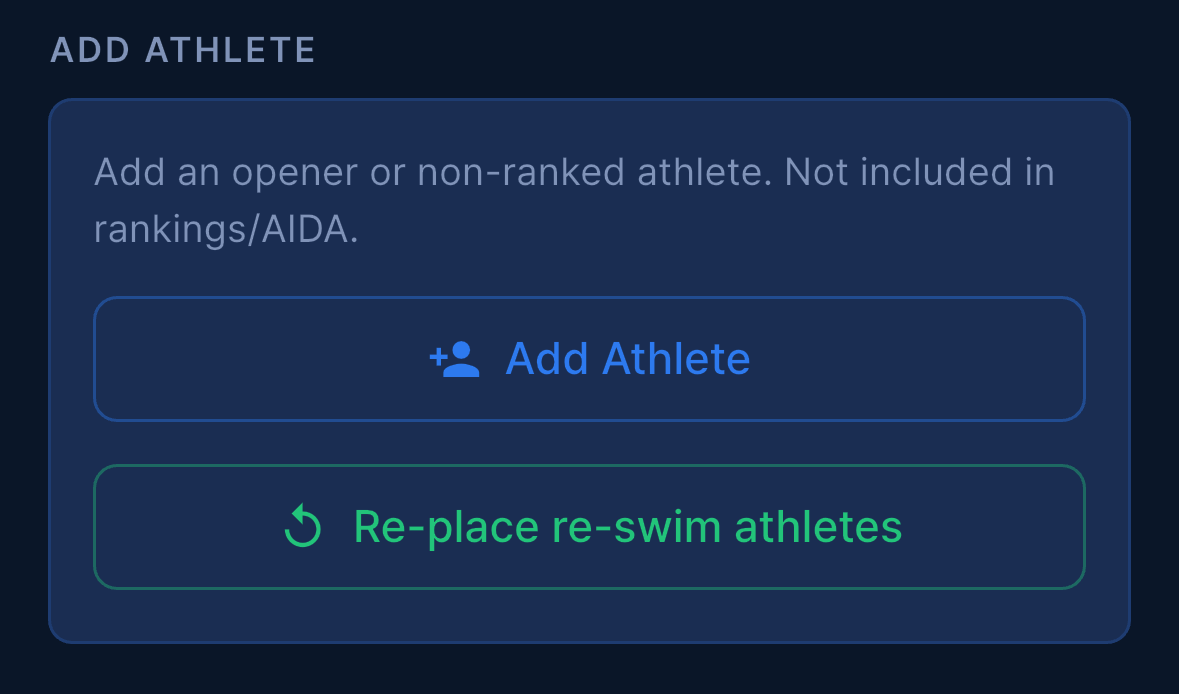
Both are covered in full in Re-swim & Opener.
Setting the first OT
The first time an Organizer or Main Judge opens an event that has not ended, the app shows a short advisory, Setting the first OT:
Set the first Official Top (OT) to at least 1 hour 30 minutes from now. Check-in closes 1 hour before OT, so if the OT is too close, the deadline has already passed and every athlete is auto-marked Late.
It is shown once per event. The don’t-show-again checkbox silences it for every event on that device, so only tick it if you already know the rule. If you do set a First OT that is less than an hour away, expect the pending athletes to start turning into Late Check-in — see Check-in.
Break Times
Breaks pause the schedule for a fixed window. The app supports two kinds, and both are added from the Break Times section of Setup.
Time-based break
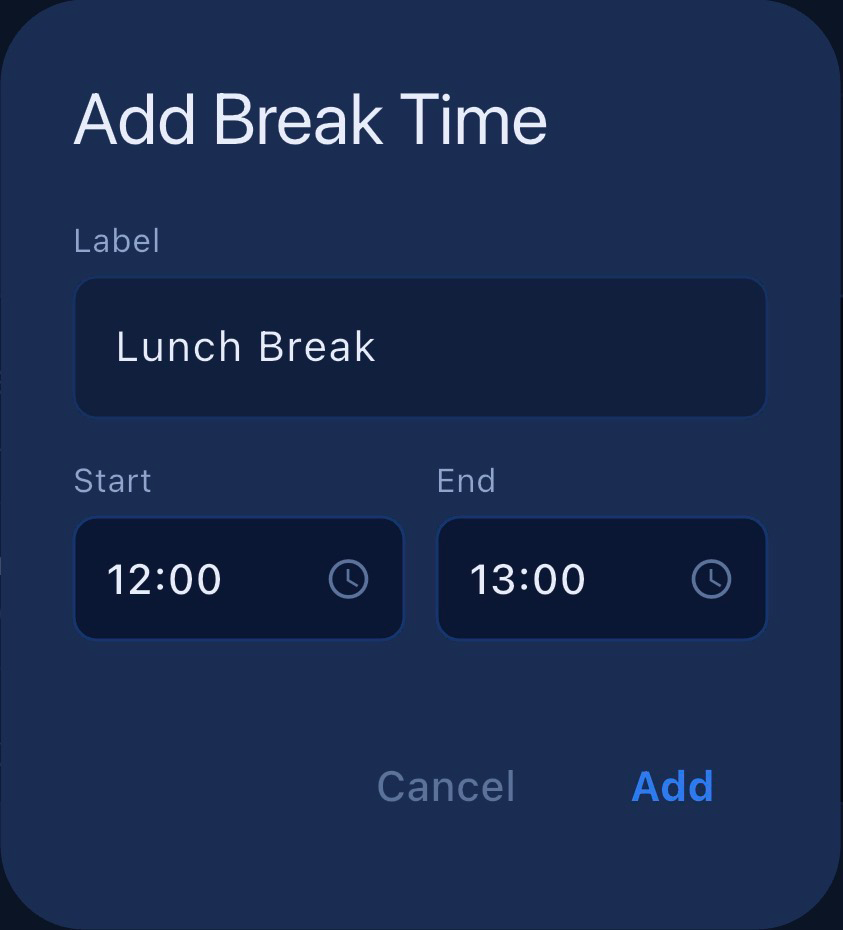
Use this for breaks that everyone agrees on in advance — lunch, a ceremony, a pool change:
- Setup →
Break Times→Add Break Time. - Choose
Time-based(“Set fixed start and end times”). - Enter the start and end time, for example
12:00–13:00. - Add it, then tap
Save Configuration.
Any athlete whose OT falls inside the window is pushed back so that their OT lands after the break ends. Line assignment is preserved.
After Athlete break
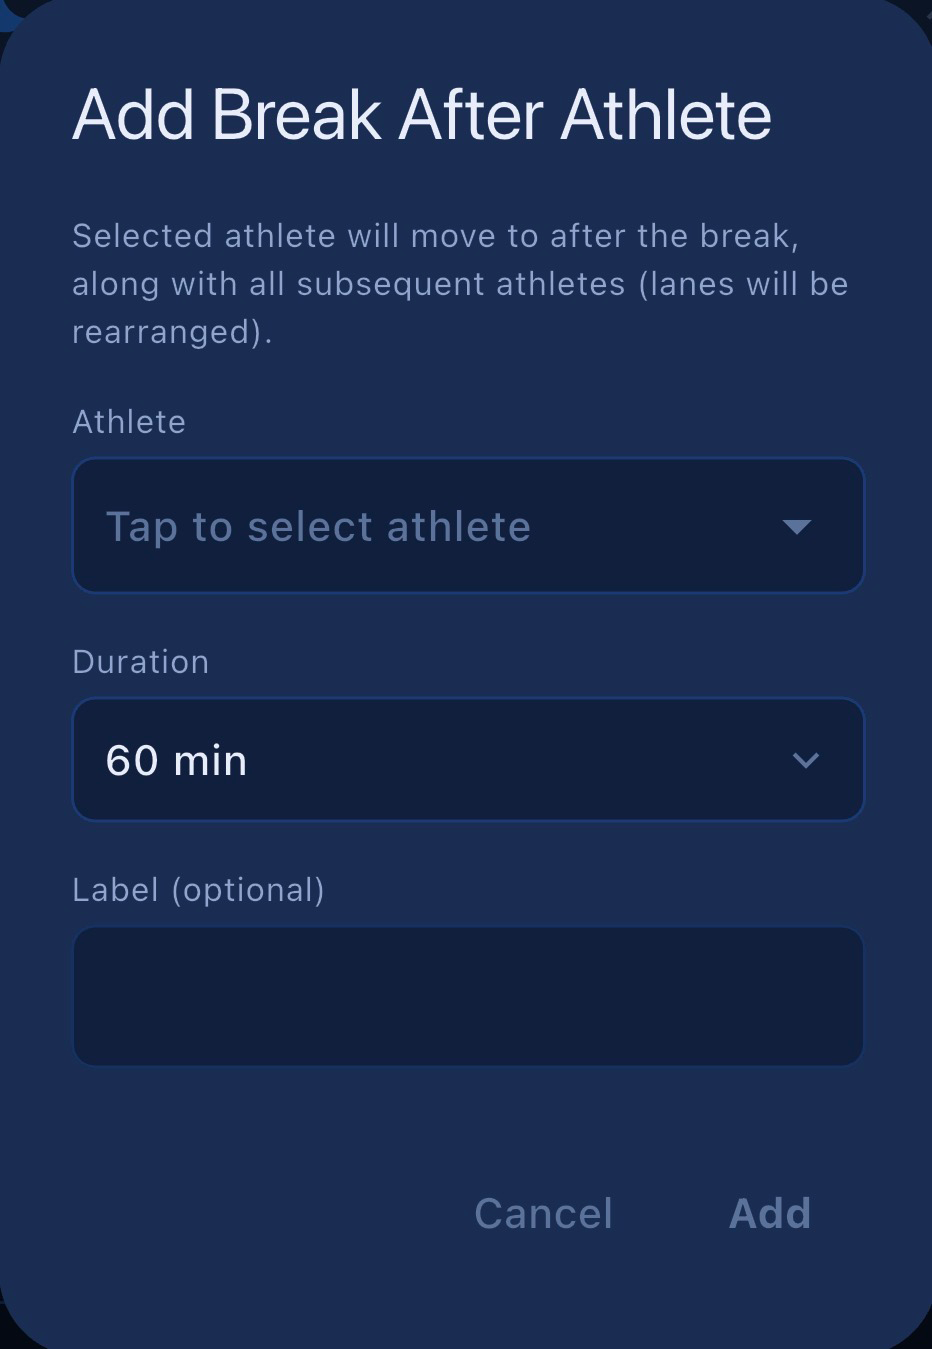

Use this when the break has to start after a particular athlete finishes, whatever the clock says — for example a 60-minute rest once the warm-up group is done:
- Setup →
Break Times→Add Break Time. - Choose
After Athlete(“Select athlete + duration”). - Pick the athlete who marks the end of the segment.
- Enter the break duration, for example
60minutes. - Add it, then tap
Save Configuration.
The selected athlete and every athlete after them in the start order are shifted by the break duration. Athletes earlier in the order are not touched, even if they are at the same clock time in another discipline. Line assignment is preserved.
To remove a break, tap the 🗑️ trash icon next to it in the Break Times list — and save.
Breaks on multi-day and multi-zone events
- Breaks are stored per Day. The Day you have selected in Setup is the Day you are editing, so switch Day first and check the list before you add anything.
- Nothing is stored until you save. Adding or deleting a break changes only what is on screen;
Save Configurationwrites it and recalculates the OTs. - On a multi-zone event a time-based break carries a zone badge —
All zonesorZone N— which you choose when you create it. An After Athlete break always follows the athlete you picked, so it moves that athlete’s own sequence. - If a manual break exists for the Day, an OT recompute triggered from
Custom Intervalsis skipped, so that hand-adjusted OTs survive.
Team competitions
Team events (Competition Type Team) group athletes into teams whose combined scores decide the standings. A Teams section appears in Setup for Team events only.
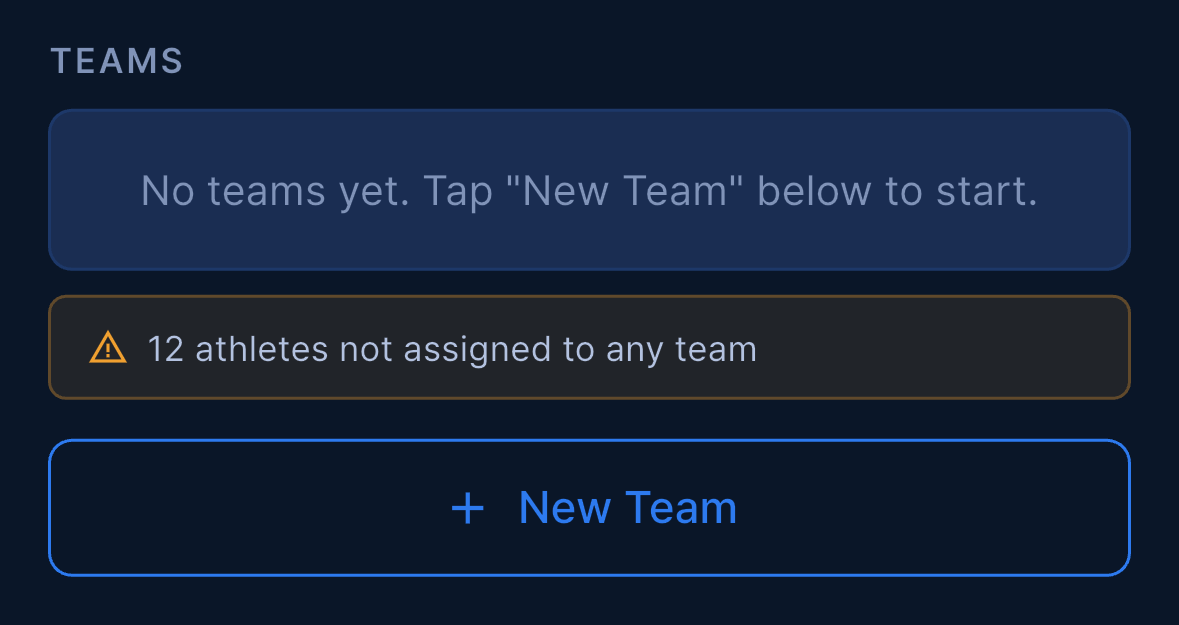
Team event disciplines — when you create a Team event (and later in Edit Event) you choose between Pool only and Includes depth. The default is Pool only. The choice matters for two things: Max AP above PB (m) is only offered and stored when the event Includes depth, and the Competition Form form is only required for athletes when depth is involved. A start list that contains any depth discipline is treated as a depth event whatever the setting says, and an older team event that has no value yet adopts the disciplines of its start list the first time Edit Event is opened.
Creating and editing teams
Tap New Team to open the team editor.
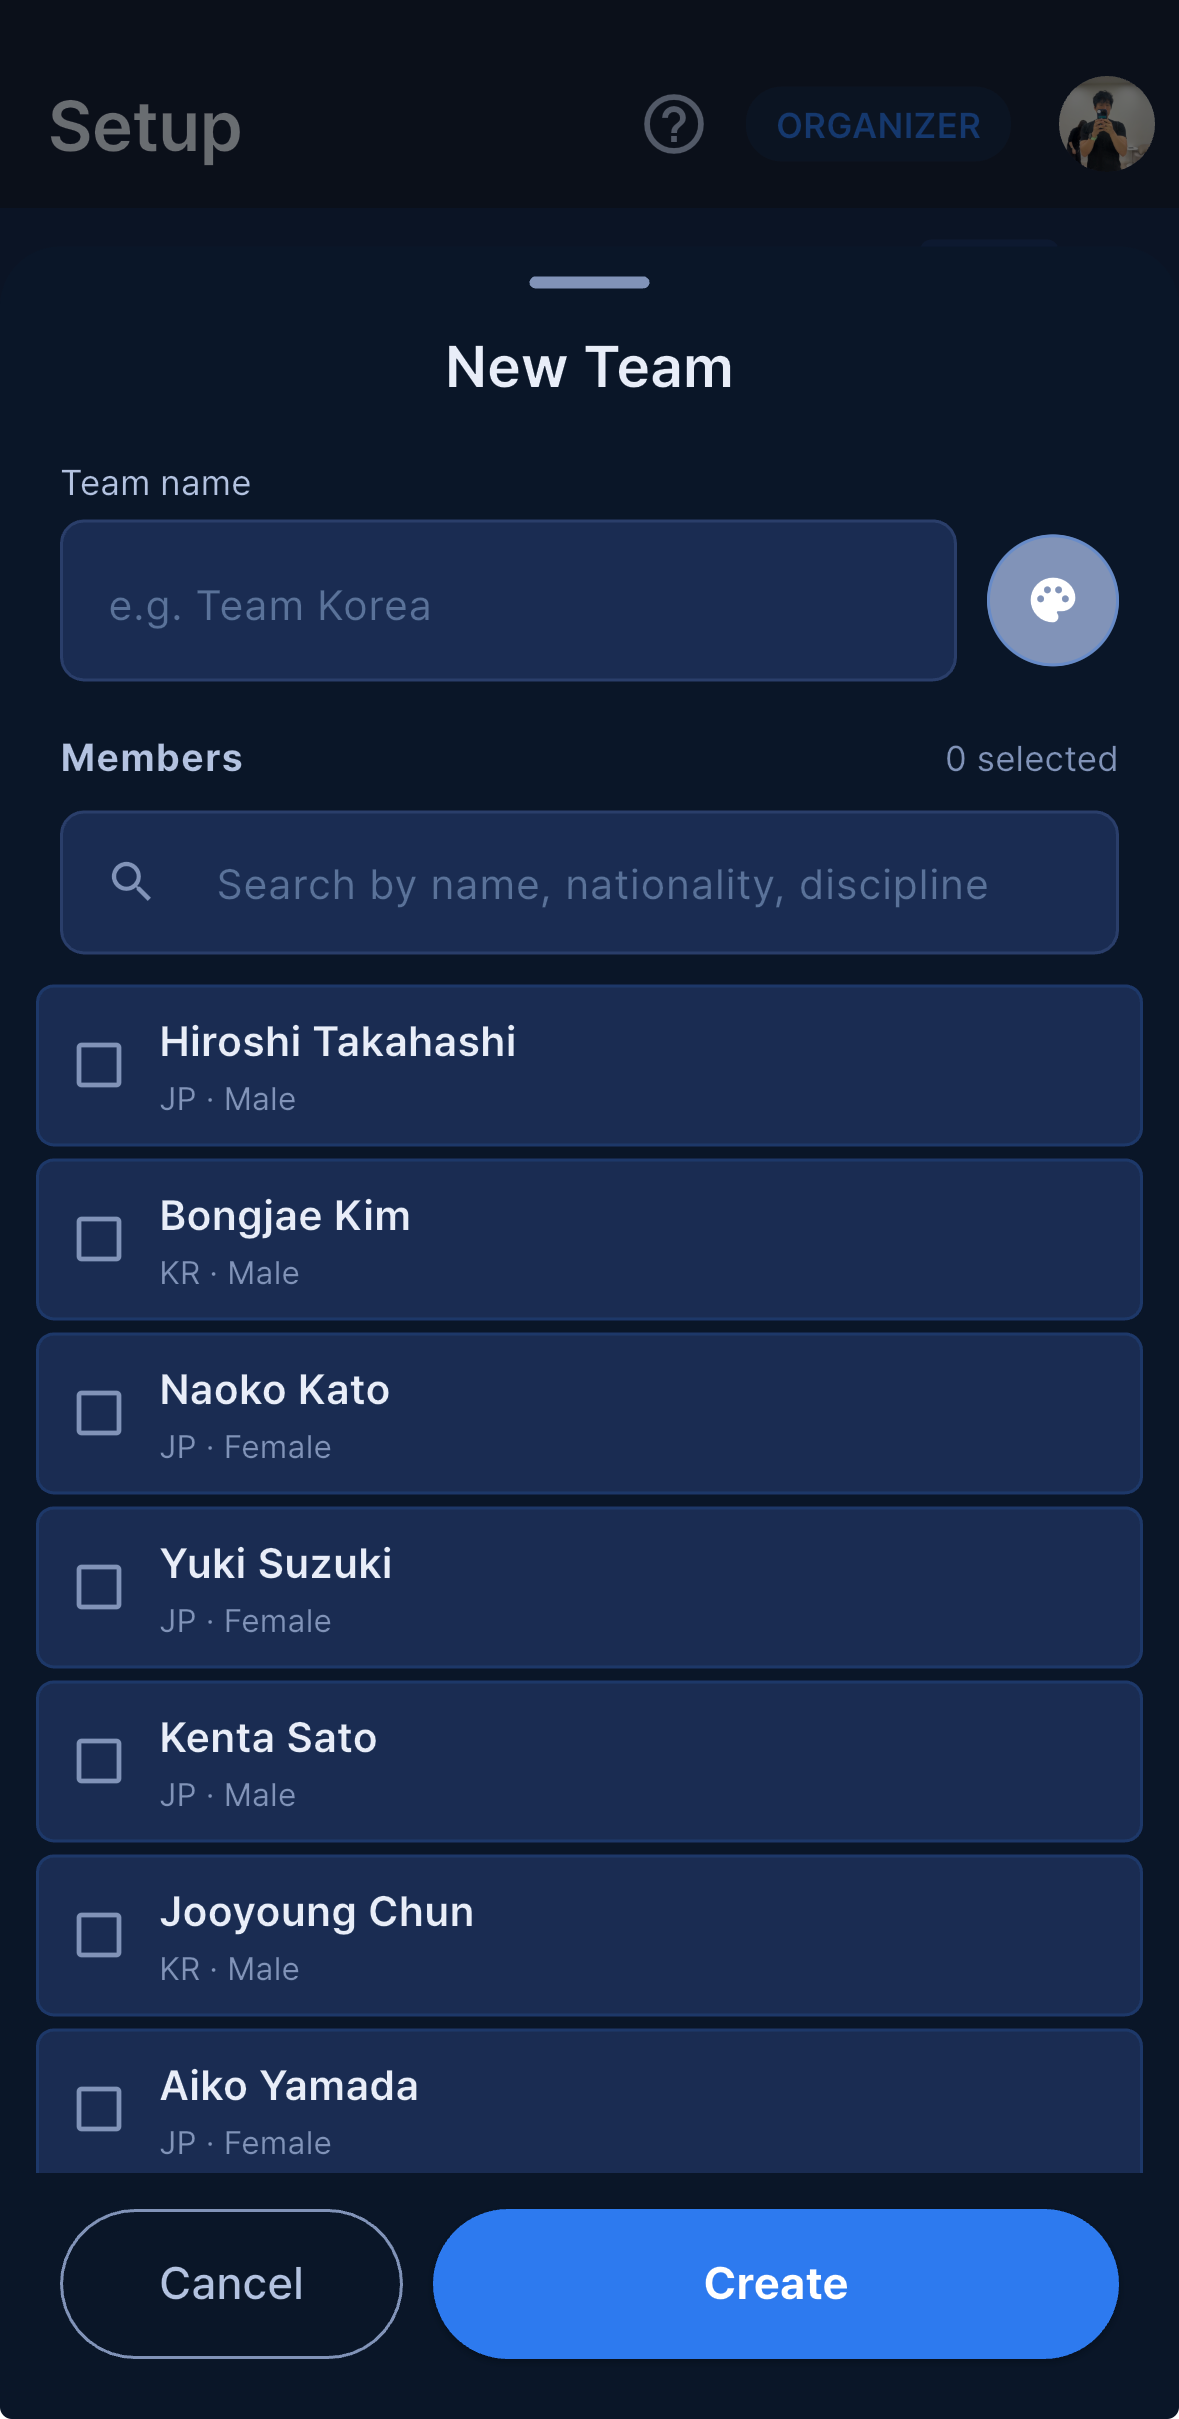
Team name— required.- Colour — pick a swatch so the team is easy to spot in lists.
Members— tick the athletes who belong to the team. The list is searchable by name, nationality or discipline. Selecting an athlete who is already on another team moves them over.
Each team card shows its name, colour and member count. Tap a card to edit it, or use its menu to delete it — the athletes of a deleted team move back to “Unassigned”. Setup warns you while athletes are still unassigned.
An athlete who competes on more than one day appears once — selecting them assigns all of their day entries to the team, so you pick each person only once.
Team standings appear in Rewards alongside the individual rankings; see Results, Rewards and records.
Check-in
Athletes check in at the desk before warm-up. Open More → Check-in — it is a More-menu screen, not a bottom tab, and every role except Photo can open it.
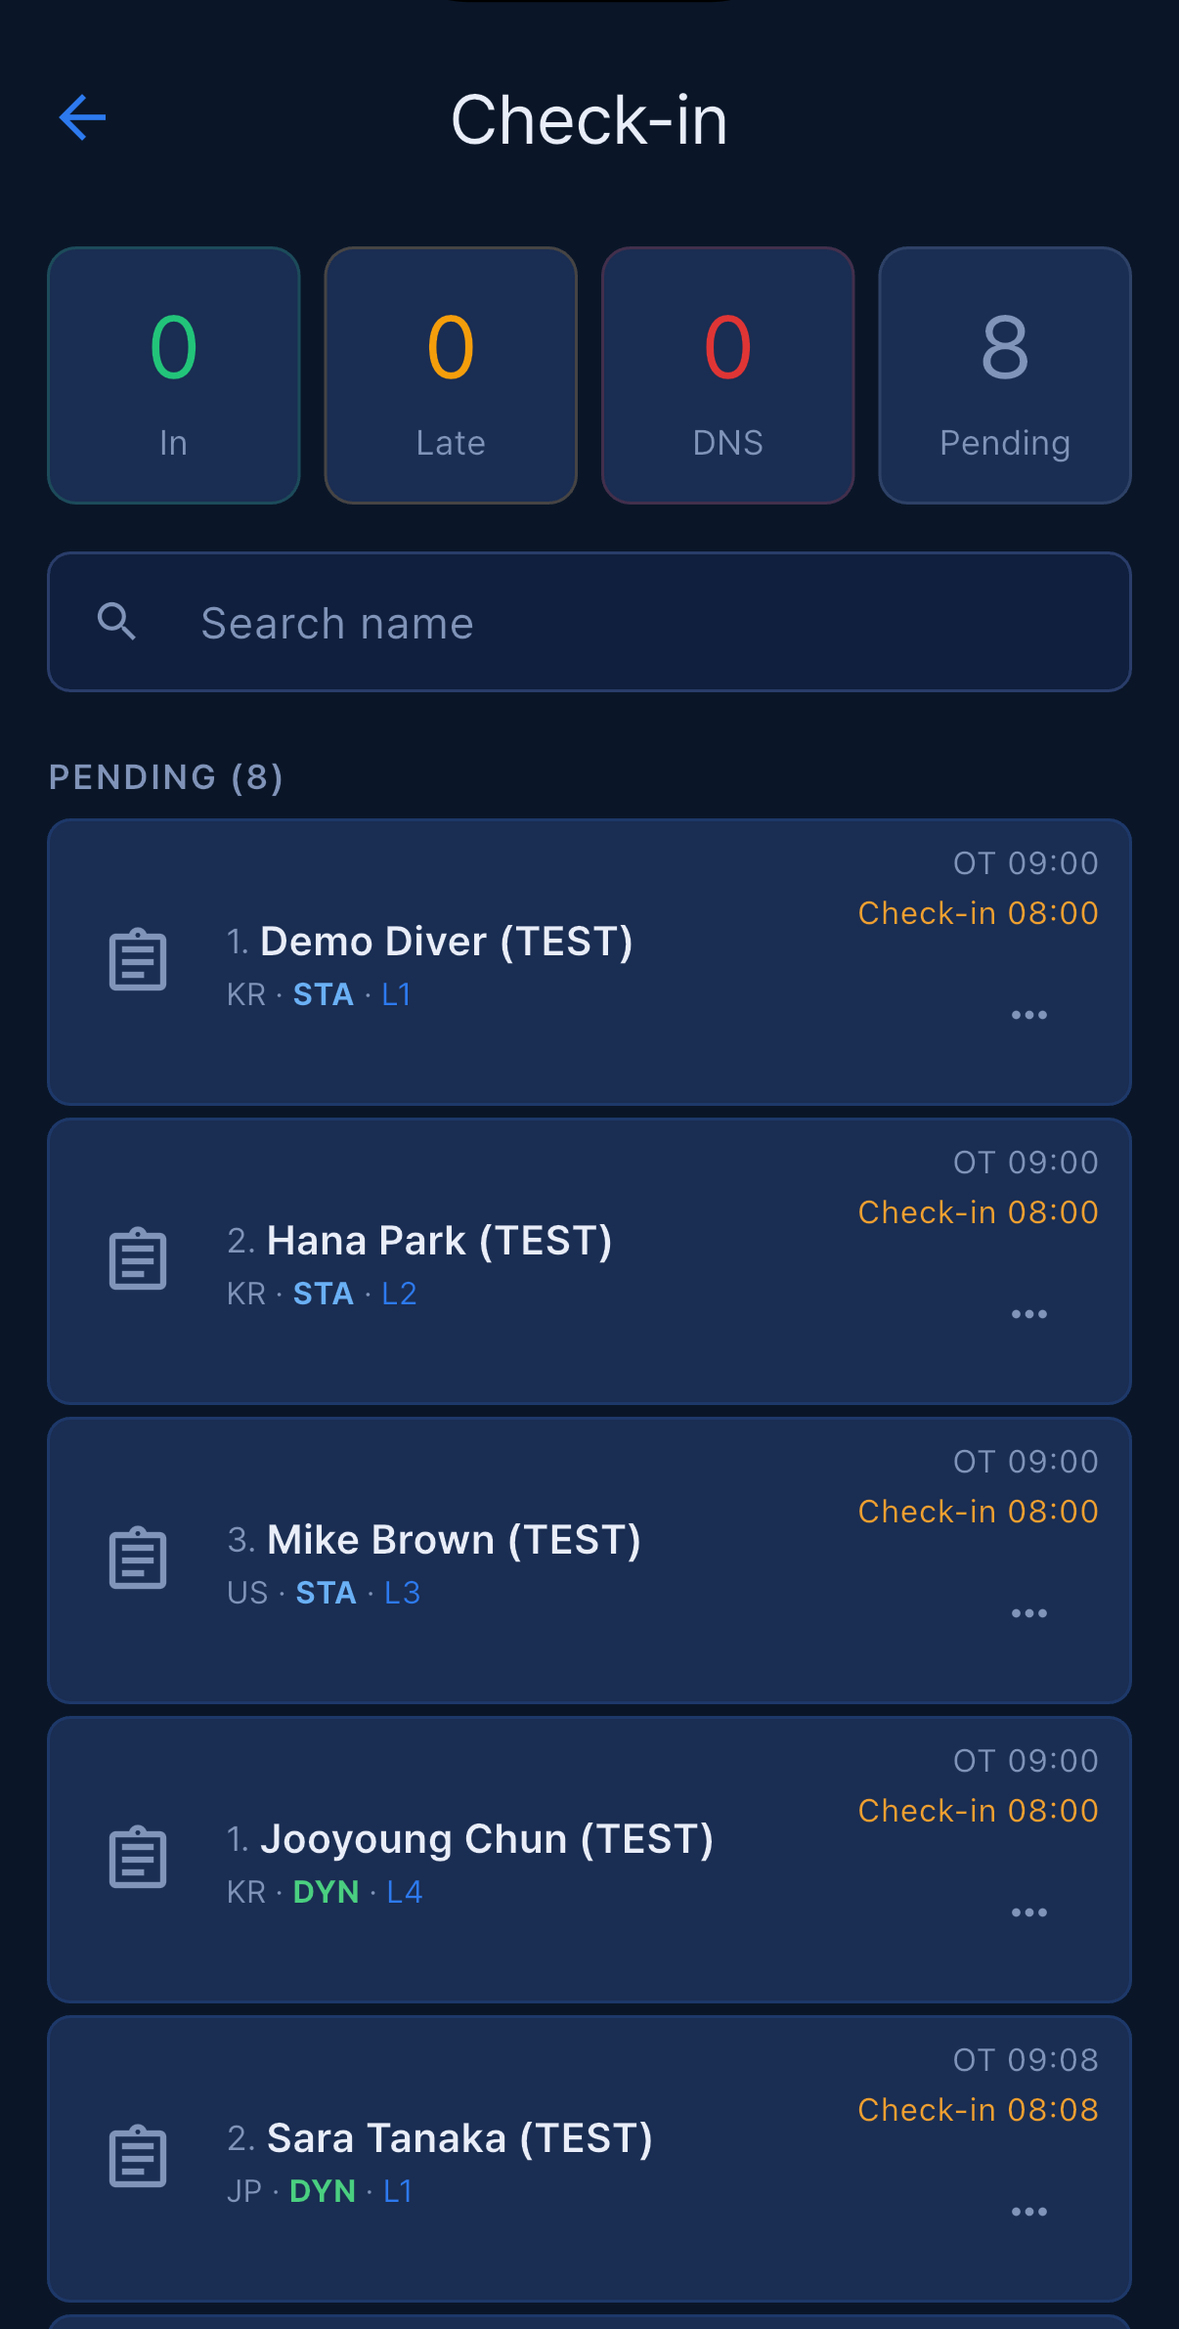
The top of the screen has four mini cards — In, Late, DNS, Pending. Tap one to filter the list to that group (the header then shows Filter and Show all), and use Search name to find one person quickly.
Each pending row shows the athlete’s name and club, a document icon on the left, OT HH:mm, and below it the check-in deadline in orange as Check-in HH:mm — that is OT − 1 hour. Rows that are already checked in collapse to name, ✓ HH:mm and an arrow; tap the arrow to expand one.
The check-in desk flow
- Tap the body of a pending row to start the check-in.
- The app runs through the checks described below. Any of them can stop or warn you, and closing one of those dialogs cancels the check-in.
- The signature sheet is the last step:
Please sign below, the athlete signs on screen, and you tapSave Signature. The row then shows the check-in time. DNSandLate Check-inare not on the card — they are on the row’s ⋯ menu, together withCheck Inand (for rows that are already checked in)Require re-check-in.
If an athlete was checked in from the ⋯ menu without signing, the row offers Get Signature; once signed it shows ✍️ Signed.
The signature drawing is for visual confirmation only. It is shown to the staff member at the moment of check-in and discarded as soon as the sheet closes — we do not store the signature image anywhere, not on the server and not on the device. Only the fact that a signature was captured is recorded, with the check-in time.
The five checks before the signature
These run in order, and only the ones that apply to that athlete appear.
| # | Dialog | What it means | How to get past it |
|---|---|---|---|
| 1 | Document revoked (red) |
The organizer revoked a document — usually a medical statement — and the athlete must submit a new one before competing. | Organizer and Main Judge get Check in anyway, and the override is written to the Log. Judge and Staff see only Only the organizer or main judge can check this athlete in. |
| 2 | Document status unknown |
The document status is still loading, could not be loaded (including when the device is offline), or the athlete has no AIDA ID at all — a manually added entry or an opener. A revoked medical statement would not be detected in this state. | Check in anyway, after checking the network or asking the organizer. |
| 3 | Blackout on an earlier day |
The athlete blacked out earlier in this competition. The dialog shows the discipline, the reason and the recovery time, plus whatever was recorded in BO Follow-up — Recorded: cleared to compete or Recorded: new medical exam required — and the medic’s note. |
Medic confirmed, once the event medic has cleared them this morning. The confirmation is logged. See Blackout follow-up and medical clearance. |
| 4 | On-site document |
The athlete chose to hand in a document at the venue, or to have it issued there. | Received continues and records the receipt; Not yet stops the check-in. If the receipt record cannot be saved the check-in still goes through and a message tells you so. |
| 5 | Required document not submitted |
Lists the forms that are missing. It does not block you. | Check in anyway, or close and send the athlete to fill the form in. This dialog only appears on Organizer and Main Judge devices, because only they can read every submission, and Competition Form is not counted in Pool-only events. |
Document icons on the pending row
The icon to the left of a pending athlete’s name summarises their paperwork. Only the highest-priority state is shown:
| Icon | Meaning |
|---|---|
| 🛡 red shield | A document has been revoked — check-in is blocked (check 1). |
| ☁️ orange cloud | Status unknown: still loading, failed to load, offline, or no AIDA ID. |
| 📄 grey | You do not have permission to see the submissions (Judge and Staff devices). |
| 📄 orange, with a number | That many required forms are missing. |
| 📍 blue pin | An on-site document has not been handed over yet. |
| ✅ green | Everything required is in. |
Tap the icon to open a sheet listing all four forms with ✓ or ✗, (optional) markers, and the on-site (On-site — not received / On-site — received) and revoked states.
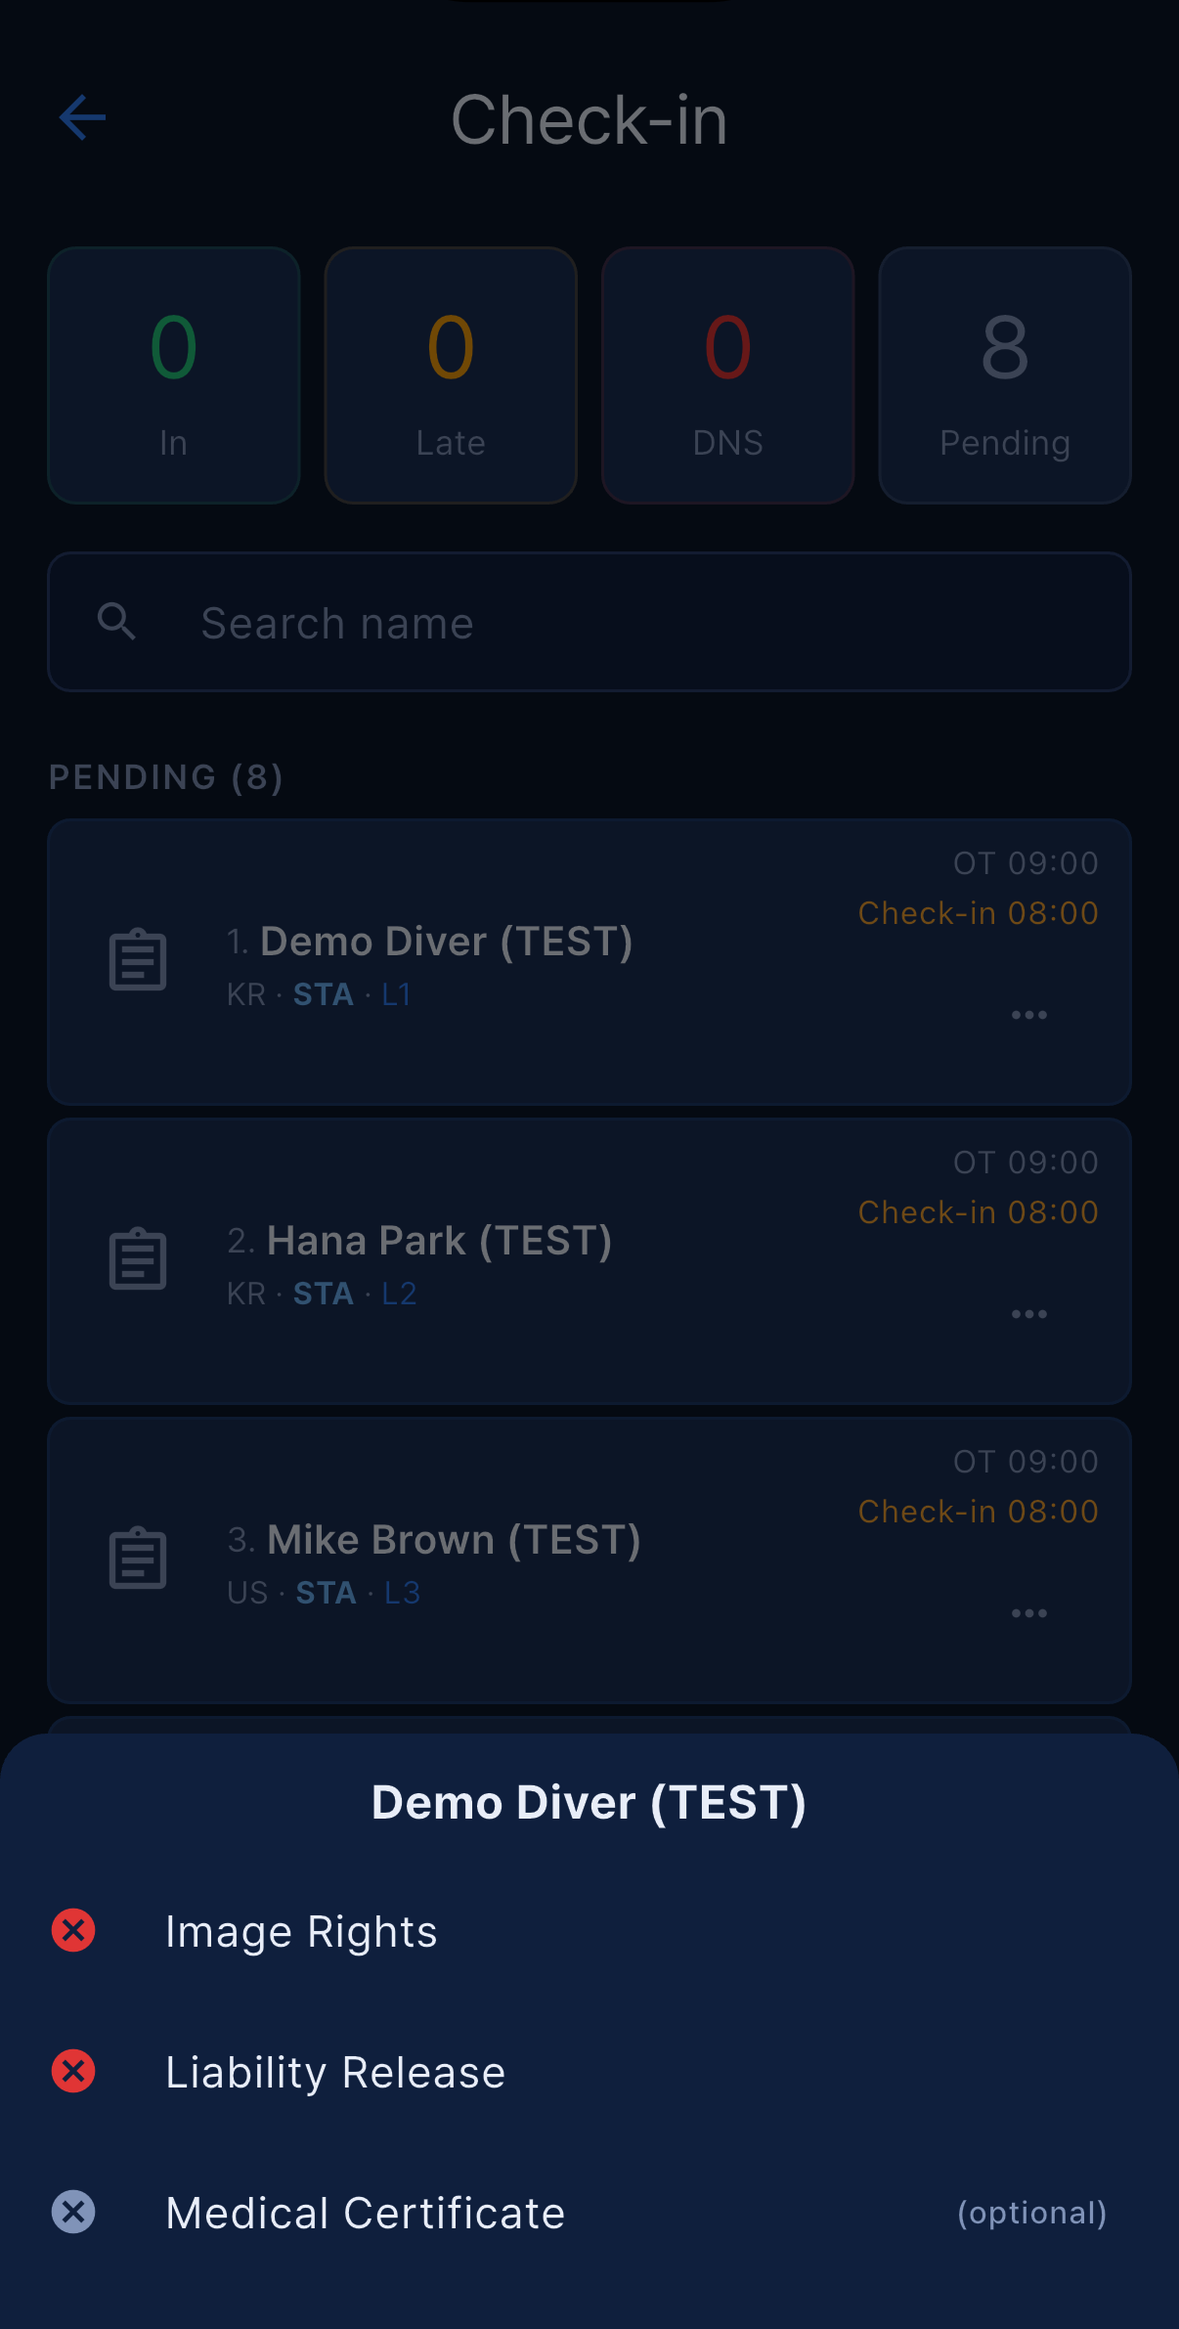
A revocation made on another device appears here within about a minute, or immediately if you pull down to refresh.
DNS, Late Check-in and automatic Late
DNS(did not start) andLate Check-inare both on the row’s ⋯ menu. Either can be applied to a pending athlete, and either can be corrected afterwards by choosingCheck Infrom the same menu.- Both are treated as a RED card with 0 points and are submitted to AIDA automatically, exactly like a judged result — you do not need to enter them again in Judge.
- Automatic Late. Any device that has the event open re-checks the schedule every 15 seconds and marks a pending athlete
Late Check-inonce OT − 1 hour has passed. It only does this when the event date is today or yesterday, the event has not ended, it is not a demo, and the list on screen belongs to the current event — it never runs on an event whose date is still in the future. The athlete’s check-in record is re-read from the server immediately before the change, so anybody who has just been checked in on another device is skipped. These entries are recorded in the Log underSystem (auto-late), so it is always possible to tell an automatic Late from one a staff member applied.
Two performances in one day
An athlete entered in two or more disciplines on the same Day is only listed once, for the earliest OT. The next entry appears in the pending list as soon as the first one is checked in, DNS’d or marked Late.
When every remaining pending row is one of these follow-on entries, a banner appears at the top: Next performance check-in — “The earlier performance is fully checked in. N athlete(s) are entered again today. Check them all in at once, or take their check-in again?”
Check in allchecks all of them in in one tap and carries the earlier signature over. The Log records it asSystem (carry-over).Take againjust closes the banner; you then take each athlete individually from the list.
With three disciplines in a day the banner returns at the next boundary. Two things to watch:
- The
Pendingmini card still counts the hidden follow-on rows, so its number can be higher than the list you see. - Follow-on rows are subject to automatic Late at their own OT − 1 hour, so if you do not carry them over they will be marked Late in time.
DNS and Late Check-in are never carried over.
Require re-check-in
The ⋯ menu of a checked-in row offers Require re-check-in. It sends that athlete’s not-yet-judged performances for the Day back to Pending and deletes the check-in record; performances that have already been judged are untouched. You will see either Re-check-in required for this athlete or Nothing to reset — performances already judged stay checked in, and the action is written to the Log.
Use it when an athlete leaves the venue and comes back, so that the document and blackout checks run again before they compete.
Check-in offline
Check-in works offline. If the device has no connection when you confirm, the check-in is held in device memory with a small ⛔ Offline badge on the card and synced to the server automatically within a few seconds of reconnecting. See Offline operation.
One consequence to expect: an offline device cannot look up document status, so Document status unknown → Check in anyway appears for every athlete while you are offline, and the document icons all show the orange cloud. That is the app telling you it cannot see a revoked medical statement — not that the paperwork is missing.
Start List & Speaker Mode
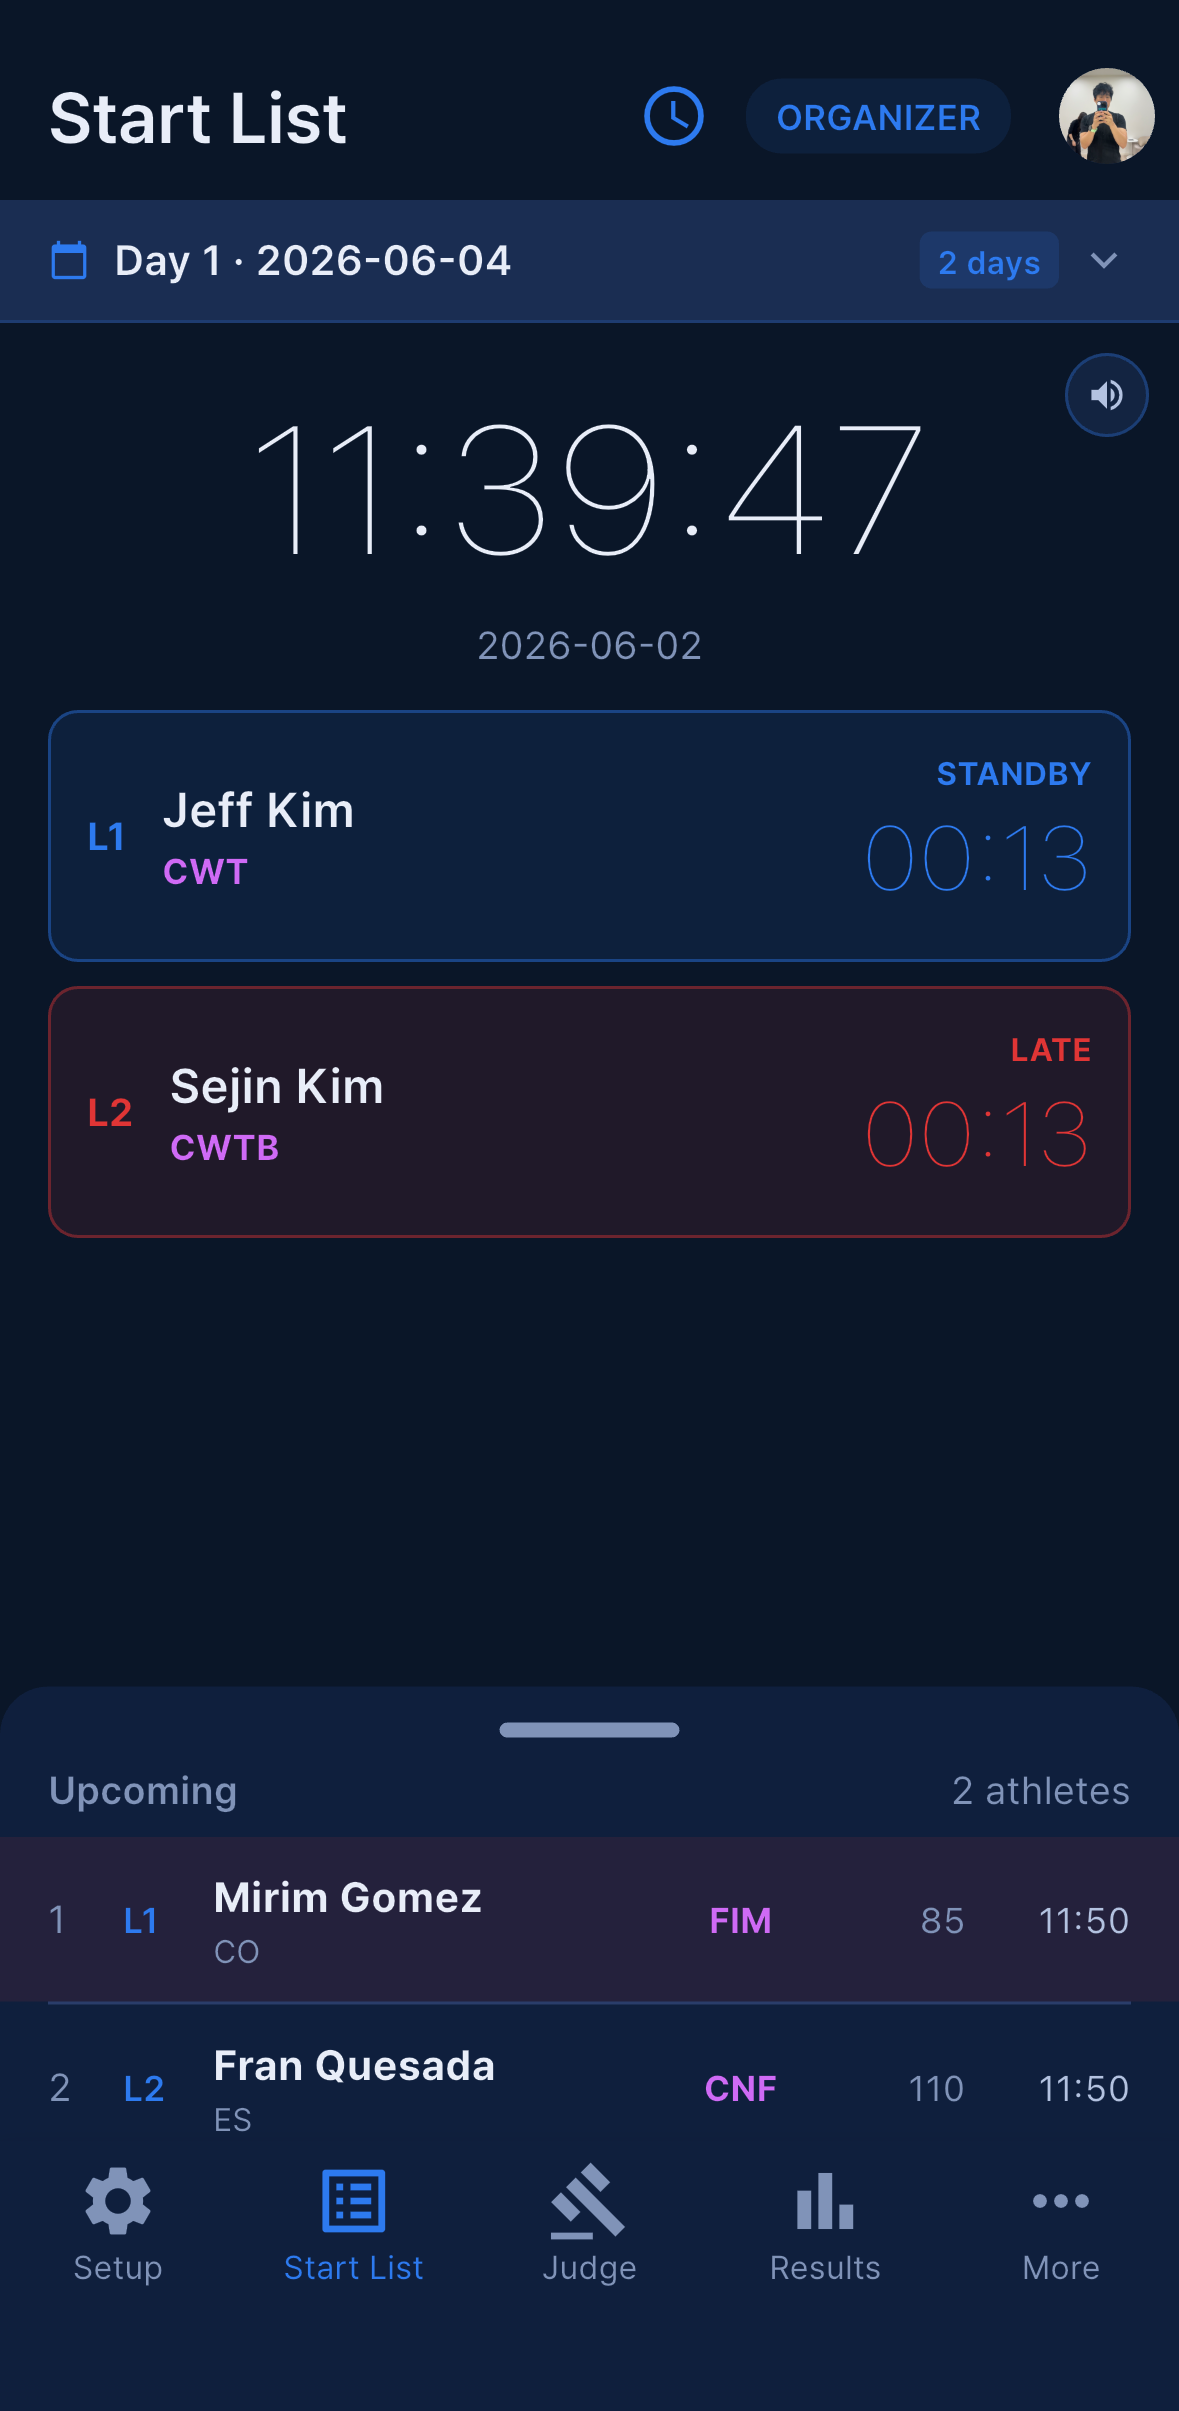
The Start List tab shows the day’s running order with a live countdown to the next OT, and speaks the countdown aloud so that athletes and judges hear it without watching the screen. Every role has this tab, and it is the screen a dedicated PA device stays on all day.
Reading the Start List
- The big clock at the top counts down to the next OT for whatever you have filtered to.
- An athlete moves up to the
STANDBYcard 3 minutes before their OT, with the remaining time next to their name. If they were checked in as Late or marked DNS, the label turns red and readsLATEorDNSinstead. - From their OT until 31 seconds after it, the card turns green and reads
PERFORMINGwith the elapsed time. After that the athlete leaves the list. - The
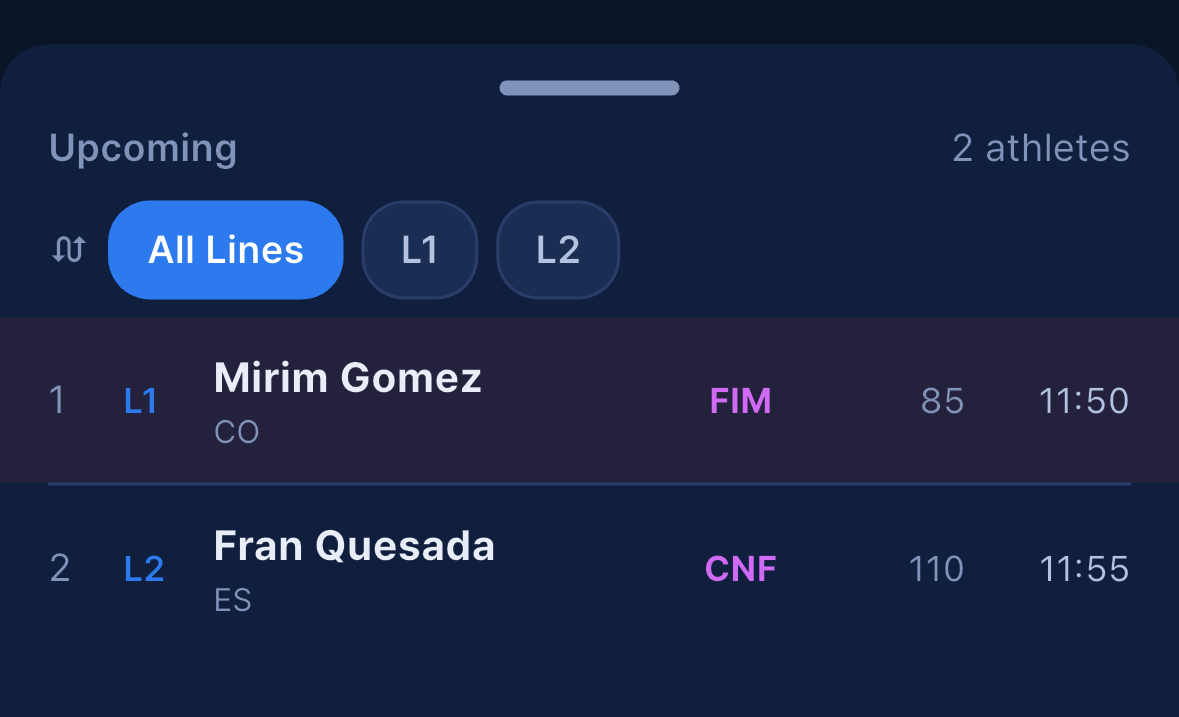
Upcomingsheet below lists everyone who is more than 3 minutes away. - Filters:
All Lines(Depth and Team), andAll zonesplus one entry per zone on a multi-zone event.
When the whole Day is more than an hour in the future, or entirely more than an hour in the past, the screen switches to PRE-EVENT VIEW · countdown disabled and the voice cues are off — so a schedule you are preparing days ahead does not start announcing itself. Demo competitions always run in live mode so you can hear the countdown immediately.
Voice countdown
As each OT approaches, the app plays spoken cues. The cues are pre-recorded audio files, so they sound identical on iOS and Android.
Cues before OT: 2:00 (“two minutes to official top”), 1:30, 1:00, 0:30, 0:20, 0:10, then 5 — 4 — 3 — 2 — 1, and at OT: “official top”.
Cues during the start window, after OT: “plus one” at +1 s, then the elapsed seconds are called as the window runs out — up to the discipline’s limit — ending with “start cancelled” if the athlete has not started by the end of the window.
The countdown clock is synchronised with the server, not taken from the phone: it re-syncs when you enter the event, when you return to the app, and every 30 minutes. That is what keeps the speaker device and the judges’ phones on the same second. If the sync fails, the device falls back to its own clock — one more reason to keep every device on automatic date and time.
OT Announce and Countdown Test
Two buttons sit under the clock.
OT Announce makes a single spoken announcement. There is no dialog and nothing to type: the app works out how long is left until the nearest upcoming OT for the line or zone you are filtered to, rounds up to whole minutes, and says “N minutes to Official Top”. With nothing scheduled it says No upcoming Official Top. It speaks in the device language, falling back to English if that voice is not installed, and it plays even when the device is muted.
Countdown Test lets you check the PA chain before the first athlete. Tap it, confirm (“A 2-minute countdown will run. It plays the real audio cues from 2 minutes before Official Top. Start?” → Start test), and the device first says This is a countdown test. and then plays the real cue audio from two minutes before OT through to start cancelled at +31 s. While it runs the button reads Testing 95s and turns red; tap it again, or leave the screen, to stop it. The test plays through mute, never touches anybody’s OT, is hidden on a Speaker Mode device, and hides itself when the next real OT is less than 5 minutes away.
Mute
Tap the 🔊 / 🔇 icon in the AppBar to switch the voice cues off on this device. Useful when the venue has its own PA doing the announcing, when the athletes prefer a silent countdown, or when you have stepped into a meeting.
Mute is per device — other devices in the same event keep speaking — and the visual countdown keeps running either way. Note that OT Announce and Countdown Test ignore mute, and that a device in Speaker Mode shows a blue SPEAKER badge where the mute toggle normally is, because it must not be silenced by accident.
Speaker Mode
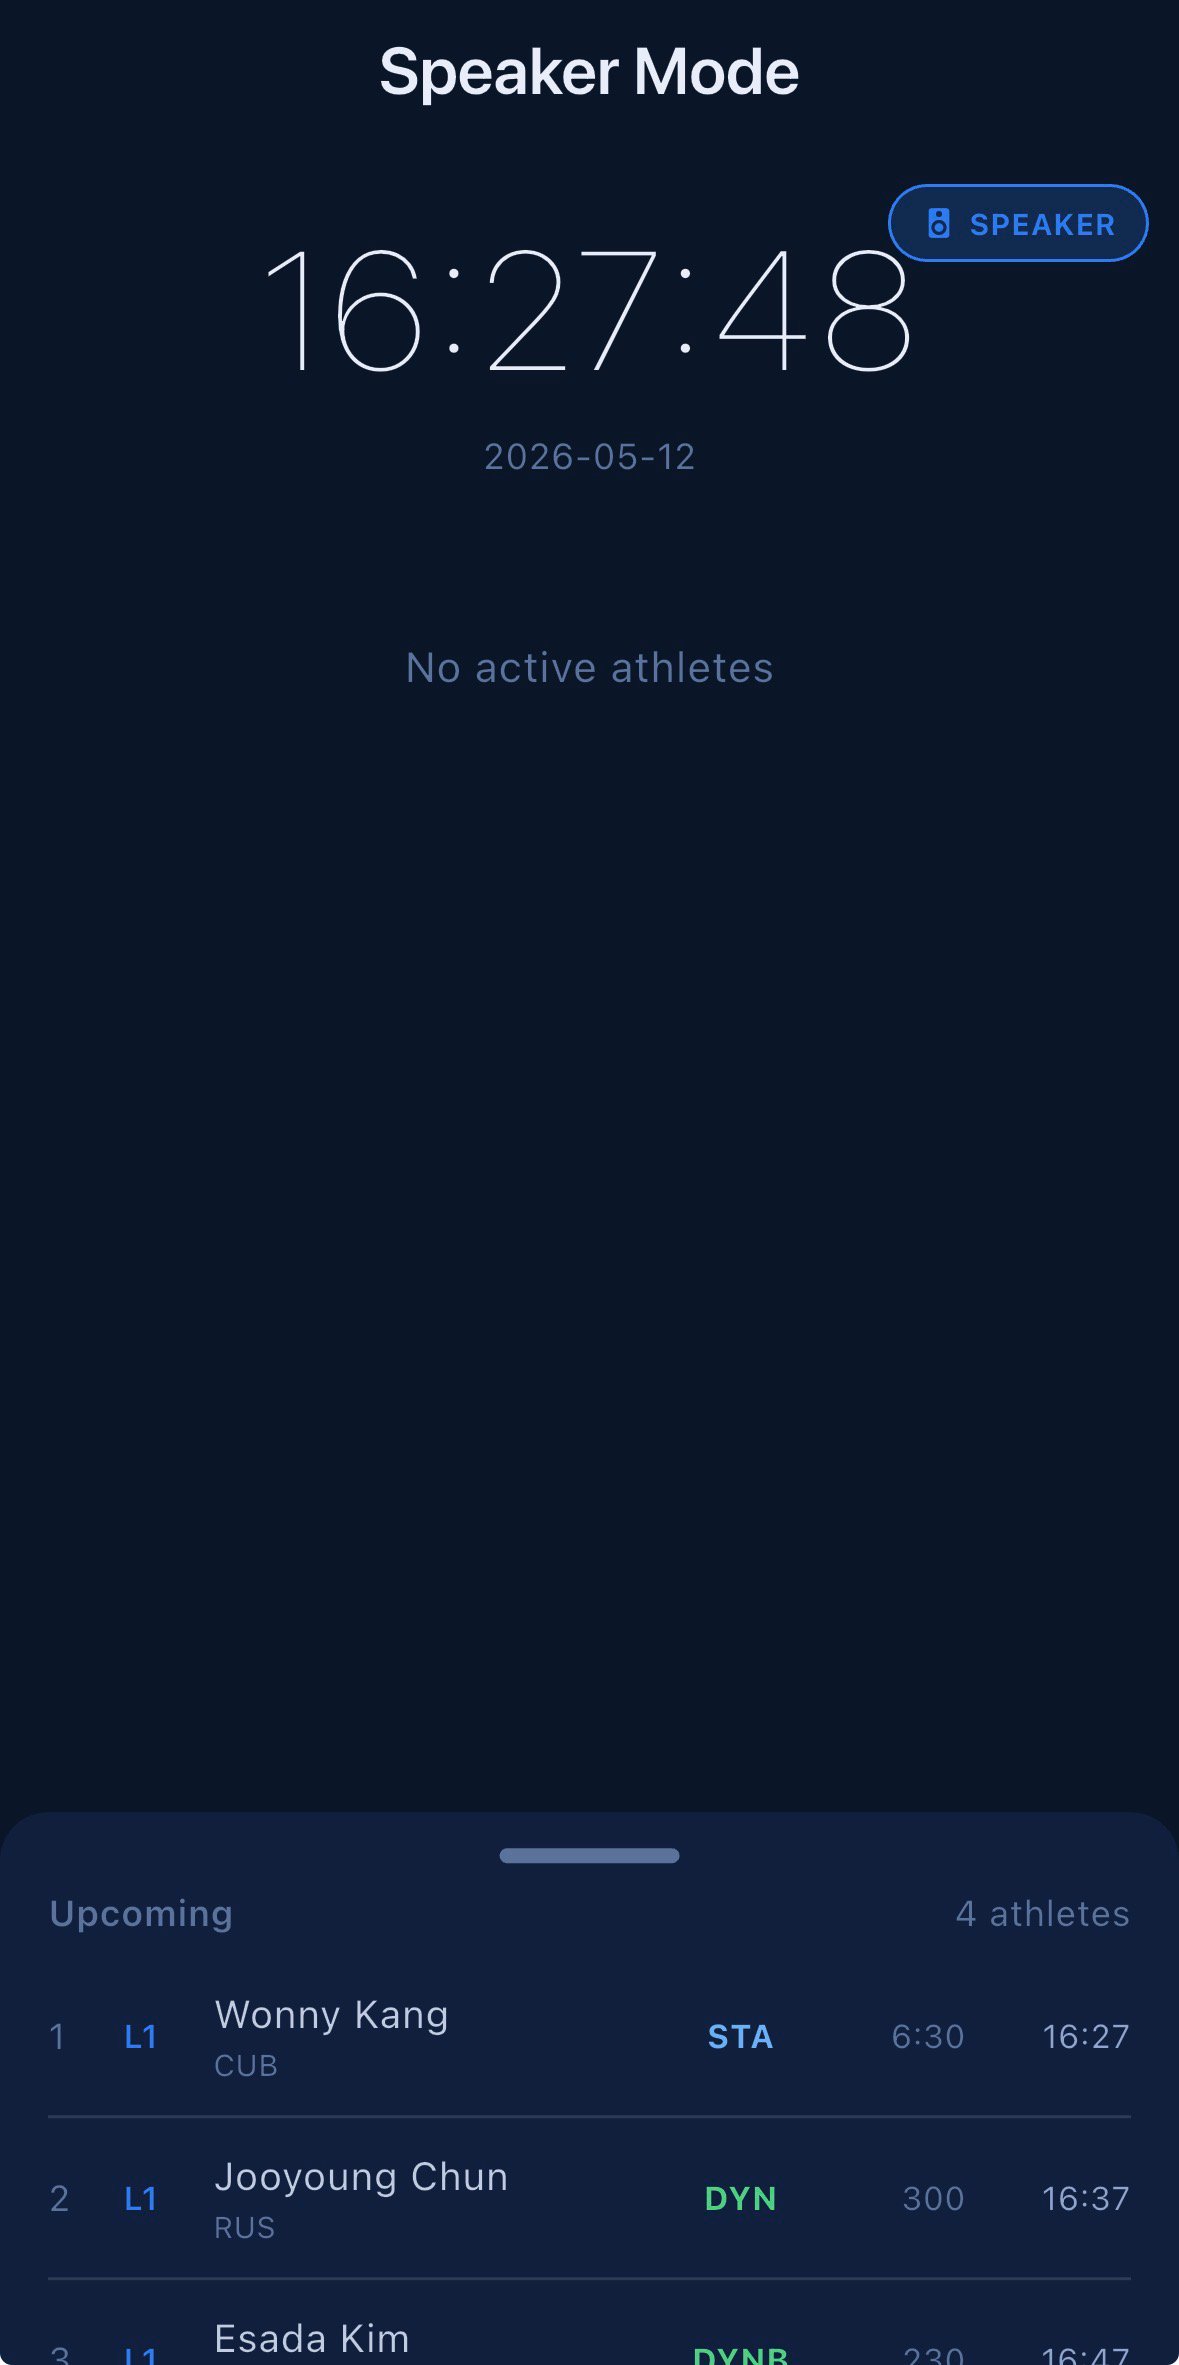
Speaker Mode turns one device into a dedicated countdown announcer for the venue’s loudspeaker.
Turn it on from More → Speaker Mode. Every staff role except Photo has the tile. Set a 4-digit PIN and confirm it.
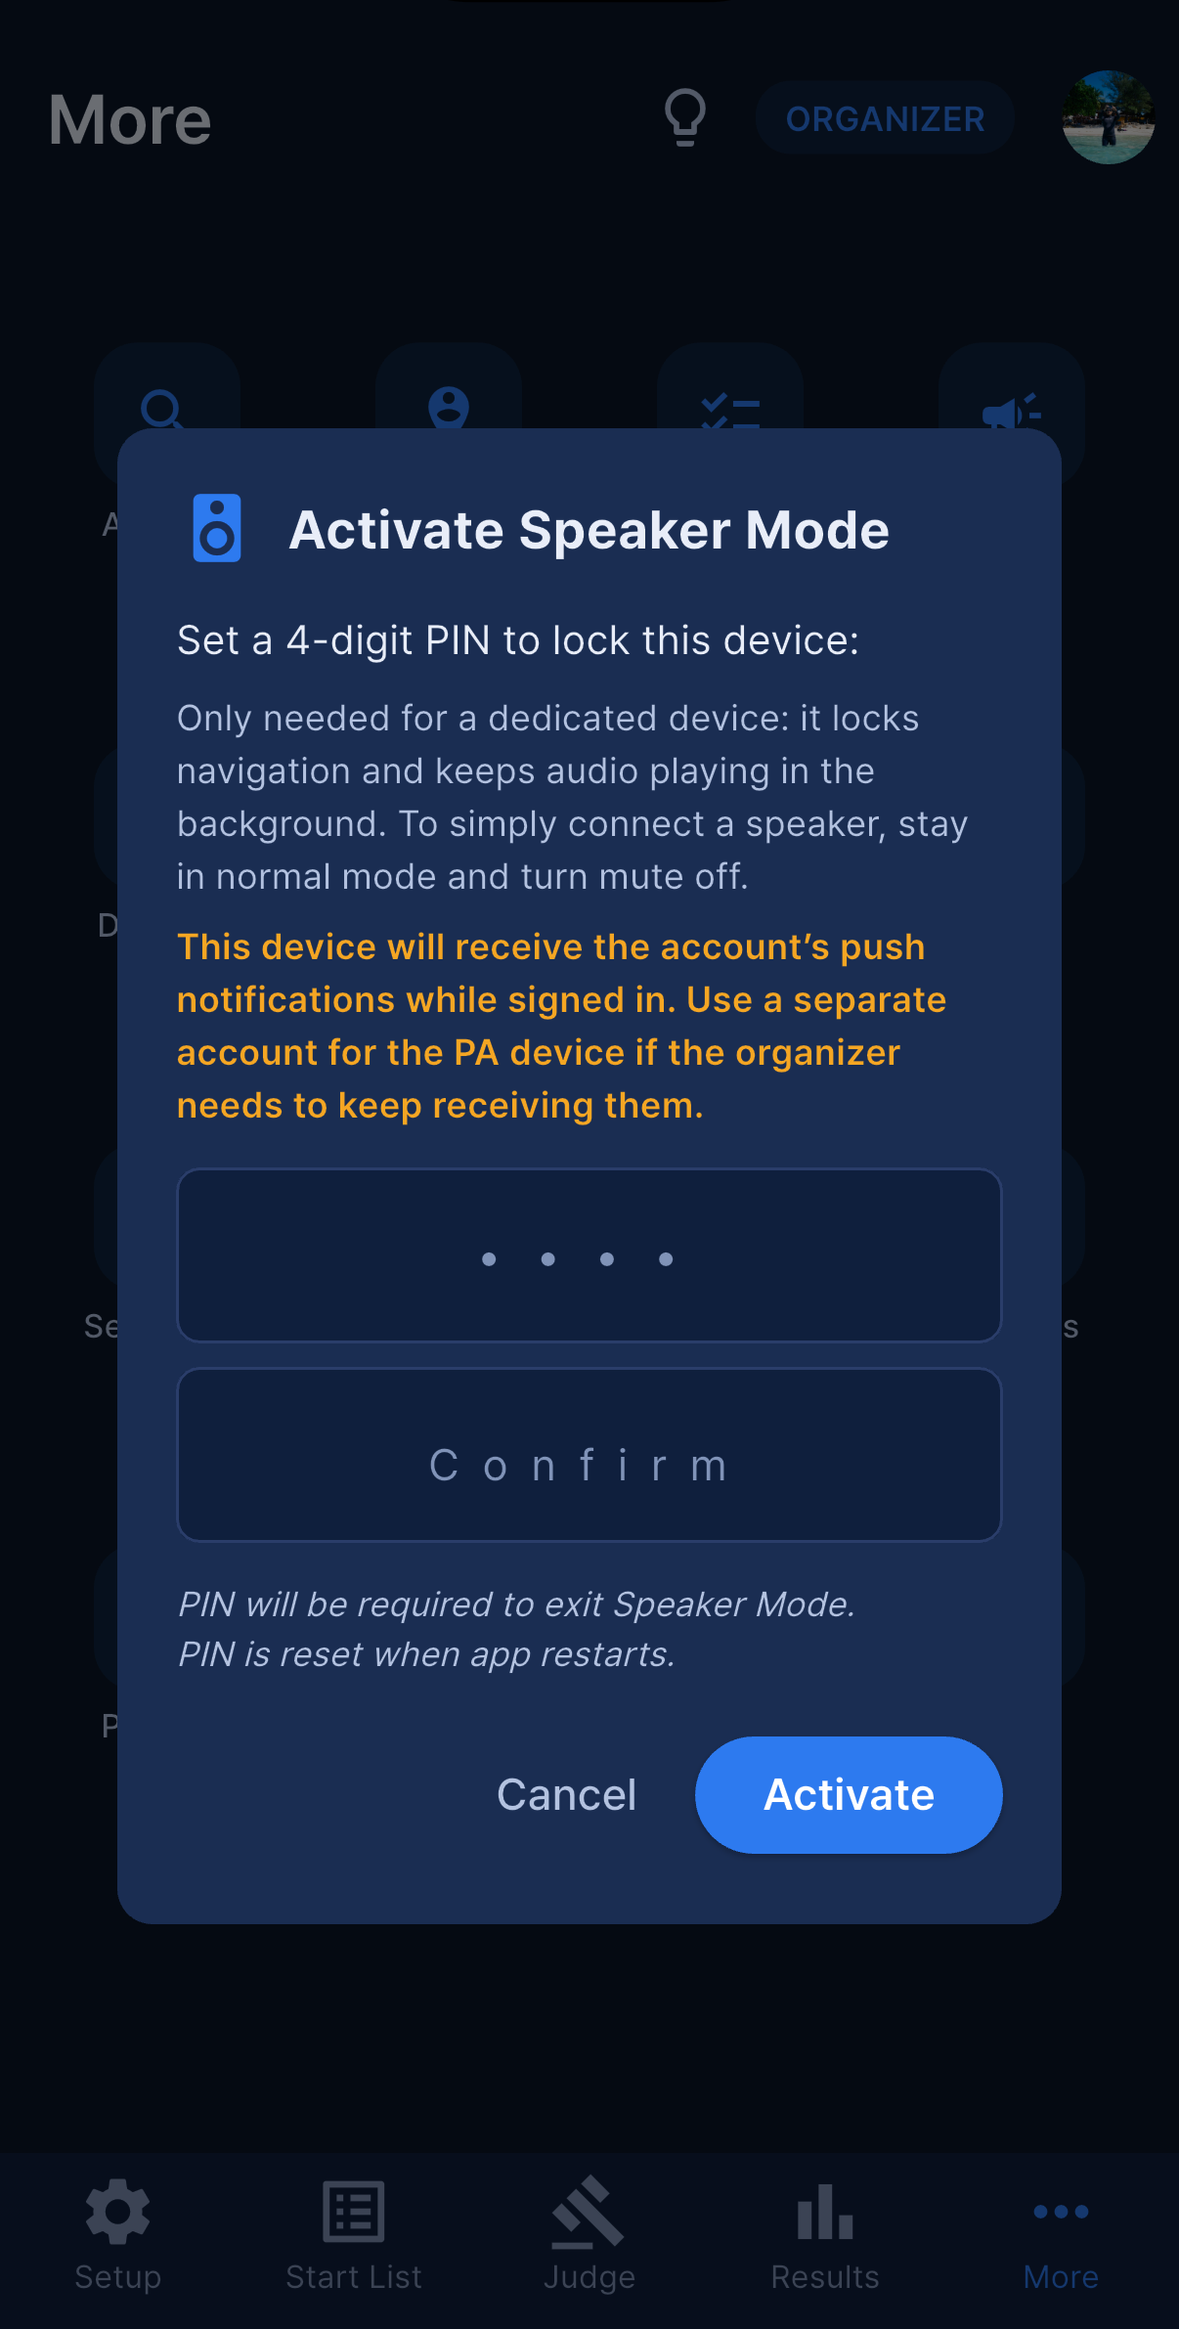
The dialog carries two warnings worth reading before you confirm:
- “Only needed for a dedicated device: it locks navigation and keeps audio playing in the background. To simply connect a speaker, stay in normal mode and turn mute off.”
- “This device will receive the account’s push notifications while signed in. Use a separate account for the PA device if the organizer needs to keep receiving them.”
Once Speaker Mode is on:
- The device is locked to the Start List. The bottom tabs, the AppBar actions and the Day selector are hidden, and back navigation is blocked.
- Mute is forced off.
- The screen is kept awake.
- The voice keeps playing in the background. On iOS a silent keep-alive track holds the audio session open; on Android a foreground-service notification (“Start list countdown active”) does the same. So the loudspeaker keeps announcing even if the phone locks itself. This applies in Speaker Mode only.
Two-device operation. A device in Speaker Mode is the one exception to the one-device-at-a-time rule, so the organizer can keep using their own phone on the same account: the other device shows Signed in here. Your other device stays signed in because it is in Speaker Mode. The exemption lives in the speaker device’s memory — restarting the app clears Speaker Mode, the PIN and the exemption — and the server-side marker expires after 12 hours. If the PA phone is restarted mid-day, turn Speaker Mode on again.
Automatic sign-out. Five minutes after the day’s last OT, the device leaves Speaker Mode and signs itself out: The competition ended 5 minutes ago — this Speaker Mode device has been signed out. This only happens after the device has actually watched a live OT go by, so opening a past event in Speaker Mode does not sign you out. Plan for the PA phone to be signed in again the next morning.
Exiting. Tap the blue SPEAKER badge and enter the PIN. The dialog warns that Ending Speaker Mode signs this device out only if the account has since signed in on another device. — so if nobody else has claimed the account, you can switch Speaker Mode on and off on a single device freely.
Recommended setup: a dedicated phone or tablet plugged into the venue’s audio system, on a charger. Voice playback drains the battery faster than passive idle.
Clocks, midnight and screen lock
OTs are stored as HH:mm, without a date. The Start List reads them in start order and, when the time jumps backwards, treats the rest of the Day as the next day — so a schedule that runs 23:34 STA then 00:04 DYN counts down and announces correctly.
Two related points for night sessions: the check-in carry-over described above stops hiding follow-on rows when a Day’s OTs span more than 12 hours, and OT Delay is still the right tool for moving a whole block of athletes (see Schedule adjustments (OT Delay)).
The app keeps the screen awake on every screen, not just Start List, so countdowns and alerts work even if nobody touches the device. Keep devices plugged in for full-day events.
Apple Watch companion
Apnea Comp has an Apple Watch app that mirrors the day’s start list on your wrist — useful for safety divers on the platform, photographers who cannot hold a phone, and athletes who want their own OT without unpacking a bag.
It is an iPhone companion: the watch pairs with an iPhone, and that iPhone pushes the current Day’s start list to it automatically — when the athletes are loaded, when OTs change, and when risk marks change. There is nothing to press to send it. Android phones have no watch app.
What the watch shows depends on the role you hold in the event: Photo gets the photo layout, Safety the safety layout, and every other staff role (Organizer, Main Judge, Judge, Staff) the staff layout. In Athlete mode the phone sends only your own entries, and only for Days the organizer has published.
Depth and water temperature measured during a dive are shown on the watch only. They are not sent to the phone or stored on the server.
What the watch shows
Move between screens with the Digital Crown or a vertical swipe — the crown matters, because watchOS blocks the touch screen while you are underwater.
| Order | Staff (Organizer / Main Judge / Judge / Staff) | Safety and Photo | Athlete |
|---|---|---|---|
| 1 | NOW UP | NOW UP | MY START LIST |
| 2 | NEXT UP | NEXT UP | SURFACE REST |
| 3 | STOPWATCH | STOPWATCH | OT ALARM |
| 4 | SURFACE REST | SURFACE REST | — |
| 5 | MY LINE | MY LINE | — |
| 6 | — | OT ALARM | — |
Staff, Safety and Photo watches show an L1 chip in the top-left corner; tap it to pick which line the watch follows (Select Line).
Each athlete card shows the name, OT in large digits, WU — the warm-up time, 45 minutes before OT — the discipline, AP, PB, DT, and a countdown reading in mm:ss before the OT or started after it. A coloured dot in front of the name is the athlete’s risk mark, and a coloured ring marks an athlete you are assigned to photograph.
STOPWATCH is a plain start / stop / reset timer. SURFACE REST counts the time since your last dive ended — it starts on its own when you surface (auto on surface) and shows LAST DEPTH and LAST TIME from that dive.
OT alarm
The OT ALARM screen is available to Safety, Photo and Athletes. It is on by default and vibrates the watch 2 minutes before, 1 minute before, and at OT (2 min · 1 min · at OT). The Vibrate toggle turns it off.
What it follows depends on the role, and the screen tells you which:
| Role | Alarm follows |
|---|---|
| Athlete | Your OT |
| Photo | Marked athletes — the athletes you are assigned to |
| Safety | Line N — the line selected with the L1 chip |
Staff watches have no alarm screen. Keep the watch active for on-time alarms: on a dimmed always-on screen watchOS throttles updates and an alarm can arrive late.
The watch works from its own clock and the OT’s HH:mm — it does not check the date. Keep the watch and the phone on automatic time, and do not leave a past day’s list loaded on the watch overnight.
Dive screen and depth
On Apple Watch Ultra, submerging about a metre opens a full-screen dive display over everything else: the time of day, the current depth in metres, TIME (how long you have been under) and MAX (the deepest point of this dive). There is no close button — the screen closes itself about 3 seconds after you surface. Other Apple Watch models run the app normally but have no dive screen.
Depth readings are limited by the permission the app currently holds, which caps measurement at 6 m:
| What you see | What it means |
|---|---|
Depth in orange with SENSOR LIMIT NEAR |
You are close to the 6 m limit. |
-- in red with BEYOND SENSOR RANGE and limit 6 m |
You are deeper than the sensor is allowed to read. |
-- in red with DEPTH SENSOR ERROR and depth unavailable |
The sensor could not be read. |
In any of those states the MAX label changes to MAX (LAST) to show that the number underneath is the last reliable reading, not a live one. Treat the watch as a surface and shallow-water aid: it is not a dive computer and must not be used to judge or monitor a deep performance.
Water Lock is handled by watchOS itself during a real dive. The app never switches it on, and after you eject the water at the surface it stays off until the next dive.
Required watch settings
Two settings on the watch decide whether the dive screen works at all.
- Motion & Fitness must be allowed. Without it the watch never receives the submersion events, so the dive screen never appears. The app shows an orange banner on NOW UP, MY START LIST and SURFACE REST while it is missing:
DEPTH NOT ALLOWED YET— Motion & Fitness permission needed (you have not answered the permission prompt yet).DEPTH OFF— Settings › Privacy & Security › Motion & Fitness (it was denied or switched off).
Fix it on the watch, then bring the app back to the front — it re-checks every time.
- Turn “Auto-Launch When Submerged” off in the Watch app on your iPhone. Leaving it on lets another app grab the screen when you submerge, so Apnea Comp’s dive screen never gets shown.
Judging results
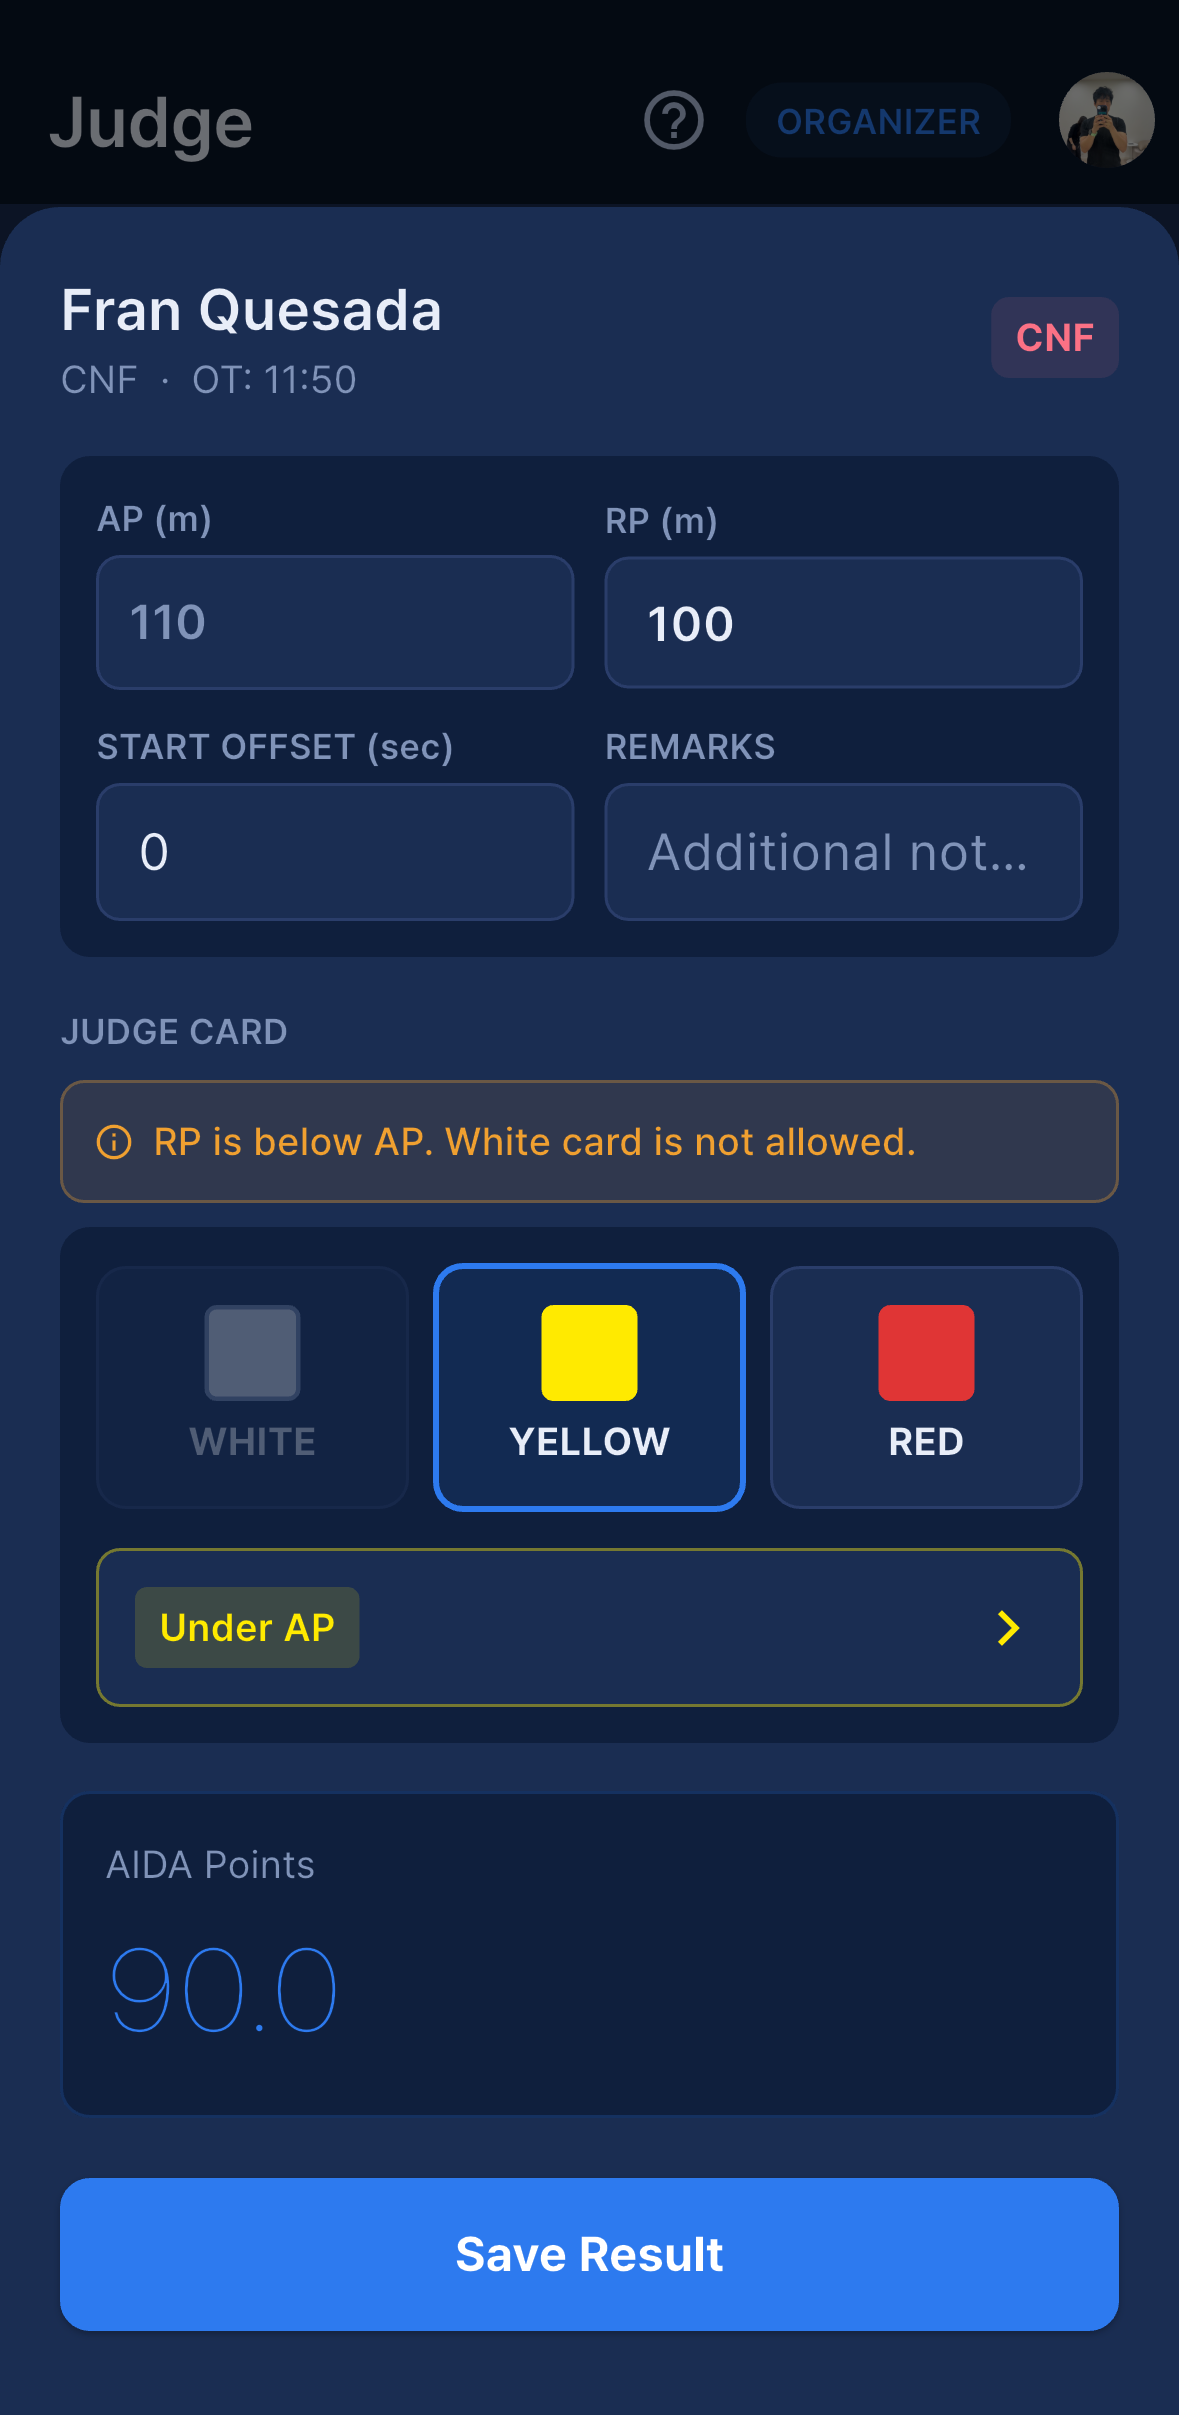
The Judge tab lists every athlete of the selected Day. Organizer, Main Judge and Judge have it; Staff, Safety and Photo do not. Athletes who have not been judged yet are shown at full strength and the ones already judged are dimmed, so the desk can see at a glance what is left.
The Judge tab
From 2 minutes before an athlete’s OT until 20 minutes after it, an athlete who has not been judged yet gets an enlarged card with larger text, a green border and a soft pulsing glow — the judging desk can find the current performer without reading names. Saving the result shrinks the card again immediately. This highlight uses the device’s own clock, so keep judging devices on automatic date and time.
Each row also shows the lane and the OT, so the same card works whether you are calling from the schedule or from the line.
Entering a result
Tap the card to open the result sheet.
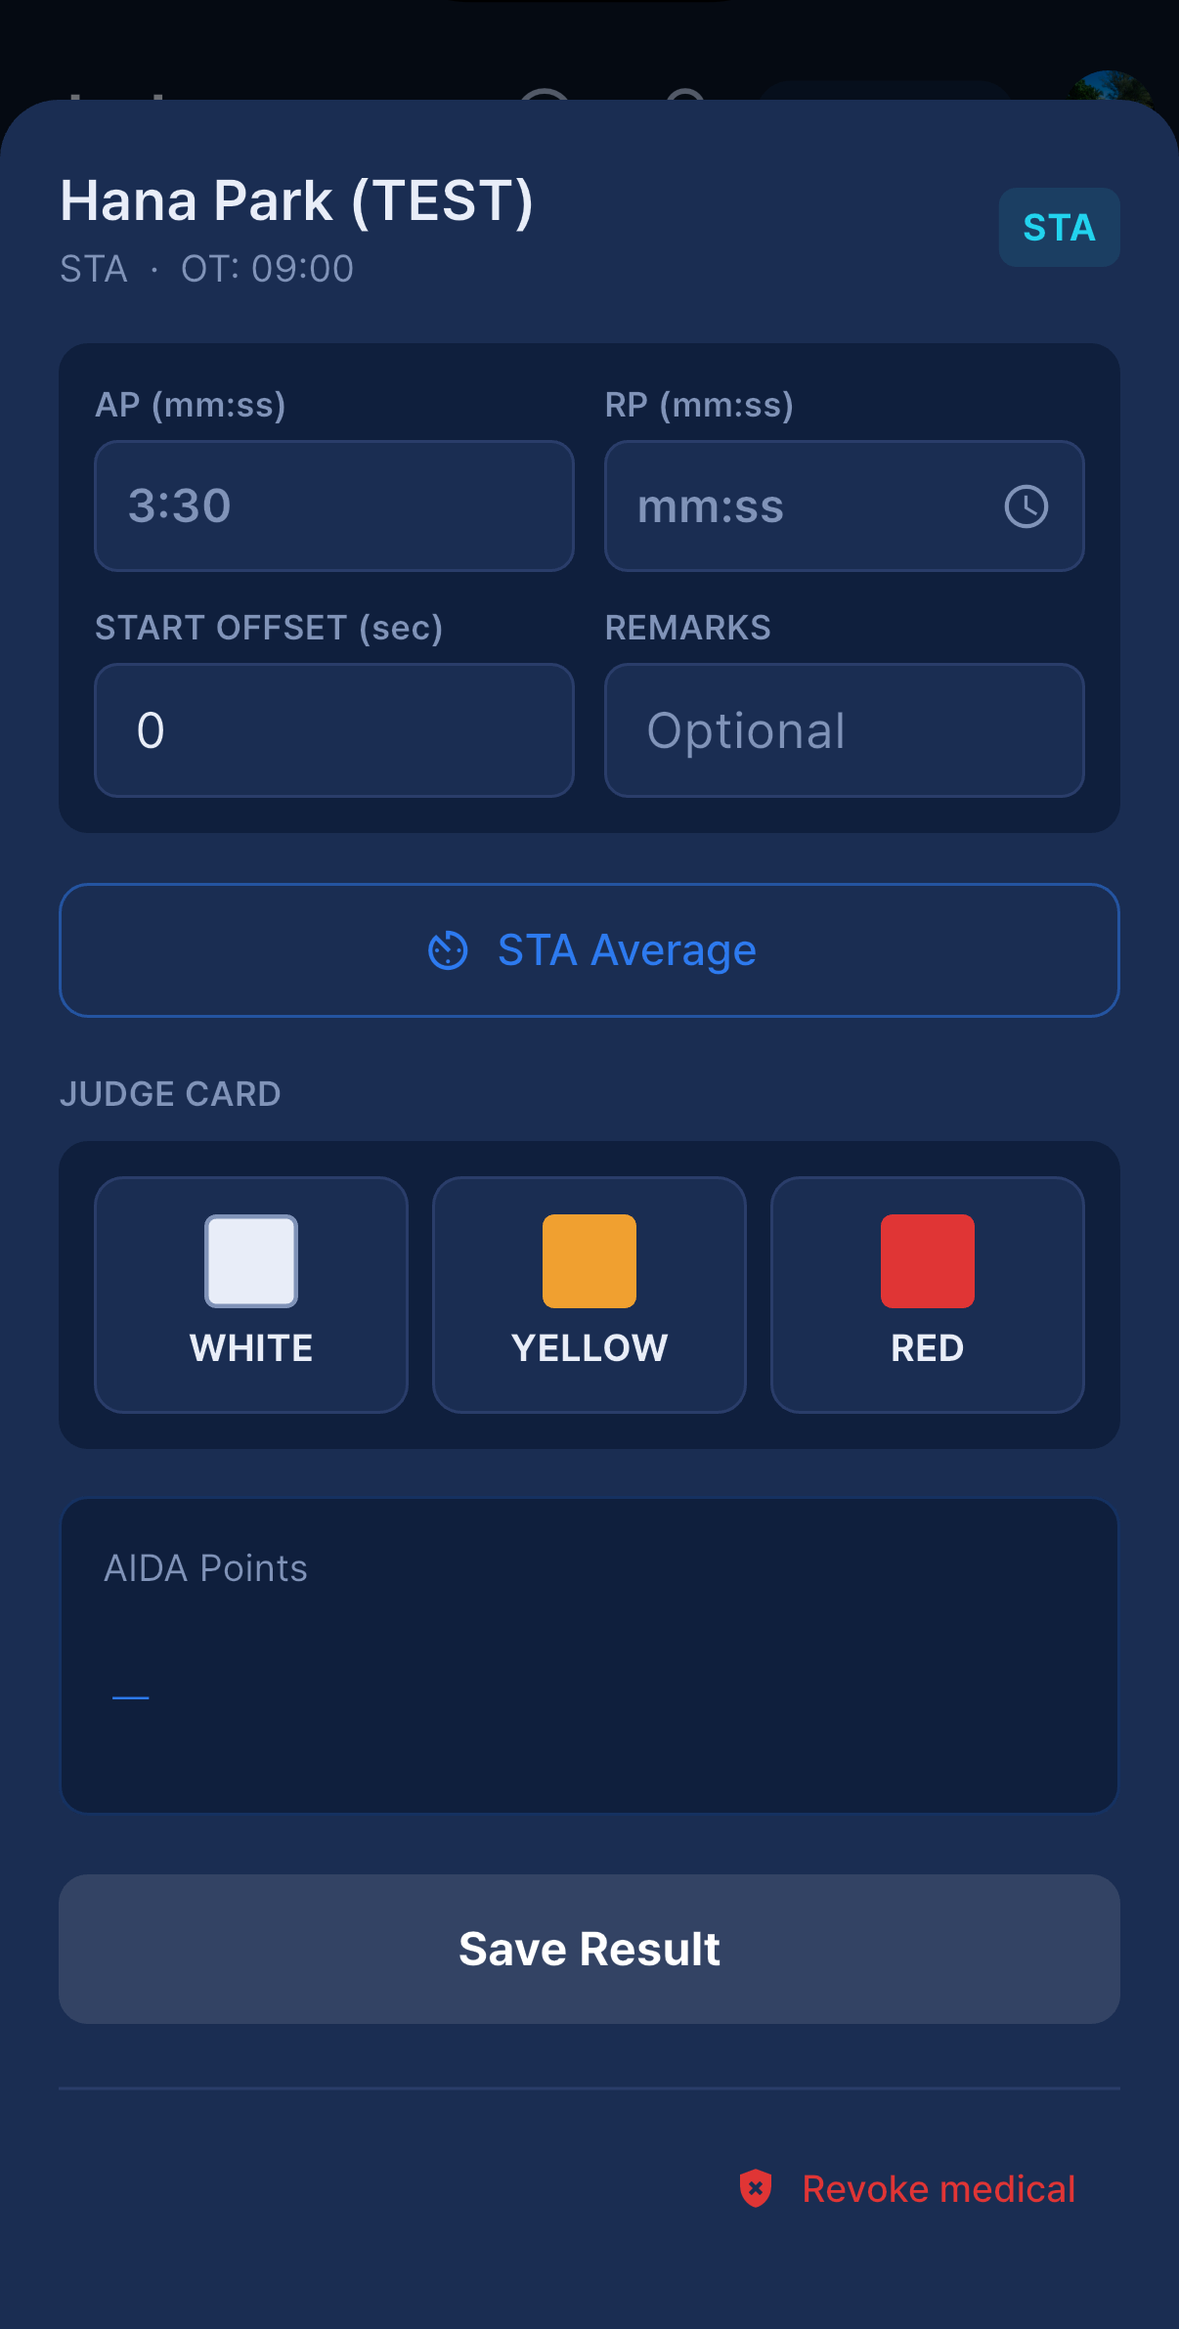
- RP — the realised performance: time for static, distance for dynamic, depth for depth. The Judge Calculator can work the number out for you.
- Card — WHITE (clean), YELLOW (penalty) or RED (DQ).
- Penalty reasons — required for anything other than WHITE. See Penalties (Rulebook 17.8).
START OFFSET (sec)— seconds early (negative) or late (positive), used for the start-window penalty.REMARKS— required for certain reasons (blackout, other penalty, DQ other, and so on). The app pre-fills a template; complete the missing detail.- Tap
Save Result.
A saved result is written to AIDA in the background. Saving the Setup configuration or reloading the start list can no longer overwrite a saved RP or card, and every change to a result is recorded in the Log with who made it.
Card badges
After saving, a small badge appears on the athlete card:
- ✅ AIDA — synced to AIDA International.
- 🔁 Retry — the sync failed; tap to see the reason and retry.
- ⛔ Offline — saved on this device and queued; it syncs automatically once you are back online. See Offline operation.
No badge at all means the entry has no AIDA startId to sync to — normal for openers and other manually added athletes.
Extra information on the card
Depending on the athlete and the event, a Judge card can also carry:
- Record attempt badges — a gold
WR A,CR A,NR AorWR/CR Amarks an announced record attempt. Once a record is confirmed the badge becomes a gold medal badge (🏅 WR,🏅 CR,🏅 NR). See Results, Rewards and records. - A magenta border — this athlete has an open protest. See Protests.
- Risk dots — the colour set in Risk Marking, so the desk sees an LMC or blackout risk without opening another screen.
Descend: mm:ss— the descent time AIDA sent for a depth entry, shown under DT when there is one.Rope +1m— on a depth event where rope calibration covers this athlete’s AP band, the measured offset is shown on the Judge card and in the athlete detail sheet (the Start List shows the same thing asR +1). See Safety and venue tools.- An entry that has been invalidated by a re-swim is dimmed with its name struck through.
Filing a protest or revoking a medical statement from Judge
- The magenta clipboard icon on the right of the athlete row opens protest filing on behalf of that athlete. Tapping the card itself always opens the judging sheet, so the two never collide. Re-swim originals that have been invalidated have no icon. Full procedure in Protests.
- The athlete detail sheet has
Revoke medicalat the bottom, for Organizer and Main Judge, with a reason required: “Revokes both the submission for this event and the athlete’s reusable copy. The athlete must submit a new medical statement; check-in is blocked until then (organizer/main judge can override at the desk).” See Blackout follow-up and medical clearance.
Judge Calculator
To save the judge from working out a distance or a static average by hand, the athlete detail sheet in the Judge tab has two small calculators built in. They compute the RP for you and write it straight into the RP field — nothing is saved until you save the result itself.
Pool Length
Distance calculations need to know how long the pool is. The value is part of the event, not of Setup: set it as Pool Length (m) when you create the event, or later in Setup → pencil icon → Pool Length (m). It exists for Pool and Team event types only — Depth events do not have it.
If it is missing, the calculator opens with the warning Pool length is not set for this event. Set it in the event settings. and cannot compute anything. Ask the Organizer or Main Judge to fill it in; it takes a few seconds and applies to the whole event.
Distance Calc (DYN / DYNB / DNF)
For the dynamic disciplines, open the athlete in Judge, then tap Distance Calc (the ruler button) in the detail sheet.
- Enter
Full laps— the number of completed lengths. - Enter
Current lap (m)— the partial distance of the final, incomplete length. - The app shows the total: laps × Pool Length + partial distance.
- Tap
Fill RPto write the total into the RP field.
STA Average Calc
For static, tap STA Average (the timer button) in the detail sheet. Enter the time measured by each of the two judges — Judge 1 (mm:ss) and Judge 2 (mm:ss), each on a mm:ss wheel. The app averages them, rounded to the nearest whole second, and Fill RP writes the average into the RP field.
Notes
- If the RP you enter or fill in is below the athlete’s AP, the app shows
RP is below AP. White card is not allowed.and the WHITE card is disabled. An under-AP performance cannot be a White card. - Depth disciplines (CWT, CWTB, FIM, CNF) have no calculator — enter the RP (depth) by hand.
- The calculators are pure arithmetic helpers. They never change the card, the penalty reasons or anything else on the sheet.
Penalties (Rulebook 17.8)
The app follows AIDA Rulebook section 17.8. Reasons are grouped by card colour, and the app blocks a save that would break a rule rather than letting a bad record through.
Yellow card reasons
- Under AP — the realised performance was short of the announced performance. The points deduction is worked out automatically from AP and RP.
- No Tag — the tag was not brought back (depth).
- Grab — pulled on the line, wall or platform during the performance.
- Pull — pulled on the line or lane rope.
- Turn — the wall was not touched at a turn (Pool).
- Start — incorrect start technique (for example a failed wall start in Pool).
- Early Start — left before the OT. 1 point per 5 seconds early.
- Late Start — left after the OT. See the start window below.
- Lanyard — lanyard rule breach (depth).
- Other Penalty — anything else not covered. REMARKS required.
Red card reasons
- Surface Protocol — incorrect surface protocol within 15 seconds of surfacing.
- Blackout Surface — loss of motor control or consciousness at the surface. REMARKS required (recovery time). Triggers the same-day rule — see Blackout follow-up and medical clearance.
- Blackout UW — blackout underwater. REMARKS required. Same-day rule applies.
- Airways — water in the airways.
- DQ Late Start — the start was later than the +30 s window allows.
- Jump Start (DYN, DYNB and DNF) — started by jumping in from outside the pool. The reason is hidden for STA and for all depth disciplines.
- Pull, Touch, Other Lane, Check-in DQ — as in the rulebook. Touch asks you to record who touched whom and when.
- DQ Other — disqualification for any other reason. REMARKS required.
Start window
Enter how far the athlete was from the OT in the Start offset field, in seconds — negative for early, positive for late. The app uses it both for the penalty points and for the window check.
| Case | Card and reason | Points |
|---|---|---|
| Early start, any discipline | Yellow + Early Start |
1 point per 5 seconds early |
| Late start, Pool disciplines | Yellow + Late Start |
1 point per 5 seconds beyond +10 s, counted up to +30 s |
| Late start, Depth disciplines | Yellow + Late Start |
no time penalty |
| Start later than +30 s, any discipline | Red + DQ Late Start |
disqualified |
If you try to save a Yellow card with Late Start and an offset of more than +30 s, the app refuses and tells you to change the card to RED and select DQ Late Start. It also refuses to save Early Start or Late Start with an offset of 0 — the seconds are part of the official record.
REMARKS
AIDA Rulebook 4.1.16.2 requires written reasons for every Yellow and Red. The Save button blocks the action if REMARKS is empty for a reason that requires it.
When you select a reason, the REMARKS field is pre-filled with a hint that tells you what to write — for example BO recovery time (e.g., 25s) for a blackout, Time of start (e.g., OT +35s) for DQ Late Start, SP detail (e.g., no verbal OK) for Surface Protocol. Complete the missing detail before saving; this is the official record and it is what a protest jury reads later.
Multi-select and combined cards
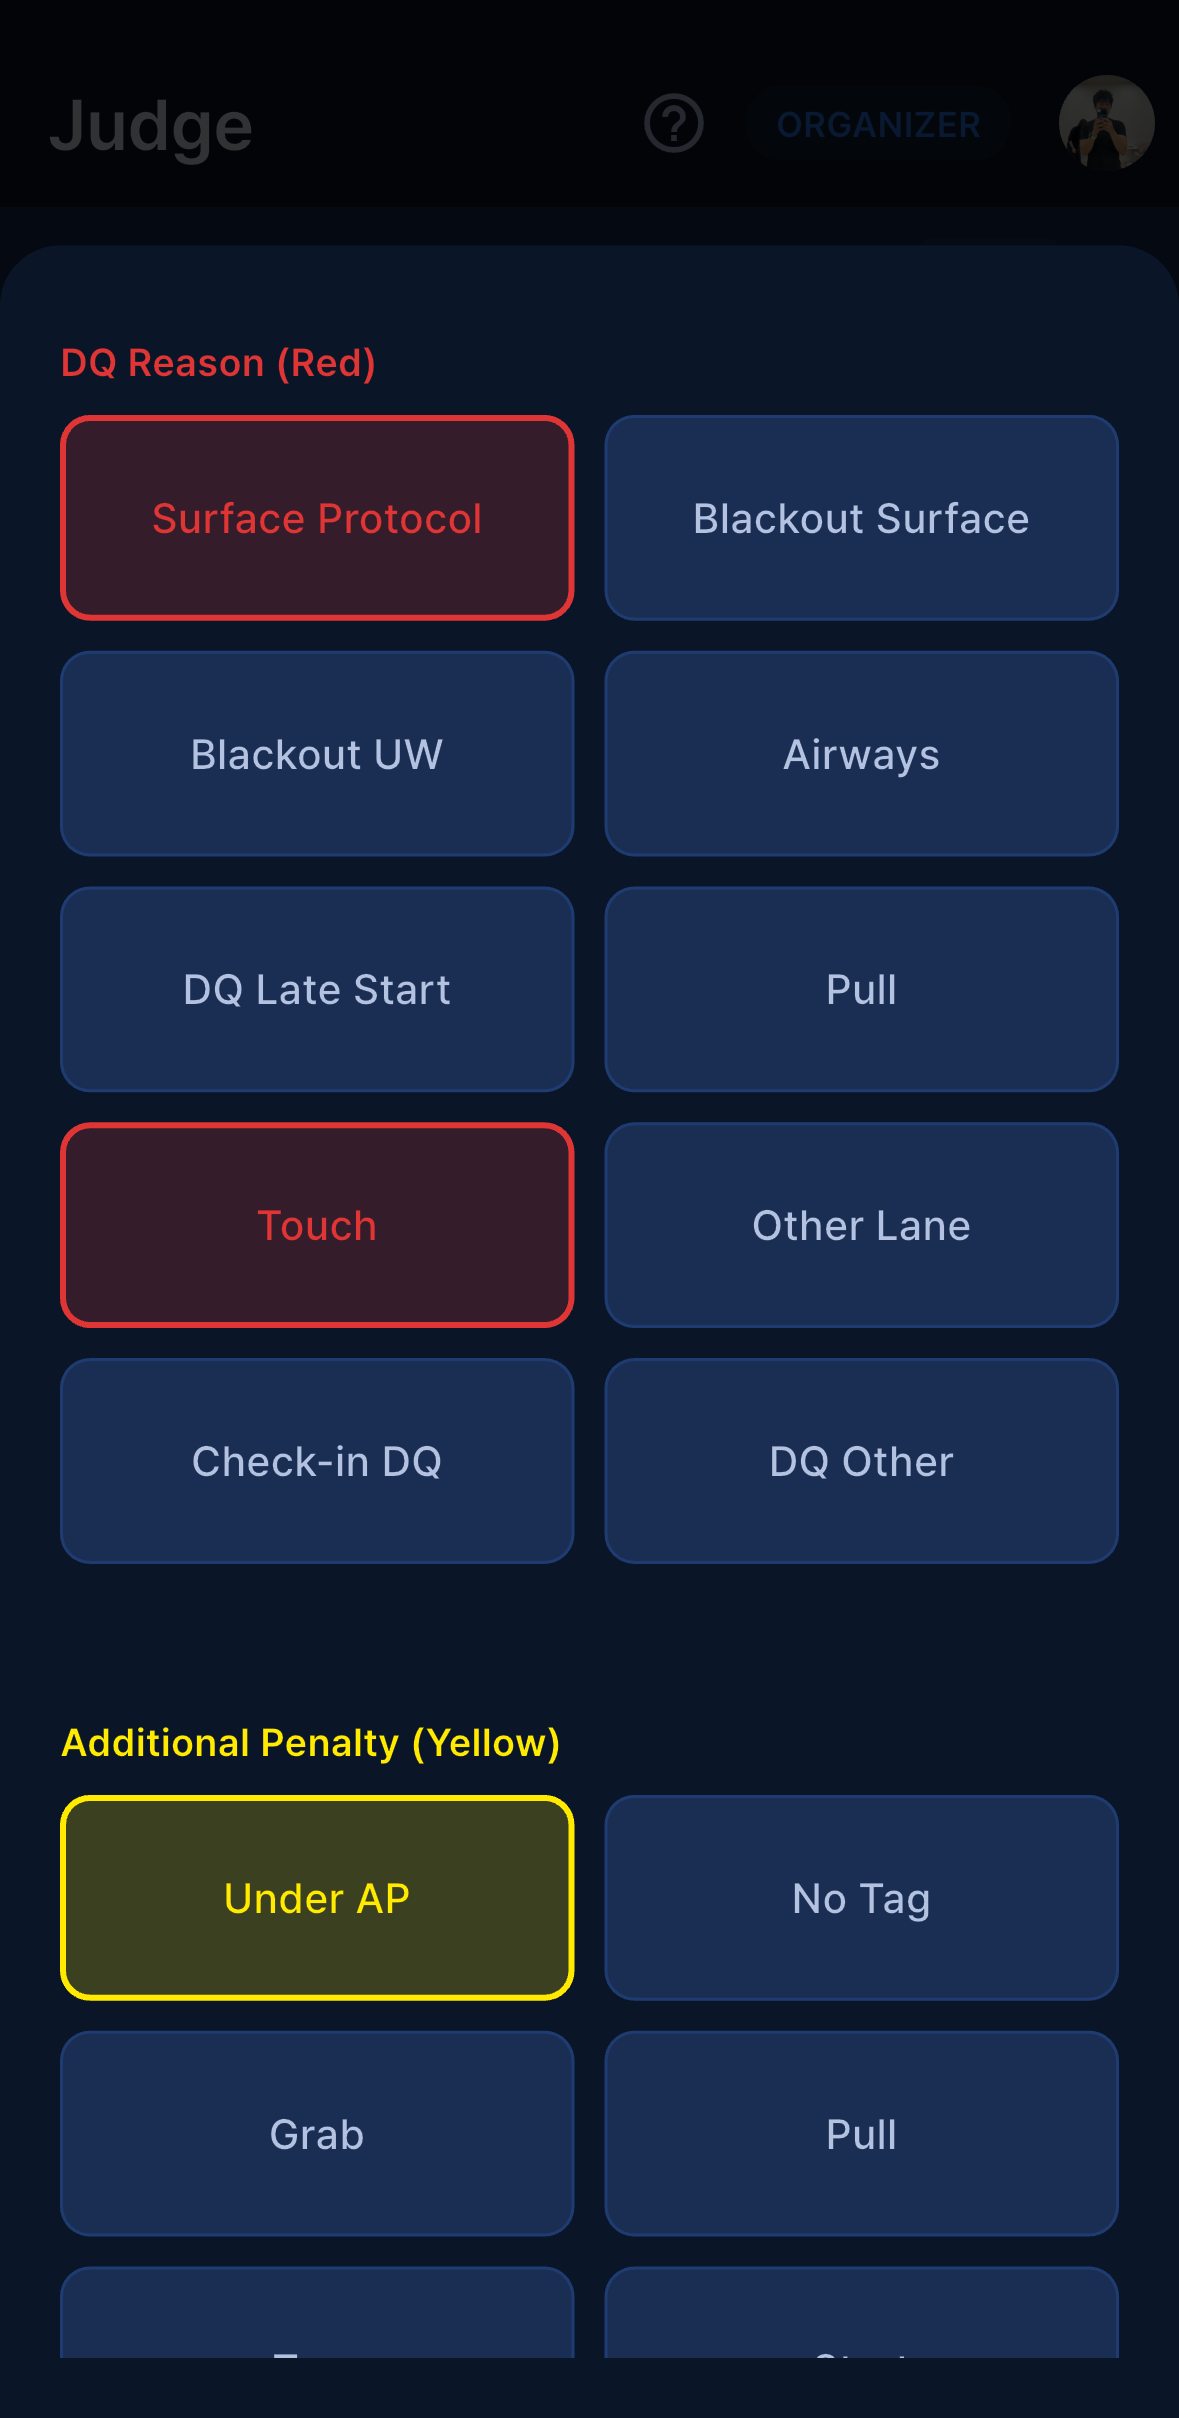
When you tap the Red card, the reason sheet shows both Red and Yellow reasons in two groups:
- DQ Reason (Red) — Surface Protocol, Blackout Surface, Blackout UW, Airways, DQ Late Start, Jump Start, Pull, Touch, Other Lane, Check-in DQ, DQ Other
- Additional Penalty (Yellow) — Under AP, No Tag, Grab, Pull, Turn, Start, Early Start, Late Start, Lanyard, Other Penalty
You can select several reasons across both groups in one save — for example Red Airways plus Yellow Under AP. Selected chips are colour-coded by category so you can see what is being recorded at a glance.
The Yellow card also supports multi-select on its own (for example Early Start + Grab). Yellow cards do not show the Red group.
Blackout follow-up and medical clearance
A blackout is the one judgement that changes more than a single result. The app turns the rulebook consequences into three steps: the rest of that day is stopped automatically, a medical decision is recorded for the days that follow, and check-in and publishing stay gated until that decision exists.
What happens the moment a blackout is judged
When you save a result with Blackout Surface or Blackout UW, the app looks for that athlete’s other, still unjudged performances on the same Day. If it finds any, it opens Blackout — remaining performances, lists the disciplines concerned and quotes the rule: World Apnea R&R 5.2.4.10 — after any blackout there is no more diving on the same competition day.
Mark DNS(the highlighted button) marks every listed performance DNS. Each one is scored as a Red card with 0 points and is sent to AIDA that way, so nothing needs to be entered by hand afterwards. The entries are recorded in the Log underAuto DNS after blackout, with the user shown asSystem (BO rule)so it is clear later that the rule did this, not a judge.Not nowskips it. Nothing is marked and the dialog does not come back on its own — you would have to mark the remaining performances DNS from Check-in yourself.
The dialog only covers the same day. Whether the athlete may start again on a later day is a medical decision, and that is what the next screen is for.
BO Follow-up
More → BO Follow-up is open to the Organizer and the Main Judge. It collects every athlete in the event who has a blackout reason on a result or an orange/red risk mark, so nobody is lost between days.
Each card shows the discipline, the blackout type, the recovery time you wrote in REMARKS and the risk chip, and is marked Needs decision until somebody records one. A red badge in the AppBar counts the outstanding cases.
For each athlete, record the event medic’s decision:
Cleared— the card then readsCleared to compete.Require re-exam— the card then readsNew medical exam required.
You can add a Medic note (optional), which is shown again at the check-in desk. If the list cannot be loaded the screen says so explicitly — do not read a failed load as “nothing to review”.
Revoking a medical statement
Require re-exam revokes the athlete’s medical statement: both the submission for this event and the reusable copy stored on their profile. The athlete has to submit a new statement, and check-in is blocked until they do.
A medical statement can also be revoked from two other places, both restricted to the Organizer and the Main Judge:
- More → Documents → open the athlete →
Revoke medical(a reason is required), with un-revoke available on the same screen to restore the original validity. - The Judge athlete detail sheet →
Revoke medicalat the bottom (a reason of at least two characters is required).
Those two routes send the athlete a push — Medical statement revoked / Submit a new medical statement. Check-in is blocked until it is submitted. A revocation made inside BO Follow-up does not send that push, so tell the athlete in person, or revoke from Documents instead if you want them notified.
If there is nothing to revoke, the app says so (Nothing was revoked — no medical statement was found for this athlete in this event. Check-in is NOT blocked.) and still records your decision. See Documents (consent forms) for what the athlete sees and how they clear the flag.
Gates the follow-up controls
Recording a decision is not paperwork — three things in the app wait for it.
- Check-in on a later day. When the desk checks in an athlete who blacked out earlier in the same competition, the app opens
Blackout on an earlier daywith the discipline, the reason, the recovery time and whatever was recorded in BO Follow-up (Recorded: cleared to competeorRecorded: new medical exam required, plus the medic note). The desk must tapMedic confirmedbefore the signature step, and the confirmation is written to the Log. - A revoked medical statement blocks check-in outright until a new statement is submitted.
- Publishing the start list. If you send or schedule a
Publish Start Listpush while athletes who blacked out on an earlier day still have no decision, the app showsBlackout follow-up pendingwith the number of athletes concerned.Publish anywaygoes ahead and records the override in the Log. If the check itself cannot run, there is no override button — the start list is not published and you are asked to try again. A scheduled start-list push is checked again just before it actually goes out.
Protests
A protest is a formal challenge to a result, filed under AIDA Rulebook 17.8. Apnea Comp tracks the whole flow — filing, the athlete’s signature, the jury’s vote, the decision, and any change to the result.
Every protest ends with the athlete’s signature, even when a staff member starts it on the athlete’s behalf.
Who can file
The Organizer, the Main Judge, a Judge, or the athlete. Staff cannot — they have no Judge tab and no Protests tile in the More menu, so neither filing on behalf nor the protest list is available to them. The reason text must be at least 5 characters. Protest fees are not tracked in the app.
Filing as an athlete
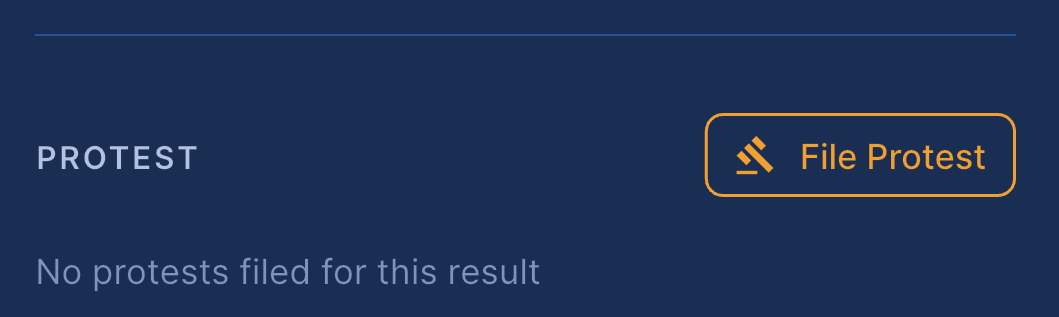
- Athlete mode → My Info → tap
File Protestnext to your result. - Write the reason, sign on screen, and tap
Submit Protest.
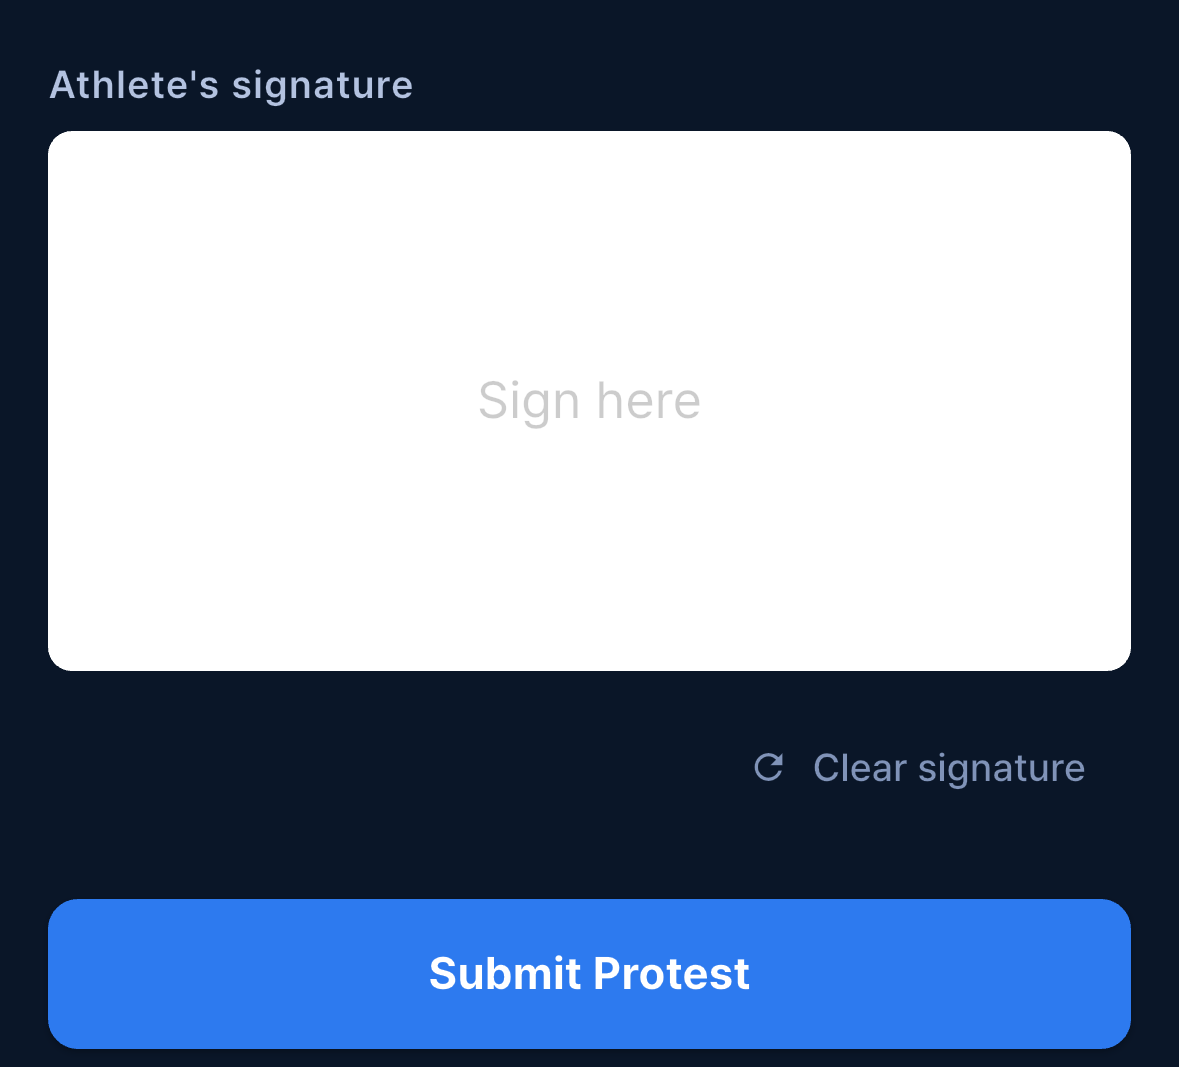
The protest goes straight to Pending — it is waiting for the jury.
Filing on behalf (staff)
- Open the Judge tab and tap the magenta clipboard icon on the right of the athlete’s row. Tapping the card body opens the judging sheet instead. Re-swim originals that have been invalidated have no icon.
- Write the reason and tap
Start Protest. No signature yet. - The protest goes to the athlete as Awaiting signature. The athlete opens My Info on their own phone, reviews the text, edits it if necessary and signs — only then does it become Pending.
The same screen also carries the Re-swim button, which is explained in Re-swim & Opener.
The jury vote
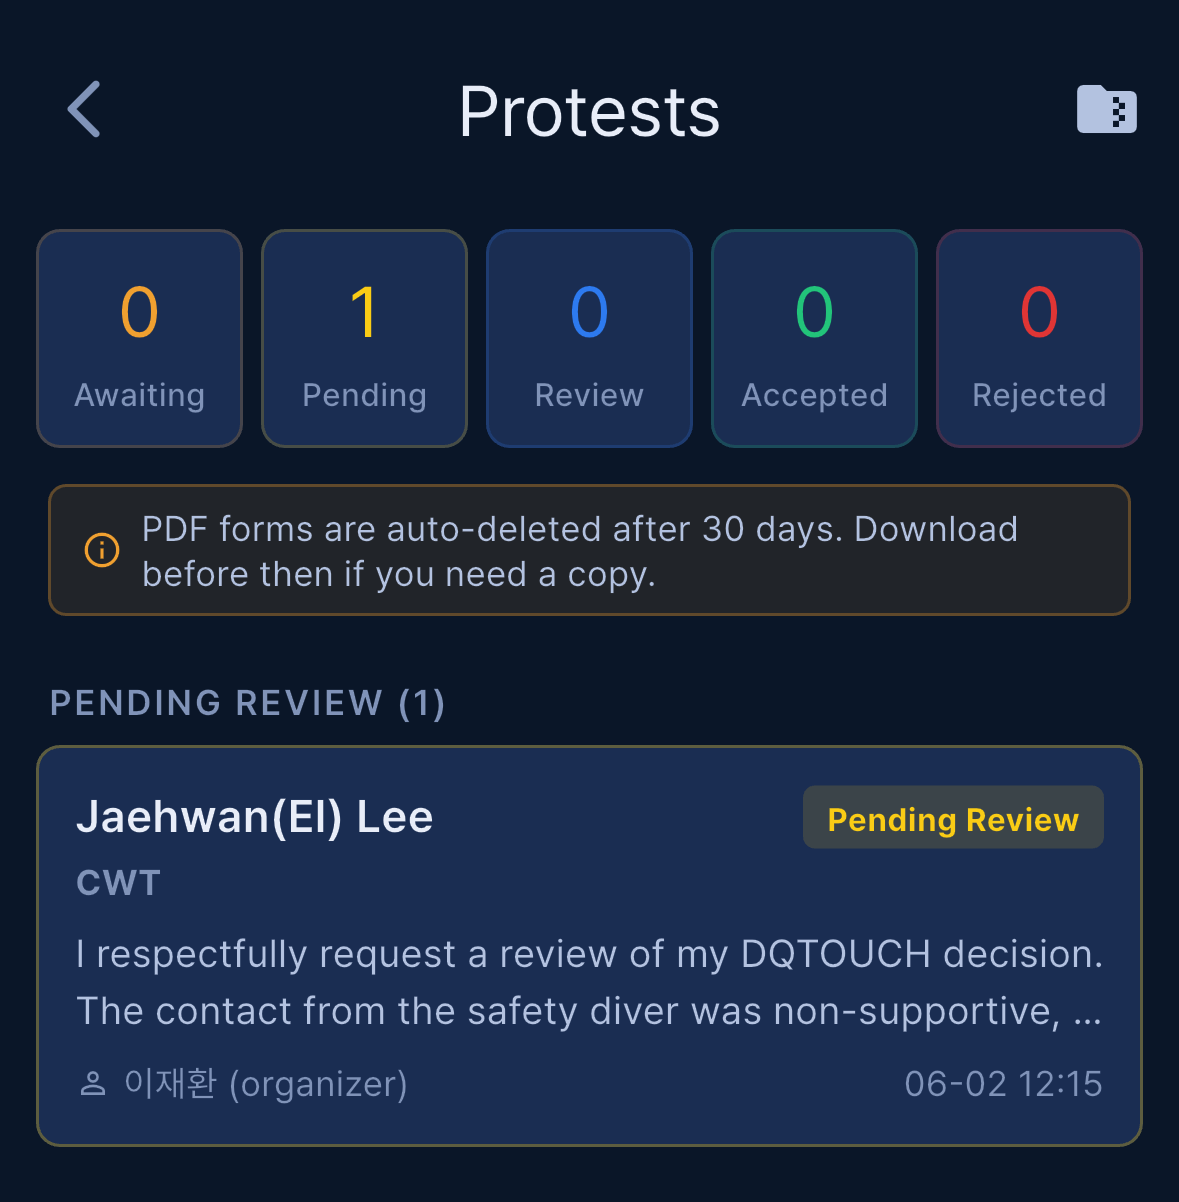
Open More → Protests (Organizer, Main Judge, Judge). Mini cards at the top count Awaiting, Pending, Review, Accepted and Rejected, and tapping one filters the list. Open a protest to work on it.
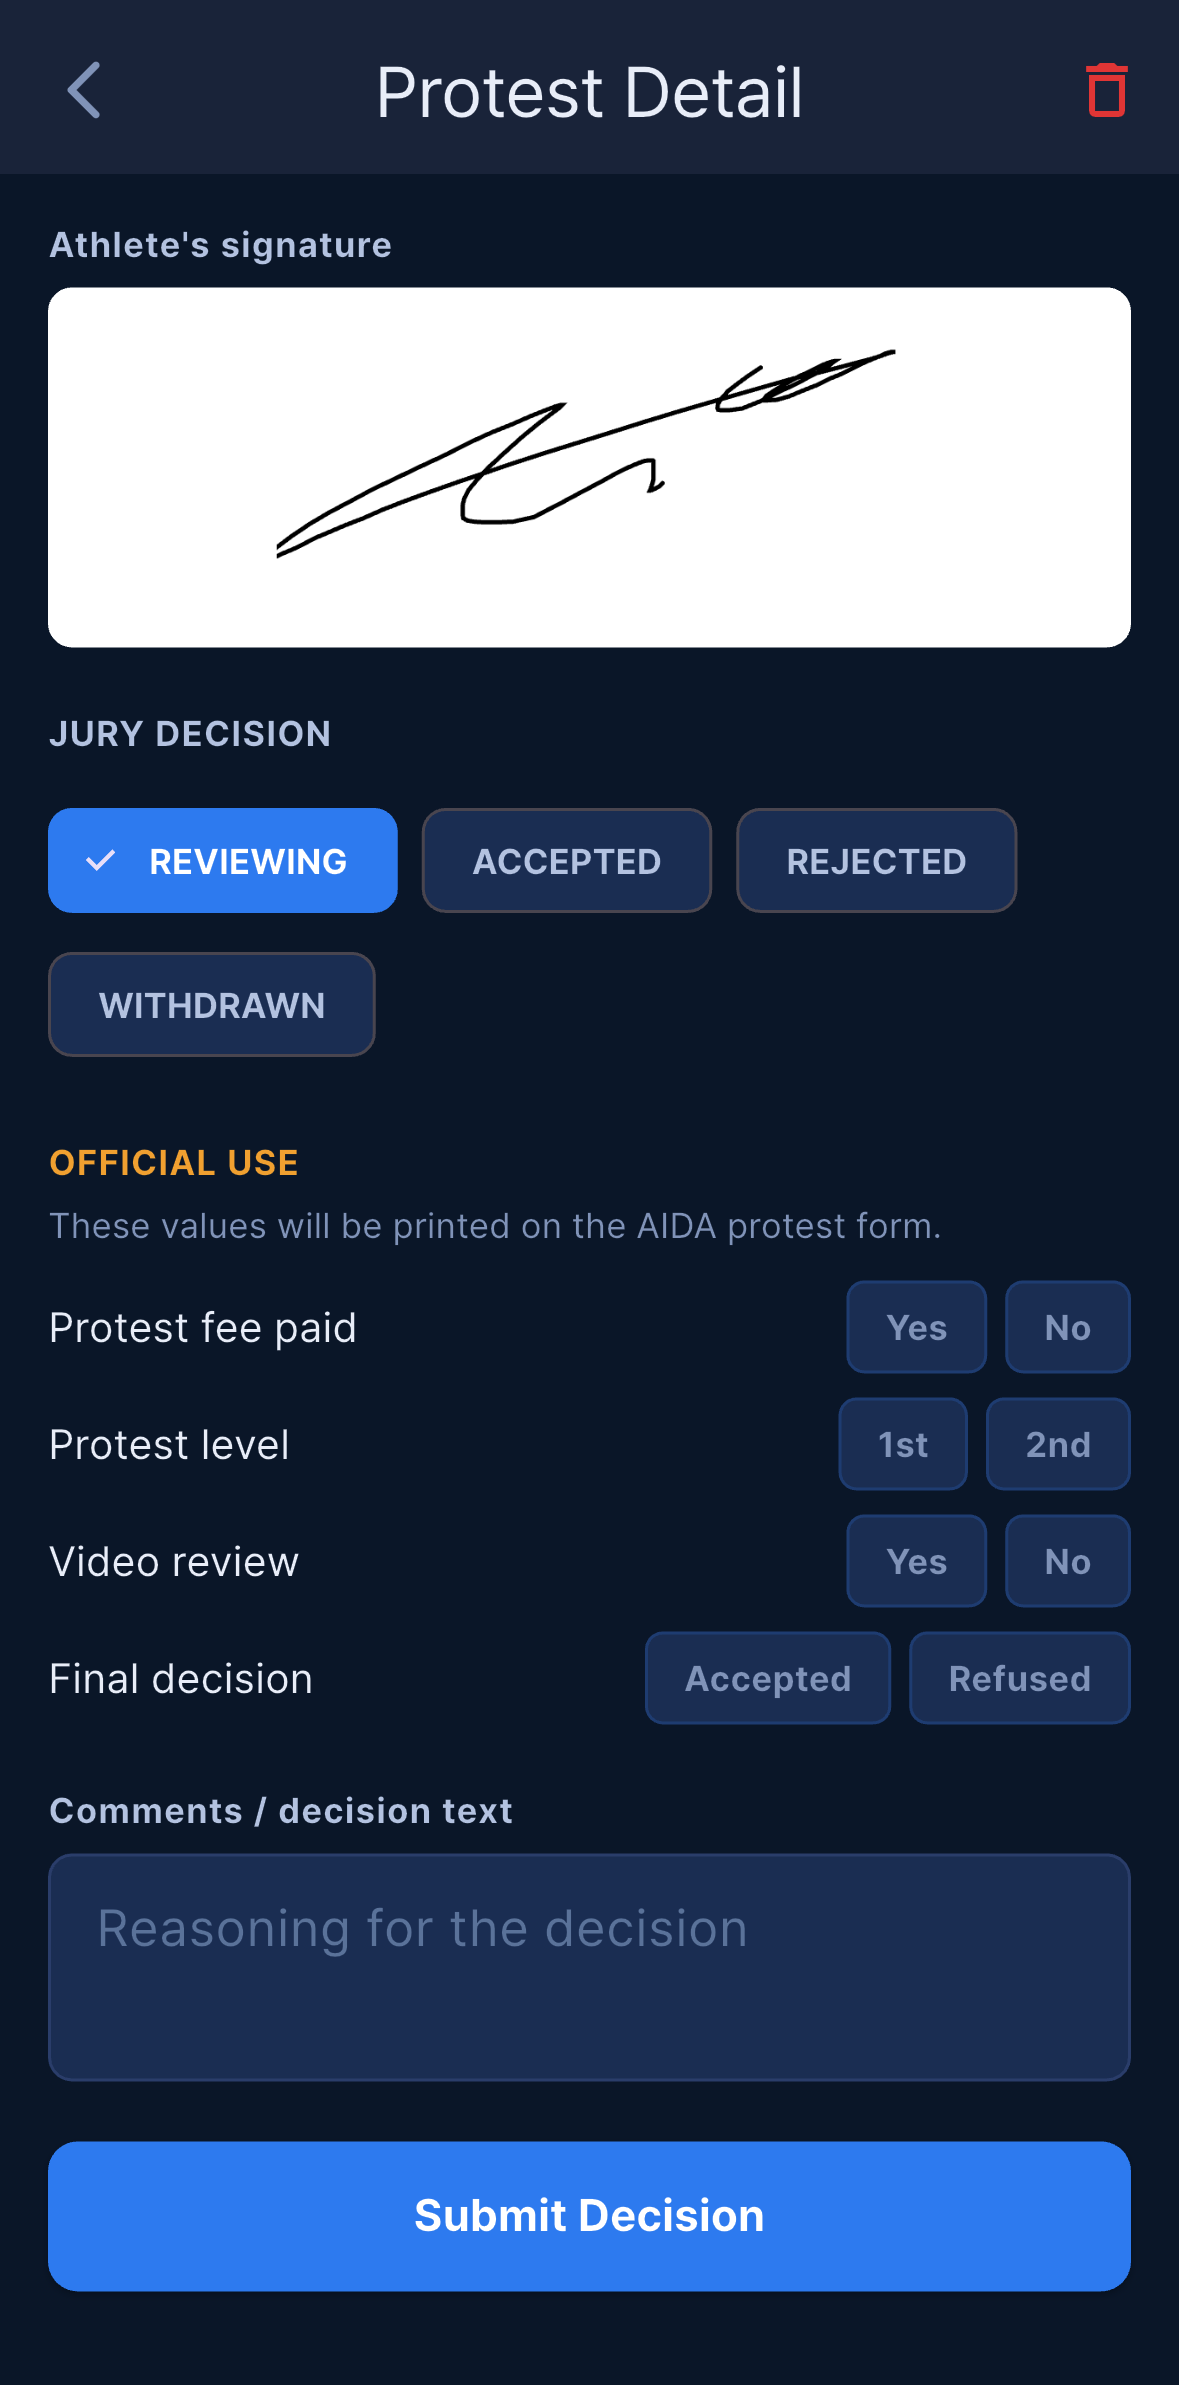
- Judge, Main Judge and Organizer all vote,
AcceptorReject, and can change their vote while voting is open. - A Judge sees only their own vote form and the confirmation
Your vote was recorded.They never see the tally and they cannot decide the protest. - The Organizer and Main Judge see the anonymous tally card
Judges' Vote (anonymous)— how many for each side, never who voted which way. If the vote is tied, either of them can useCast deciding vote (tie). - The vote is advisory. It informs the decision; it does not make it.
The decision
Only the Organizer and the Main Judge submit the final decision: the status, the decision text, and the jury signature. A protest cannot be decided while it is still awaiting the athlete’s signature, and once submitted the decision cannot be edited.
ACCEPTED— you can amend the result before confirming: card, RP and remarks. The amendment is applied to the athlete’s record and flows through to Results, Rewards and AIDA. UnderOFFICIAL USE, setFinal decisiontoAccepted.REJECTED/WITHDRAWN— the result stands. For a rejection, setFinal decisiontoRefused.
When you decide the last unresolved protest of a Day, the app offers All protests resolved — Publish the unofficial results again? Official results follow automatically 15 minutes later if no new protest is filed. Open push screen takes you to Send Push with that Day already selected. This matters: the protest cancelled the automatic official-results push, and only a fresh unofficial push restarts the 15-minute clock (see Push notifications).
Protest forms (PDF)
Deciding a protest generates the official AIDA protest form as a PDF automatically — you do not have to fill anything in a second time.
The Organizer and the Main Judge can download a single form from its row in the Protests list, or every form at once with the folder-ZIP icon in the top right. Stored PDFs and ZIPs are deleted automatically 30 days after they are created, so download anything you need for your records before then.
Deleting a protest
The Organizer or the Main Judge can delete a protest from its detail screen (trash icon), in any state — decided ones included. Deletion is permanent. Use it to clear a test entry, or a protest that is stuck awaiting a signature that will never come.
What a protest blocks
While a Day has an unresolved protest — awaiting signature, pending or reviewing — two things stop:
Load Listfor that Day is refused. Reloading replaces that Day’s athletes, and the protests attached to them would go with the rows. Pull-to-refresh still works, and other Days are unaffected.Confirm Official Resultsfor that Day is blocked withProtests still openand the number of open protests. There is no override. Filing a protest also cancels that Day’s automatic official-results push.
Both gates are per Day: a protest on Day 1 does not block Day 2.
Notifications
Who gets a push depends on how the protest moved:
| Event | Who is notified |
|---|---|
| The athlete files and signs it themselves | staff only (not the athlete) |
| Staff file on the athlete’s behalf | staff and that athlete (Action Required) |
| The athlete signs a protest staff started | staff only |
The jury decides — ACCEPTED or REJECTED |
staff and that athlete |
The jury records WITHDRAWN, or the protest is set to REVIEWING |
nobody |
Staff notifications exclude the Photo role. Athletes only receive protest pushes if their AIDA athlete ID is linked to their account.
Re-swim & Opener
Reserving a re-swim
Loading a Day’s start list from AIDA replaces that Day’s athletes, so a re-swim is reserved in a queue first and inserted when the target Day’s list is built. That way it is never wiped out by a reload.
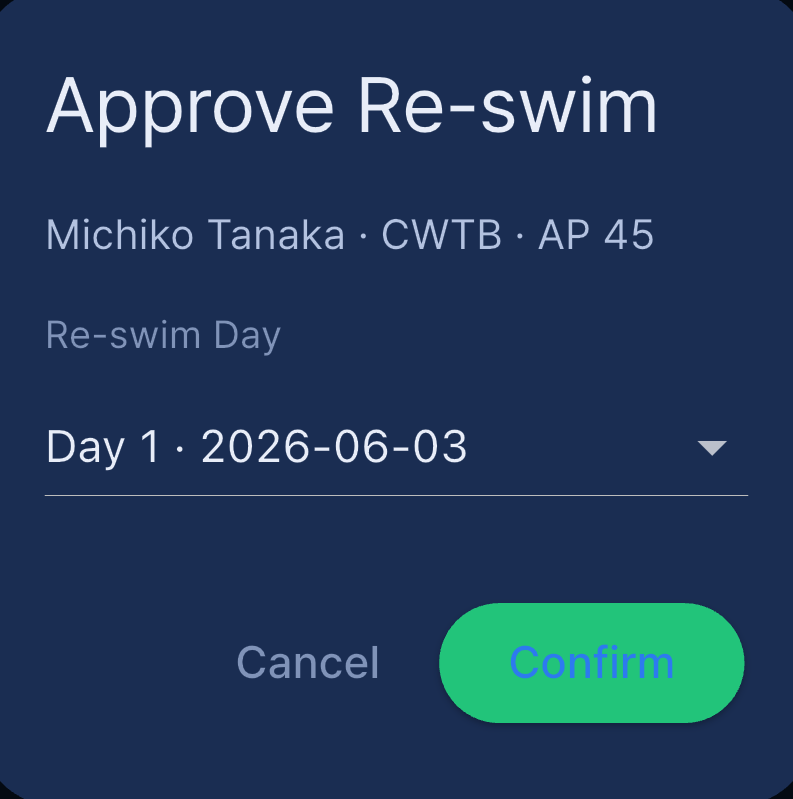
There are two places to start one, both limited to Judge, Main Judge and Organizer — an athlete never has this button:
Re-swim, underStart Proteston the on-behalf filing screen. Use it when a re-performance is called for and there is no accepted protest — you do not have to accept one first.Approve Re-swim, on the protest detail screen. It appears only once the protest status isACCEPTED.
Either way you pick the Re-swim Day from the day dropdown and confirm. Reserving sends no push to the athlete — the official who reserved it just gets a confirmation, so tell the athlete yourself.
Placing a re-swim
- If the Day you chose is the one currently loaded, the placement dialog opens immediately.
- Otherwise the re-swim waits in the queue. When that Day’s start list is built or loaded, the app reports
{n} re-swim athlete(s) reserved for this day. Place them in the start list.and offers the same dialog.
In the dialog choose an automatic sort — Sort by AP (ascending), Sort by AP (descending) or Random order — or Manual position, which hands you over to Assign Lines to place the athlete on a line and position by hand. A line can be set with Line (optional).
If a Day’s list is already built and you missed the prompt, use Setup → Add Athlete card → Re-place re-swim athletes. With nothing waiting it simply says No pending re-swims for this day.
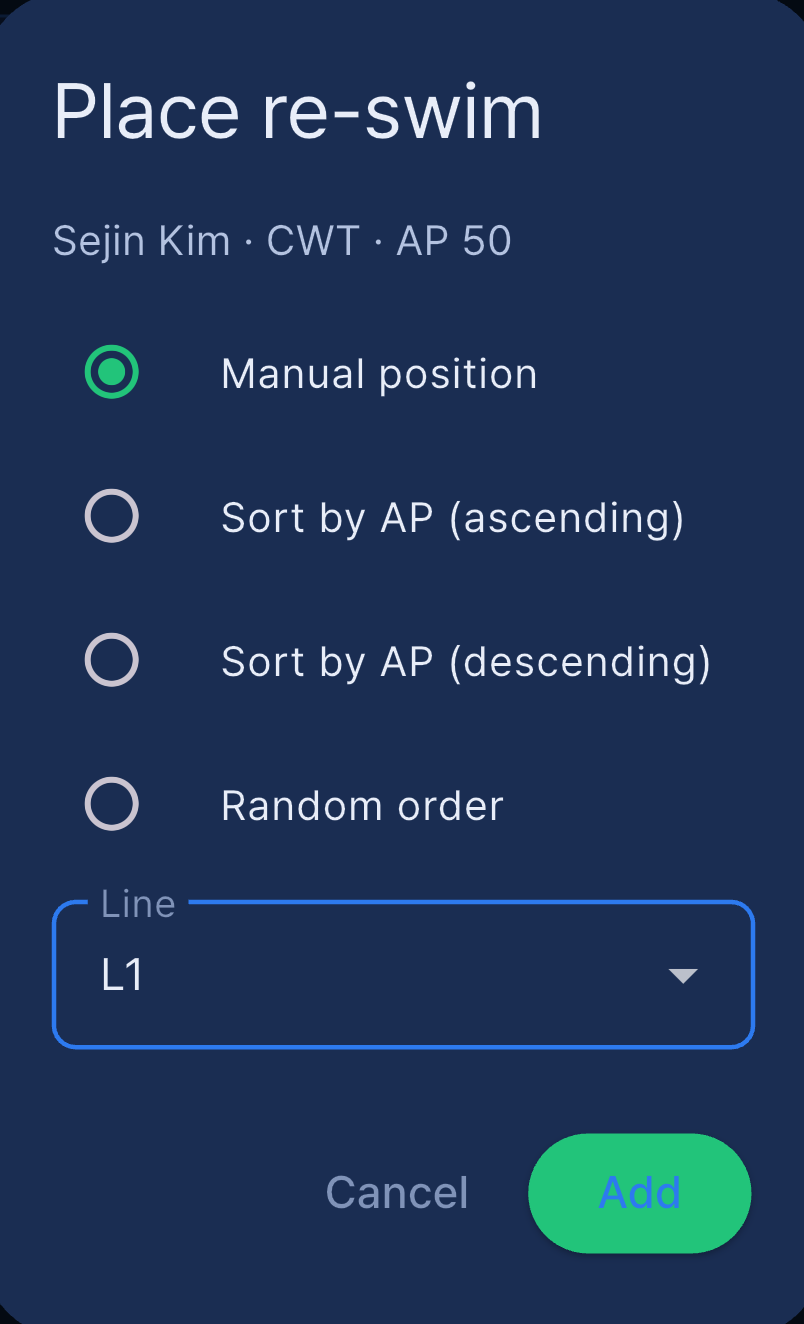
When a re-swim is placed, the original entry is invalidated: it is struck through, excluded from rankings, and still shown in Results and the Start List so the history stays visible. The re-swim result feeds the Day’s ranking and is sent to AIDA using the original start ID.
Cancelling a re-swim
There are three ways back:
- In the placement dialog — the red
Cancel re-swimdiscards the reservation. - From the Judge tab — tap the struck-through invalidated original. Instead of the judging sheet you get
Cancel this re-swim? A placed re-swim is removed and the original result is restored.Confirming cancels all of that athlete’s re-swims and restores the original result. Tapping the re-swim row itself cancels only that one. - Leaving Assign Lines without positioning a manually staged re-swim — the app asks
Keep at end,Keep adjustingorCancel re-swim.
Opener and manual entries
An opener is a demonstration or warm-up entry that should not count. The Setup card reads Add an opener or non-ranked athlete. Not included in rankings/AIDA.
Organizer and Main Judge open Setup → Add Athlete and enter name, nationality, gender, discipline, AP and PB. STA uses an mm:ss time picker; the other disciplines take a number.
Openers and invalidated re-swim originals are excluded from rankings and never sent to AIDA, but they do appear in the Start List and in Results — the day’s running order and the record of what happened stay complete.
Schedule adjustments (OT Delay)
If the day slips — a long warm-up, an incident, an equipment problem — you can shift the remaining OTs without rebuilding the start list.
The clock icon sits in the AppBar of the Start List tab only, just before the role badge, and only the Organizer and the Main Judge see it. It is not on the Judge tab.

- Tap the clock icon to open
Adjust Schedule. - Under
APPLY DELAY STARTING FROM, pick the athlete the delay starts at — the first one whose OT should move. Only athletes whose OT has not yet passed are listed. On a multi-zone day the list is split by zone. - Enter
DELAY (MINUTES). Whole positive minutes only; you cannot pull the schedule earlier. PREVIEWshows the new times, old → new, and how many athletes will be updated.- Tap
Apply.
Every OT from that athlete onward shifts forward by the delay, and the matching warm-up and check-in times move with them. On a multi-zone day only athletes in the same zone are shifted — the other zones keep their own clocks.
Applying a delay sends an automatic push to the affected athletes: OT Schedule Updated / Your OT has been delayed by N minute(s). Please check the updated schedule. Tapping it opens the Start List. Two limits are worth knowing at the desk: this message is English only, whatever language the athlete uses, and it only reaches athletes whose AIDA athlete ID is linked — someone who joined with the Athlete code and was never matched will not get it. Announce the change over the PA as well.
There is no undo, so read the preview before applying. All staff devices update in real time, and the change is recorded in the Log.
Results, Rewards and records
The Results tab
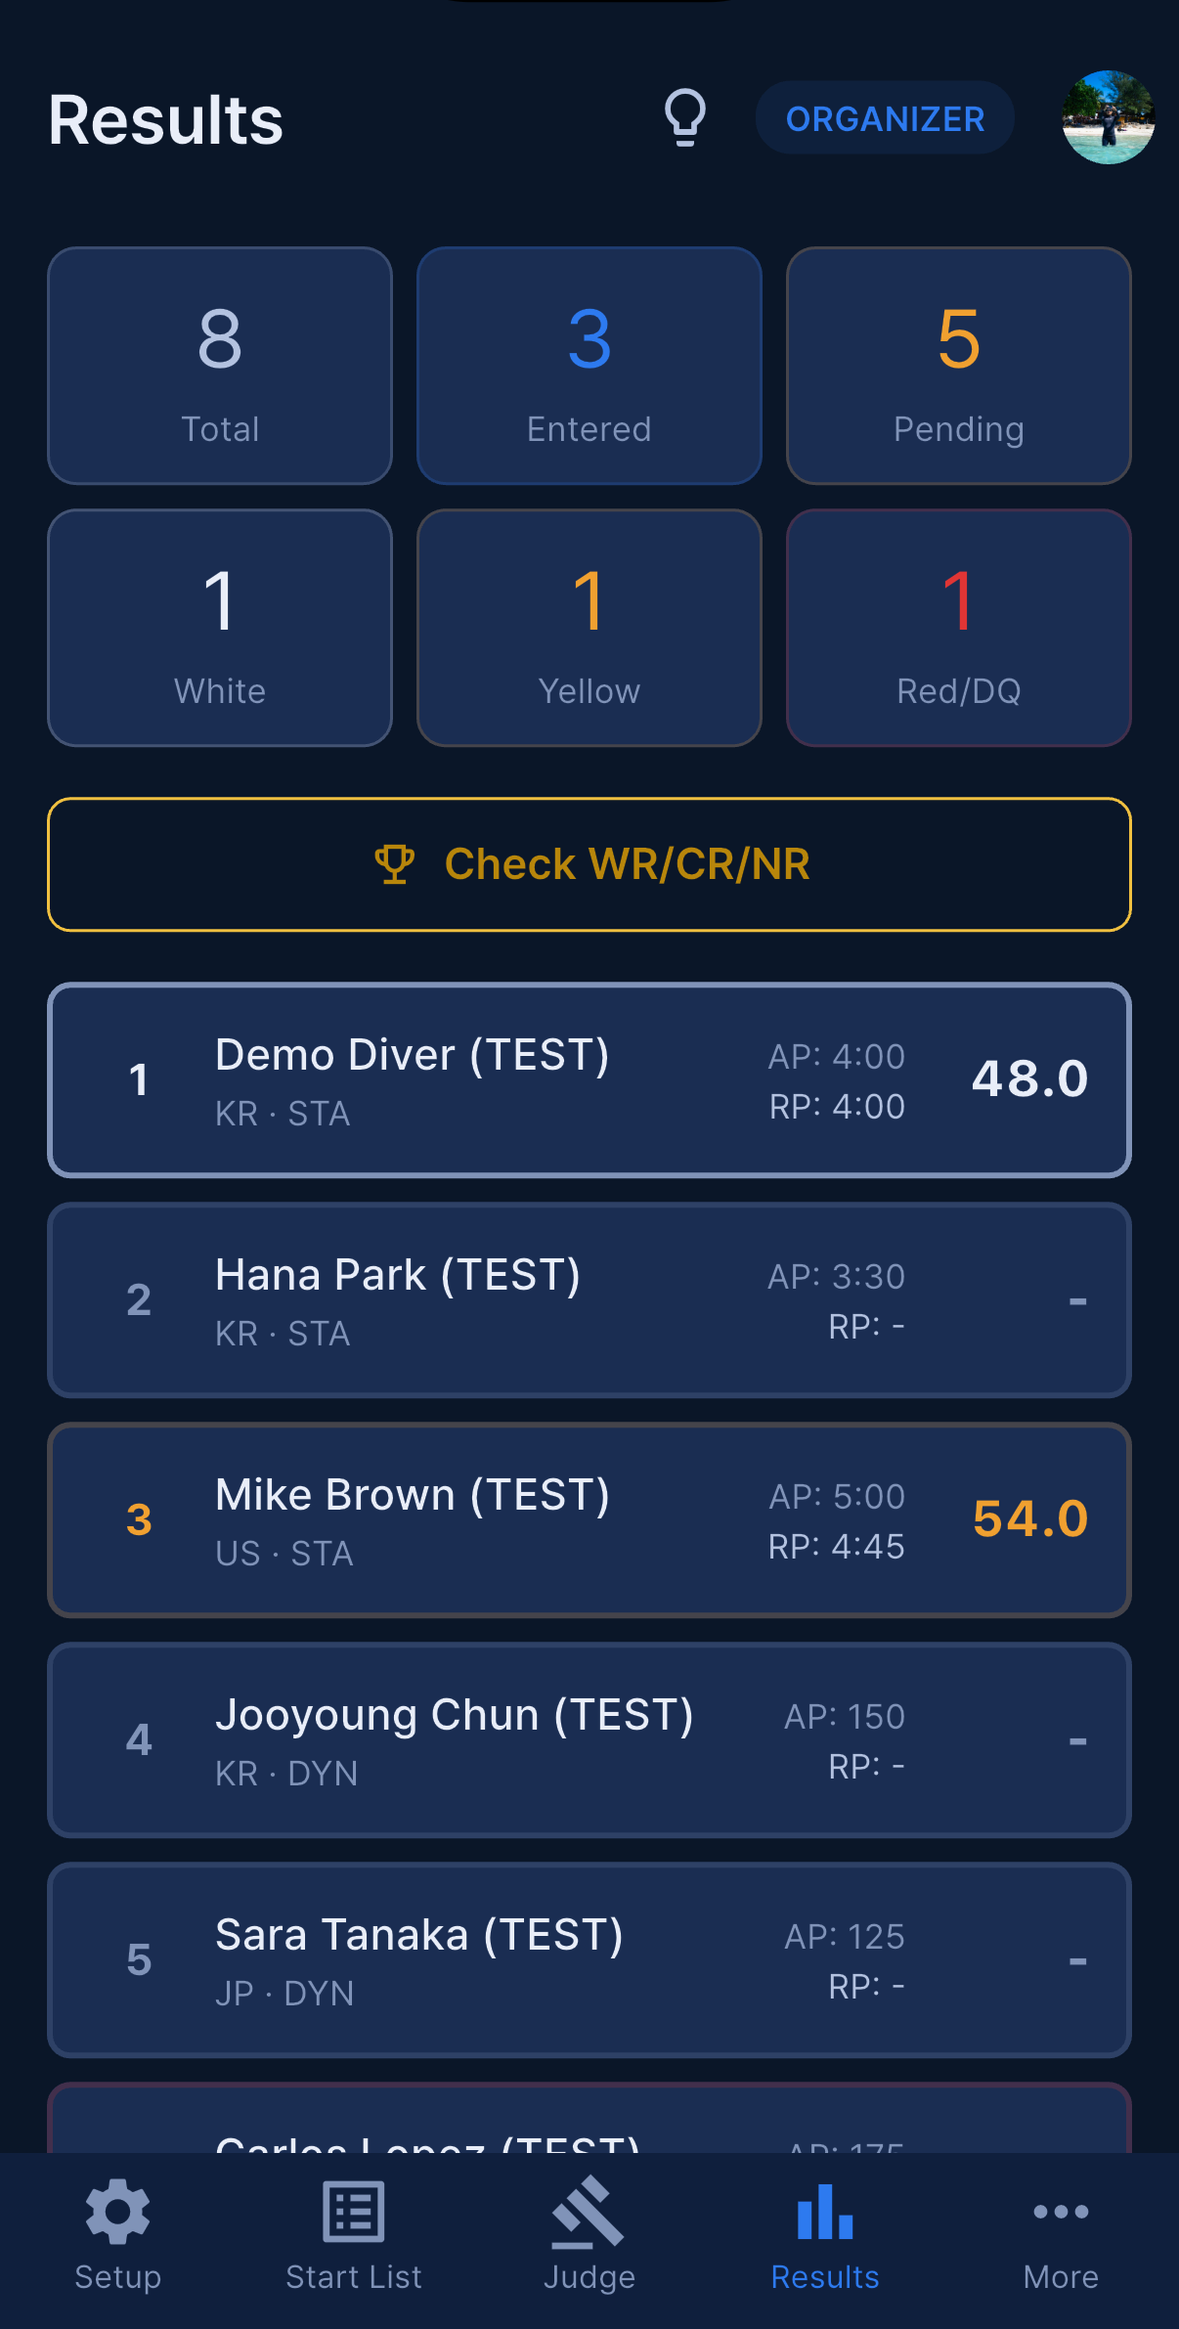
The Results tab shows the day as it runs, updating as judgements come in.
- The list is in start order — OT, then line — exactly like the Start List. The number on the left is the start position, not a placing. Placings and medals live in Rewards.
- Six summary cards sit at the top:
Total,Entered,Pending,White,Yellow,Red/DQ. Tap one to filter the list to that group, and tap the × to clear the filter. Openers and invalidated re-swim originals are left out of these counts. - Tap any row to open the athlete’s profile — this event’s AP → RP, card, points and placing, plus their public AIDA career. See Joining as an athlete.
- If the event is marked for record attempts, a medal banner appears at the top.
- Sync banners (
Sync now,Resync,Update token) appear above the list when something has not reached AIDA yet — see Offline operation. - In light mode each row is shaded by card — white, pale yellow, pale red — and rows that have not been judged sit on a darker background.
Export
Two buttons at the bottom of the Results tab share an Excel workbook through the normal iOS / Android share sheet:
Export Start List (Excel)— the day’s running order.Export Results (Excel)— the judged results, withPoints,Card,CheckIn,Record,Judge MarksandRemarkscolumns.
Each workbook has an All sheet plus one sheet per discipline, and inside every sheet the athletes are grouped by line in OT order. The file is named after the event and the Day. Korean, Japanese and Chinese names come through intact.
The Rewards screen has its own Export CSV, which is the one to use for a notice board — see below.
Rewards and ranking
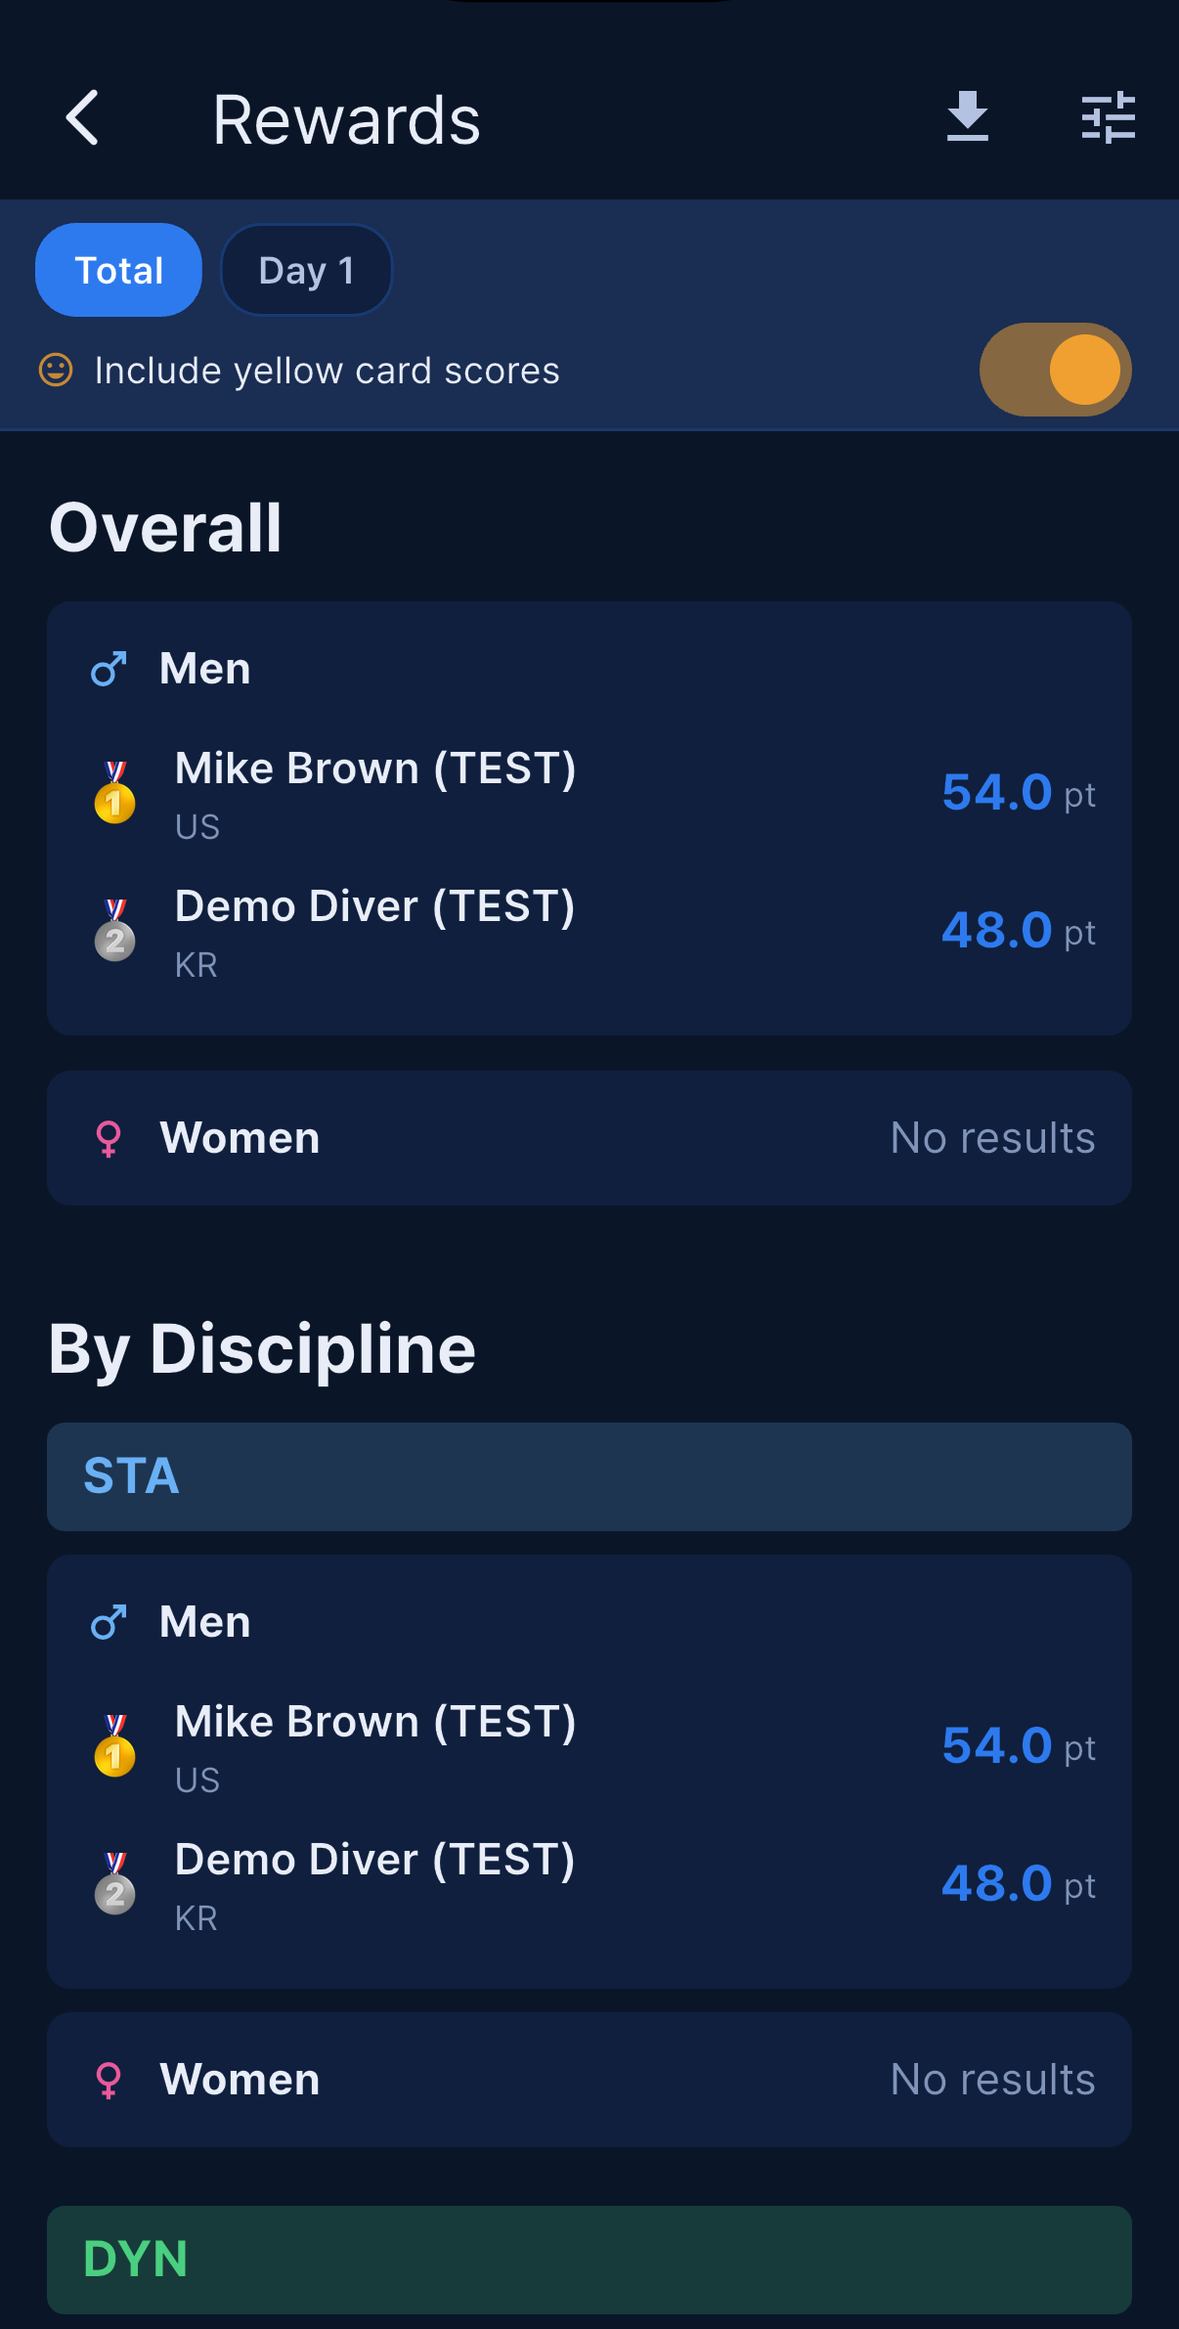
Staff open Rewards from the More menu; athletes have it as a tab in Athlete mode. The athlete version shows the rankings only — no Day chips, no yellow toggle, no tiebreak editor and no export.
- Day chips —
Total,Day 1,Day 2, … to scope the standings. Include yellow card scorestoggle.Tiebreak(the icon in the top right) — drag to reorder the rules, withReset to defaultat the bottom.Export CSV— a UTF-8 CSV that opens correctly in Excel and Numbers in every language and reflects the Day, yellow and tiebreak settings currently on screen.
Each Overall and per-discipline group is split into Men and Women and lists the top three. Places use competition ranking, so two athletes tied for 1st are both 1st and the next place is 3rd.
The AIDA default tiebreak order (Rulebook §4.2.16) is:
| Order | Rule |
|---|---|
| 1 | Total points (high first) |
| — | Best single discipline score — applied automatically on single-day events and whenever a Day chip is selected, in the Overall ranking only |
| 2 | Smallest AP−RP difference |
| 3 | Fewer red cards |
| 4 | Fewer yellow cards |
| 5 | More white cards |
The best-single rule is an equity correction: on one day, an athlete who scored STA 60 + DYN 40 ranks below an athlete who scored STA 100, because two entries should not beat one strong one on the same total. It is applied for you, so it is not listed in the tiebreak dialog and Reset to default does not touch it, but it is named in the metadata of the CSV export. It never applies to per-discipline rankings.
Two more rules decide who is on the list at all:
- DQ entries — Red cards, DNS and Late Check-in — are excluded from awards. In a discipline ranking they drop out entirely. In the Overall ranking an athlete is dropped only if every performance was a DQ; one DQ among several results does not remove them. An athlete with no eligible result shows
No results. - Openers and invalidated re-swim originals are excluded from rankings. Everyone still appears in Results.
In Team events, teams with the same total points share the same rank.
Records (WR / CR / NR)
Mark and confirm World, Continental and National record attempts.
- Mark the event — when creating or editing an event, turn on World Record and / or Continental under
Record Attempts. A medal badge then shows on the event card and in the Results header. - Attempt badges — an athlete whose AP is at or above the current record gets a gold attempt badge (
WR A,CR AorNR A; WR outranks CR, which outranks NR) on their Judge card and on their own My Info screen. These are recalculated when an Organizer or Main Judge runsLoad List. Note that theRecord Attemptstoggle offers WR and CR only — NR attempt badges appear on their own. - Check records — on the Results tab, tap
Check WR/CR/NR. The button is visible to the Organizer and Main Judge only; a Judge has no button and tapping a badge does nothing. The app queries the AIDA official records by nationality, discipline and gender and suggests a level for each athlete. It needs network, and entries it cannot fetch are skipped. When it finishes:Records checked · N suggested · M unavailable. - Confirm — a suggestion shows as a dashed badge. Tap it to confirm WR, CR or NR, or to clear it. Confirmed records show as a solid badge and are included in the Excel export.
Two details decide whether a suggestion appears at all:
- A performance that equals the record counts, not only one that beats it.
- Only white-card performances are suggested — National Records included. A yellow or red card, or an entry that has not been judged, produces no suggestion and clears any suggestion already on that athlete.
Check WR/CR/NR only re-examines athletes who currently hold a white card. So if a white card is later corrected to yellow, the old suggestion is not removed by pressing the button again — it clears on the next Load List.
More → Log, which the app shows to the Organizer and Main Judge, is the audit trail behind all of this. Each entry carries a one-line summary in your device language: judging entries read RP x (AP y) · reason · points, and a change is only labelled WHITE → YELLOW when the card actually changed — a first judgement is never shown as a correction. Push entries show recipients, failures and scheduled sends; Setup saves show lines, interval, first OT and how many athletes were already judged. Each row carries its date (MM-DD, or YY-MM-DD for another year). If two devices save the same athlete the last save still wins, but the previous values remain in the Log so you can see what changed and who changed it.
Push notifications
Apnea Comp uses push notifications for time-sensitive event updates. One of them does more than notify: sending the Start List push is what makes the day’s start list visible to athletes.
Manual pushes
More → Send Push (Organizer and Main Judge) has three cards, with a Day selector above them:
Publish Start List— the day’s lines and OTs are confirmed.Publish Unofficial Results— results released for athlete review.Confirm Official Results— the final results.
Tapping a card opens a confirmation dialog that shows the title and body exactly as the athlete will see them, with Cancel, Schedule for later (Start List and Unofficial Results only) and Send. There is no recipient count in the dialog — the count arrives afterwards as Sent to N recipient(s).
Publish Start List is the publishing switch. The dialog says so: Sending this push publishes the start list to athletes. Until it is sent, athletes see Start list not published yet on the Start List tab and Check-in, warm-up and OT will appear once the organizer publishes the start list. on My Info. Publishing is per Day, it takes effect immediately on the athletes’ phones with no restart, and it happens even if nobody is subscribed to notifications. A scheduled start-list push publishes at the moment it actually goes out, not when you schedule it.
Two reminders around it: after Save Configuration in Setup the app prompts Publish to athletes? for that Day, and publishing is gated by outstanding blackout decisions (Blackout follow-up pending → Publish anyway) as described in Blackout follow-up and medical clearance.
Scheduling a push for later
Choose Schedule for later in the confirmation dialog (Start List and Unofficial Results only), pick a date within the next 30 days, then a time on the HH:mm wheel. The wheel opens at the current time plus one minute; the current minute and anything in the past are refused with Scheduled time must be in the future.
The schedule is held on the server, not on your phone, so it goes out whether or not your device is awake. Scheduling the same kind of push for the same Day again replaces the previous schedule, and the app tells you so.
A Scheduled (N) list at the top of the screen shows every pending schedule — across all Days and all kinds — with its time, kind and Day, and a Cancel button on each row. It refreshes every 30 seconds, and it also shows Sending now and Past due — not sent yet. If the list itself cannot be read you get a red warning line rather than an empty list; never read a failed load as “nothing is scheduled”.
Cancelling reports exactly what happened: cancelled, cancel requested while it was already being sent, already sent or cancelled, or failed. Sending a push manually cancels the matching schedule for that Day, and sending official results also cancels that Day’s pending unofficial schedule, so the same message never goes out twice.
Scheduling requires app version 1.2.1 or newer on the device that sends it.
Unofficial → Official automation
Sending unofficial results arms the official announcement for you: Official results will be sent automatically in 15 minutes if no protest is filed. A scheduled unofficial push starts its 15 minutes from the moment it actually goes out, not from when it was scheduled.
- A protest cancels it. Any protest filed for that Day cancels the pending official push automatically, and the Day is checked again immediately before it would be sent.
- Manual
Confirm Official Resultsis blocked while that Day has an unresolved protest —Protests still open, with no override. - Re-publish to restart the clock. After the last protest on the Day is decided, publish the unofficial results again; the 15-minute timer starts over. The app offers this for you with
All protests resolved → Open push screen. - If the automatic follow-up cannot be armed, the app warns you to send the official results manually.
Automatic sends, cancellations and abandoned retries are written to the Log as System (auto-push).
Automatic notifications
These go out without staff action:
| Trigger | Recipients | When | Language |
|---|---|---|---|
| OT Delay applied | affected athletes with a linked AIDA athlete ID; same zone only | immediately | English only |
| Check-in reminder, 1 hour | athletes not yet checked in | 2 hours before OT | English only |
| Check-in reminder, 30 minutes | athletes not yet checked in | 1.5 hours before OT | English only |
| Protest filed by the athlete | staff only | on submission | 5 languages |
| Protest awaiting signature (staff filed) | staff + that athlete | on submission | 5 languages |
| Protest signed by the athlete | staff only | on signature | 5 languages |
| Protest decided | staff + athlete, ACCEPTED / REJECTED only |
on decision | 5 languages |
| AP exceeds PB limit | that athlete | once, when Load List first finds it |
5 languages |
| Medical statement revoked | that athlete | on revocation from Documents or the Judge sheet (not from BO Follow-up) | 5 languages |
| Missing documents reminder | athletes missing mandatory forms | the day before the event | — |
| Board notice | the audience you choose | on posting | as written |
| Dispatch | the staff you choose | on sending | as written |
Check-in reminders stop as soon as the athlete is checked in, or marked DNS or Late Check-in, and they need the athlete’s AIDA athlete ID and a Day date.
Time zones. Check-in reminder times are worked out as if the OT were Korean time (UTC+9). Outside that time zone the reminders arrive shifted by the difference, so do not rely on them as the only warning — announce the check-in deadline on site as well.
Who receives what
- Start List, Unofficial Results and Official Results go to every approved member of the event — Organizer, Main Judge, Judge, Staff, Safety and athletes — regardless of the Day you selected. The Photo role is excluded. An AIDA link is not required for these.
- Just before an immediate send, pending athletes who match the start list are approved automatically, so they receive that push too. This step does not run for scheduled sends.
- Targeted pushes — OT Delay, protest notifications, check-in reminders — need the athlete’s AIDA athlete ID to be linked. Somebody who joined with the Athlete code and was never matched will not receive them.
- Board notices also reach members who joined with the Athlete code and are still awaiting approval.
- Notifications go to the last device that signed in with that account. Signing out on a phone releases its registration; signing in there with another account transfers it.
- The language of a notification follows the device language, not the in-app language setting — with the English-only exceptions listed above.
Tapping a notification opens the right place. For staff: start list and OT delay → Start List; unofficial and official results → Results (the Photo role stays where it is); notice → Board; dispatch → a centred popup; protest → the Protests list for Judge and above, otherwise the Start List. For athletes: protest → My Info; start list and OT delay → Start List (My Info for past events); results → Results; notice → Board. If the push carries a Day, the app switches to that Day.
Turning notifications off
There is no notification toggle inside the app. Use device settings:
- iPhone: Settings → Apnea Comp → Notifications.
- Android: Settings → Apps → Apnea Comp → Notifications.
Turning them off at OS level stops them arriving, but it does not immediately clear the registration held for your account. That is cleared when you sign out, when another device signs in with the same account, or when the push service reports the registration as invalid.
Every push is also written to the event Log — Push sent:, Push scheduled: and Scheduled push cancel: — with the recipient count, the Day and who sent it, so a duplicate announcement can always be traced.
Push features are not available inside demo competitions: Send Push and Dispatch show Not available in demo, and the publish prompt after saving Setup reports that push is unavailable there.
Board and Dispatch
Two messaging tools live side by side in the More menu. Board is the public notice board for the whole event; Dispatch is a direct message from one staff member to a chosen group of colleagues. Both are available to every role, but who may write differs.
Board (notices)
Staff open the board from More → Board (megaphone icon). Athletes reach the same board from the megaphone icon in the event AppBar, which carries a red badge counting the notices posted since they last opened it. That badge is remembered on the device, so opening the board on one phone does not clear it on another.
The list shows each post’s title, author and date. Tap a post to read the body; web addresses inside the text become tappable links.
Only the Organizer and Main Judge can post. Tap New post, fill in Title (required) and Message, then tap Post. Edit and delete buttons appear only for the person who wrote the post.
After posting, the app asks Notify by push? with three choices:
| Choice | What happens |
|---|---|
| Don’t send | The notice appears on the board only. |
| Athletes only | Athletes of this event are notified. |
| Everyone | Athletes and staff are notified. |
Notice pushes carry your title and message exactly as you typed them — they are not translated, so write in the language your participants read. Tapping the notification opens the board.
Athletes who joined with the Athlete code and are still waiting for approval can already read the board and receive notice pushes, which makes it a good way to reach late entries. The board also opens inside demo competitions, where it is simply empty.
Dispatch (staff messages)
More → Dispatch is for messages between staff. Any approved member who is not an athlete can write one: tap New dispatch, type the message, and pick the recipients (Select all selects everyone at once). You never appear in your own recipient list.
There is no subject line. The push arrives with your name as the title and your message as the body, and it is not translated. When a recipient taps the notification, the newest dispatch opens as a popup in the middle of their screen.
Organizer and Main Judge see every dispatch in the event, including who each one went to. Everyone else sees only the dispatches they sent or received. The author, the Organizer and the Main Judge can delete a dispatch.
Dispatch is not available in demo competitions.
Safety and venue tools
Besides judging and scheduling, the More menu holds the tools the safety team, the rope team, the equipment manager and the photographers use during the day. Which tiles you see depends on your role — see Roles and what each can do.
Risk Marking
More → Risk Marking is open to Organizer, Main Judge, Judge and Safety. It lists the current Day’s start list with a line filter (All, L1, L2, …).
Tap or long-press an athlete and choose a level: None (clear), Yellow, Orange or Red. Use it to flag athletes you want the safety team to watch for LMC or blackout — a difficult warm-up, a big jump in AP, a history of samba.
The mark colours the athlete’s row here, shows as a coloured dot on the Judge card and on the Apple Watch, and reaches every device in the event in real time, so a mark set at the desk is on the safety diver’s wrist within seconds.
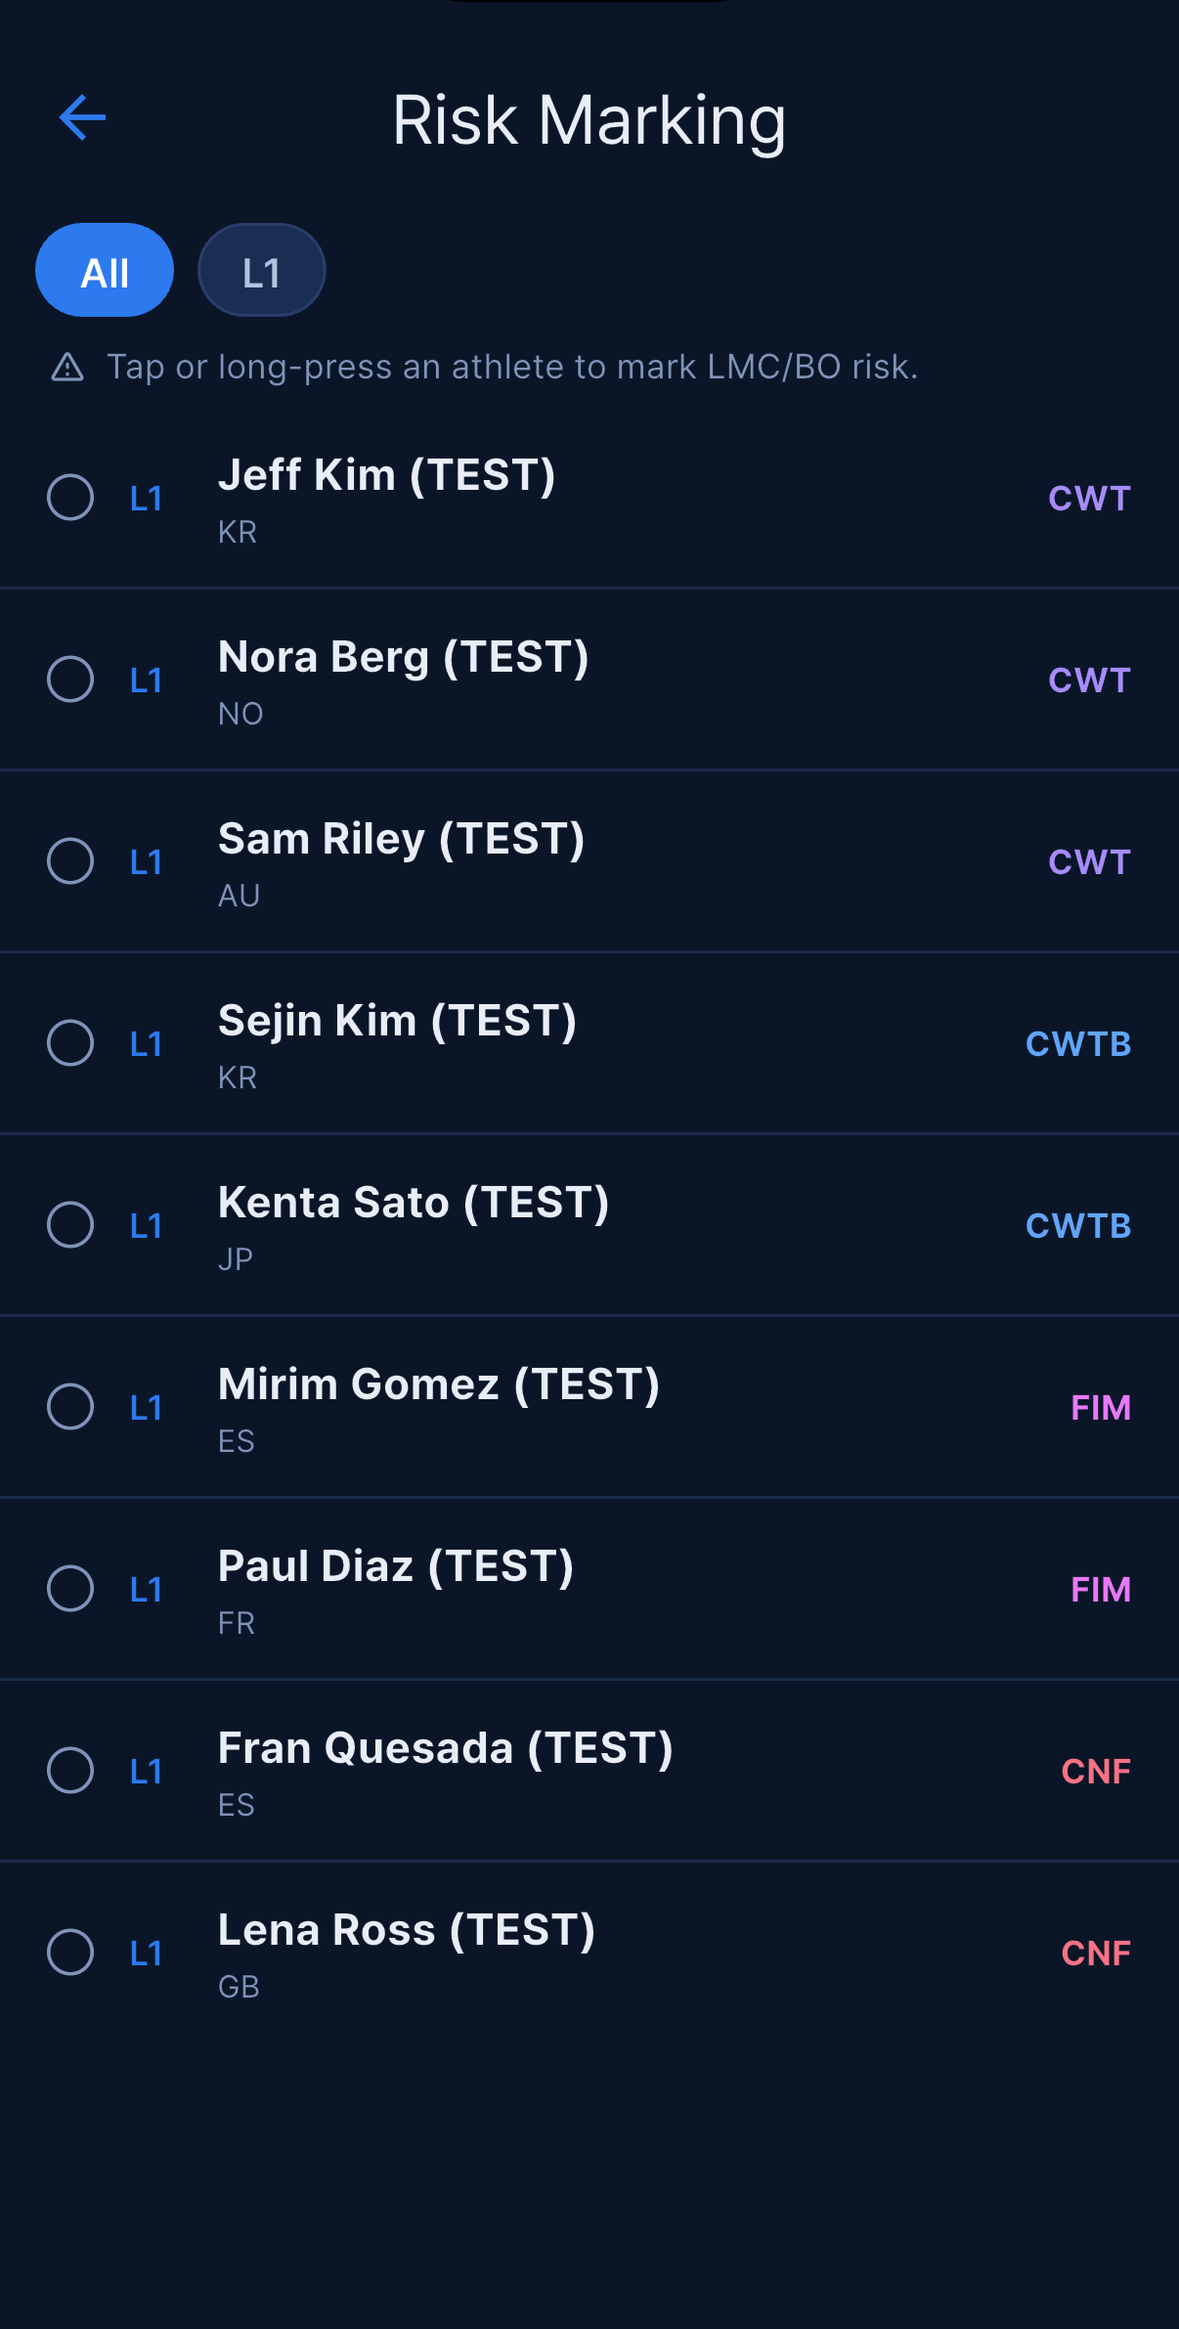
Athletes marked Orange or Red also appear in BO Follow-up alongside athletes who actually blacked out, so nothing you flag gets lost at the end of the day. See Blackout follow-up and medical clearance.
Rope Calibration
More → Rope Calibration is shown to the same roles as Risk Marking, and only for depth events or Days that have depth athletes on the list.
Enter the official gauge reading measured at each 10 m rope marking. The app shows the Error (marking − gauge) to one decimal place in orange: a + value means the rope has to go deeper, a − value means it has to come up. Rows are created down to the deepest AP on the list, with a minimum of 60 m; Add 10 m deeper adds another band. Tap Save at the top right when the measurements are in.
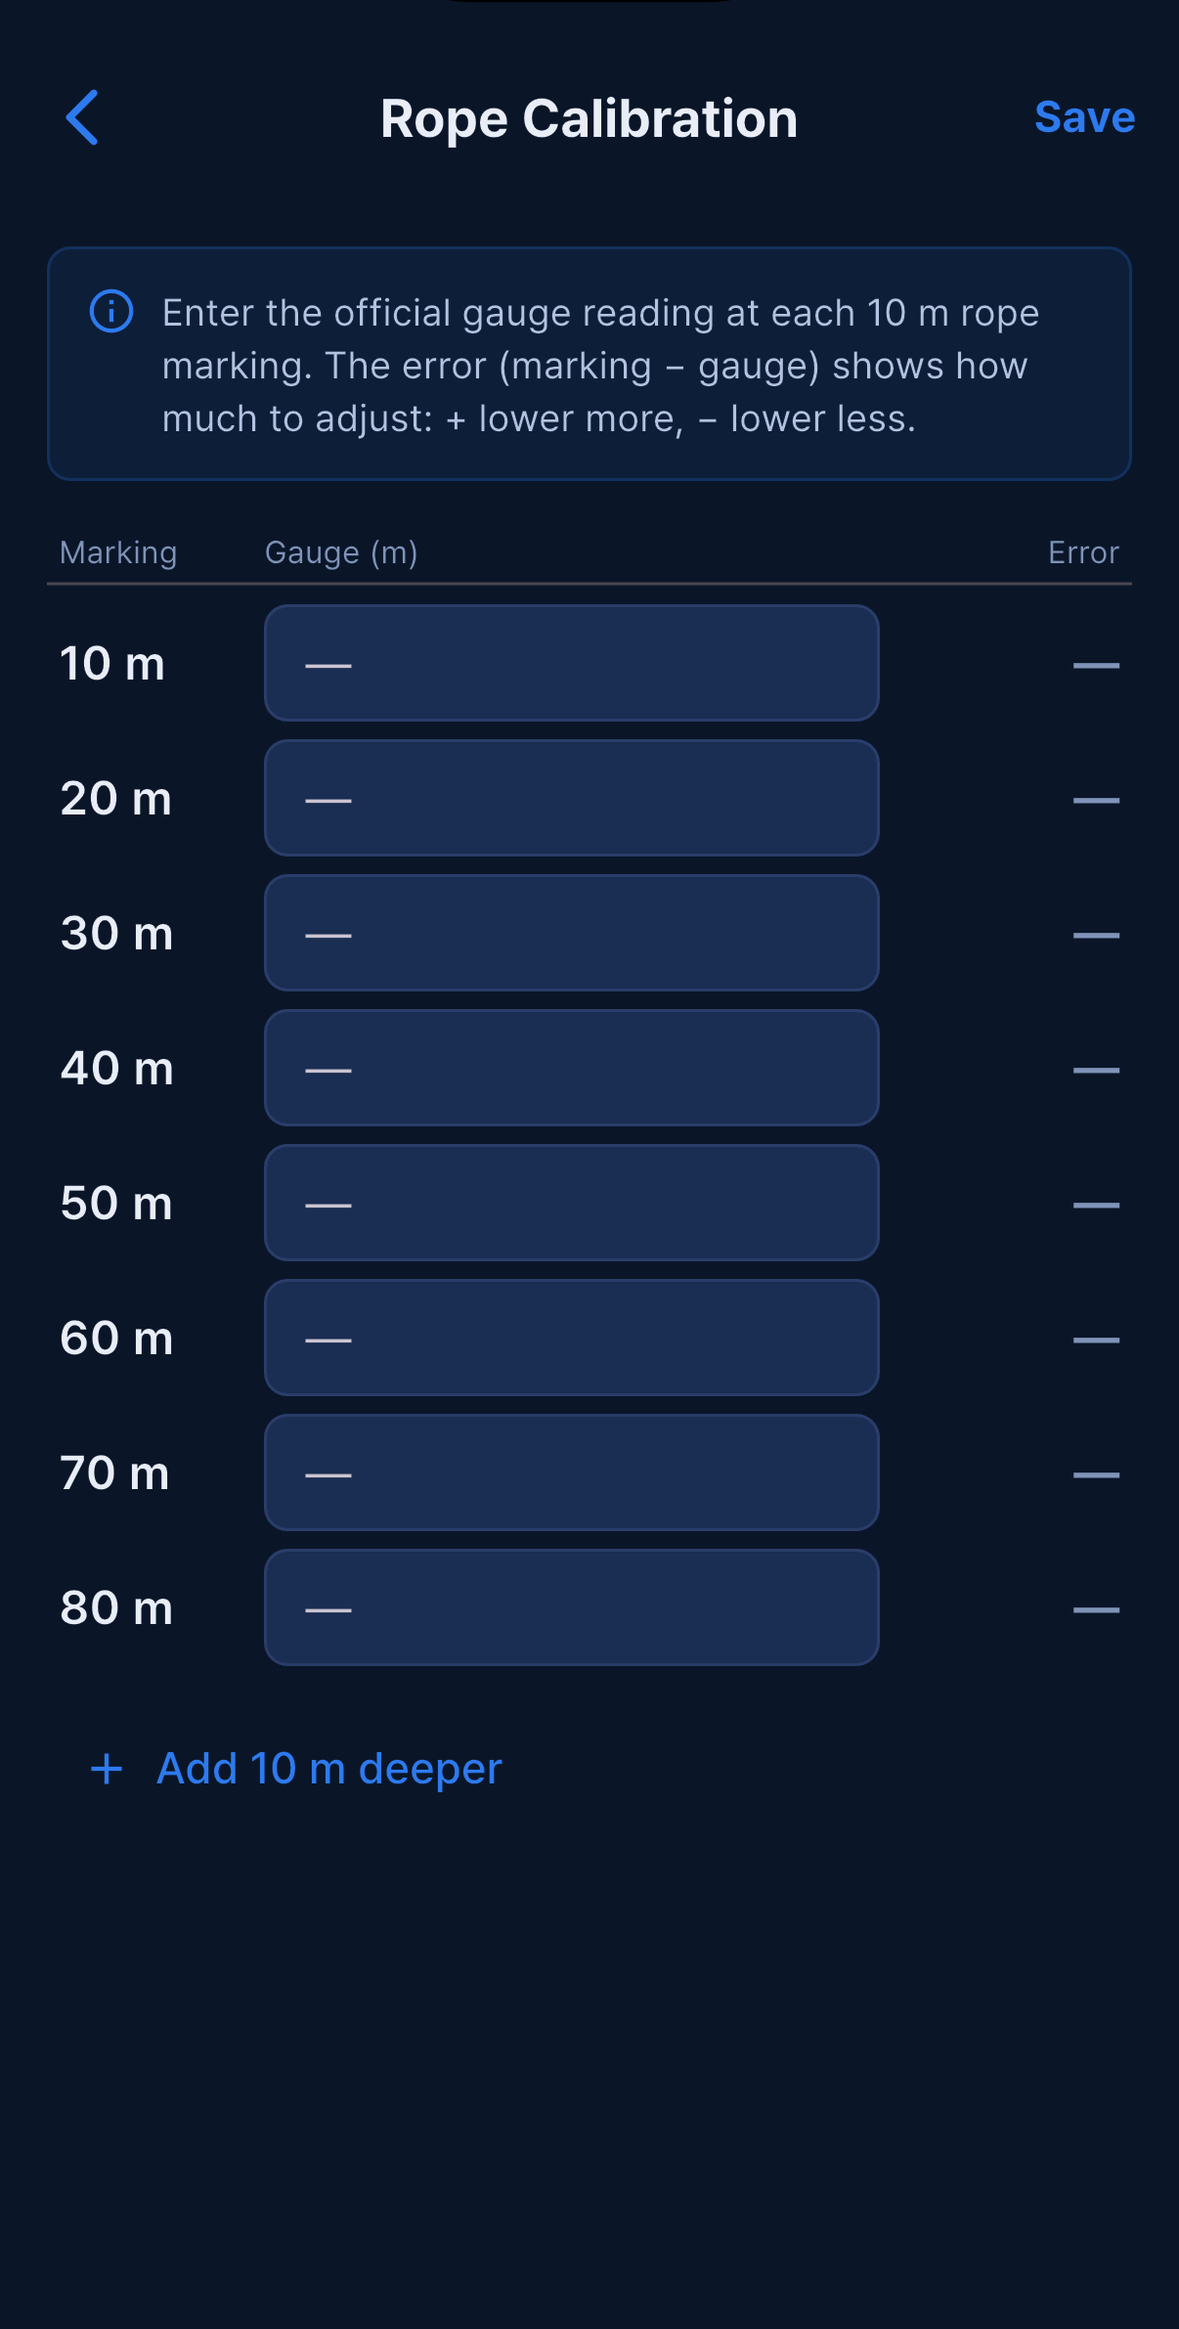
Calibration is stored per Day, so a rope re-rigged overnight is measured again the next morning. Once saved, every depth athlete shows the error for their own AP band — Rope +1m on the Judge card and detail sheet, and R +1 on the Start List. Bands you did not measure show nothing at all rather than guessing.
Equipment Checklist
More → Equipment is open to every role except Photo. It is a shared checklist of everything that has to be at the venue, ticked off by the people who actually carry it.
- Organizer and Main Judge create categories and items, and tag each one with a role — Common, Organizer, Main Judge, Judge, Staff or Safety. An item inherits the role of its category unless you change it.
- Any event member can tap an item to tick or untick it, and the name of the person who ticked it is shown next to it.
- The header counts progress as x / y checked. When everything is ticked, an Organizer or Main Judge can tap Confirm; the confirming name is shown afterwards.
- The role chips at the top filter the list, so the safety team can see only their own items.
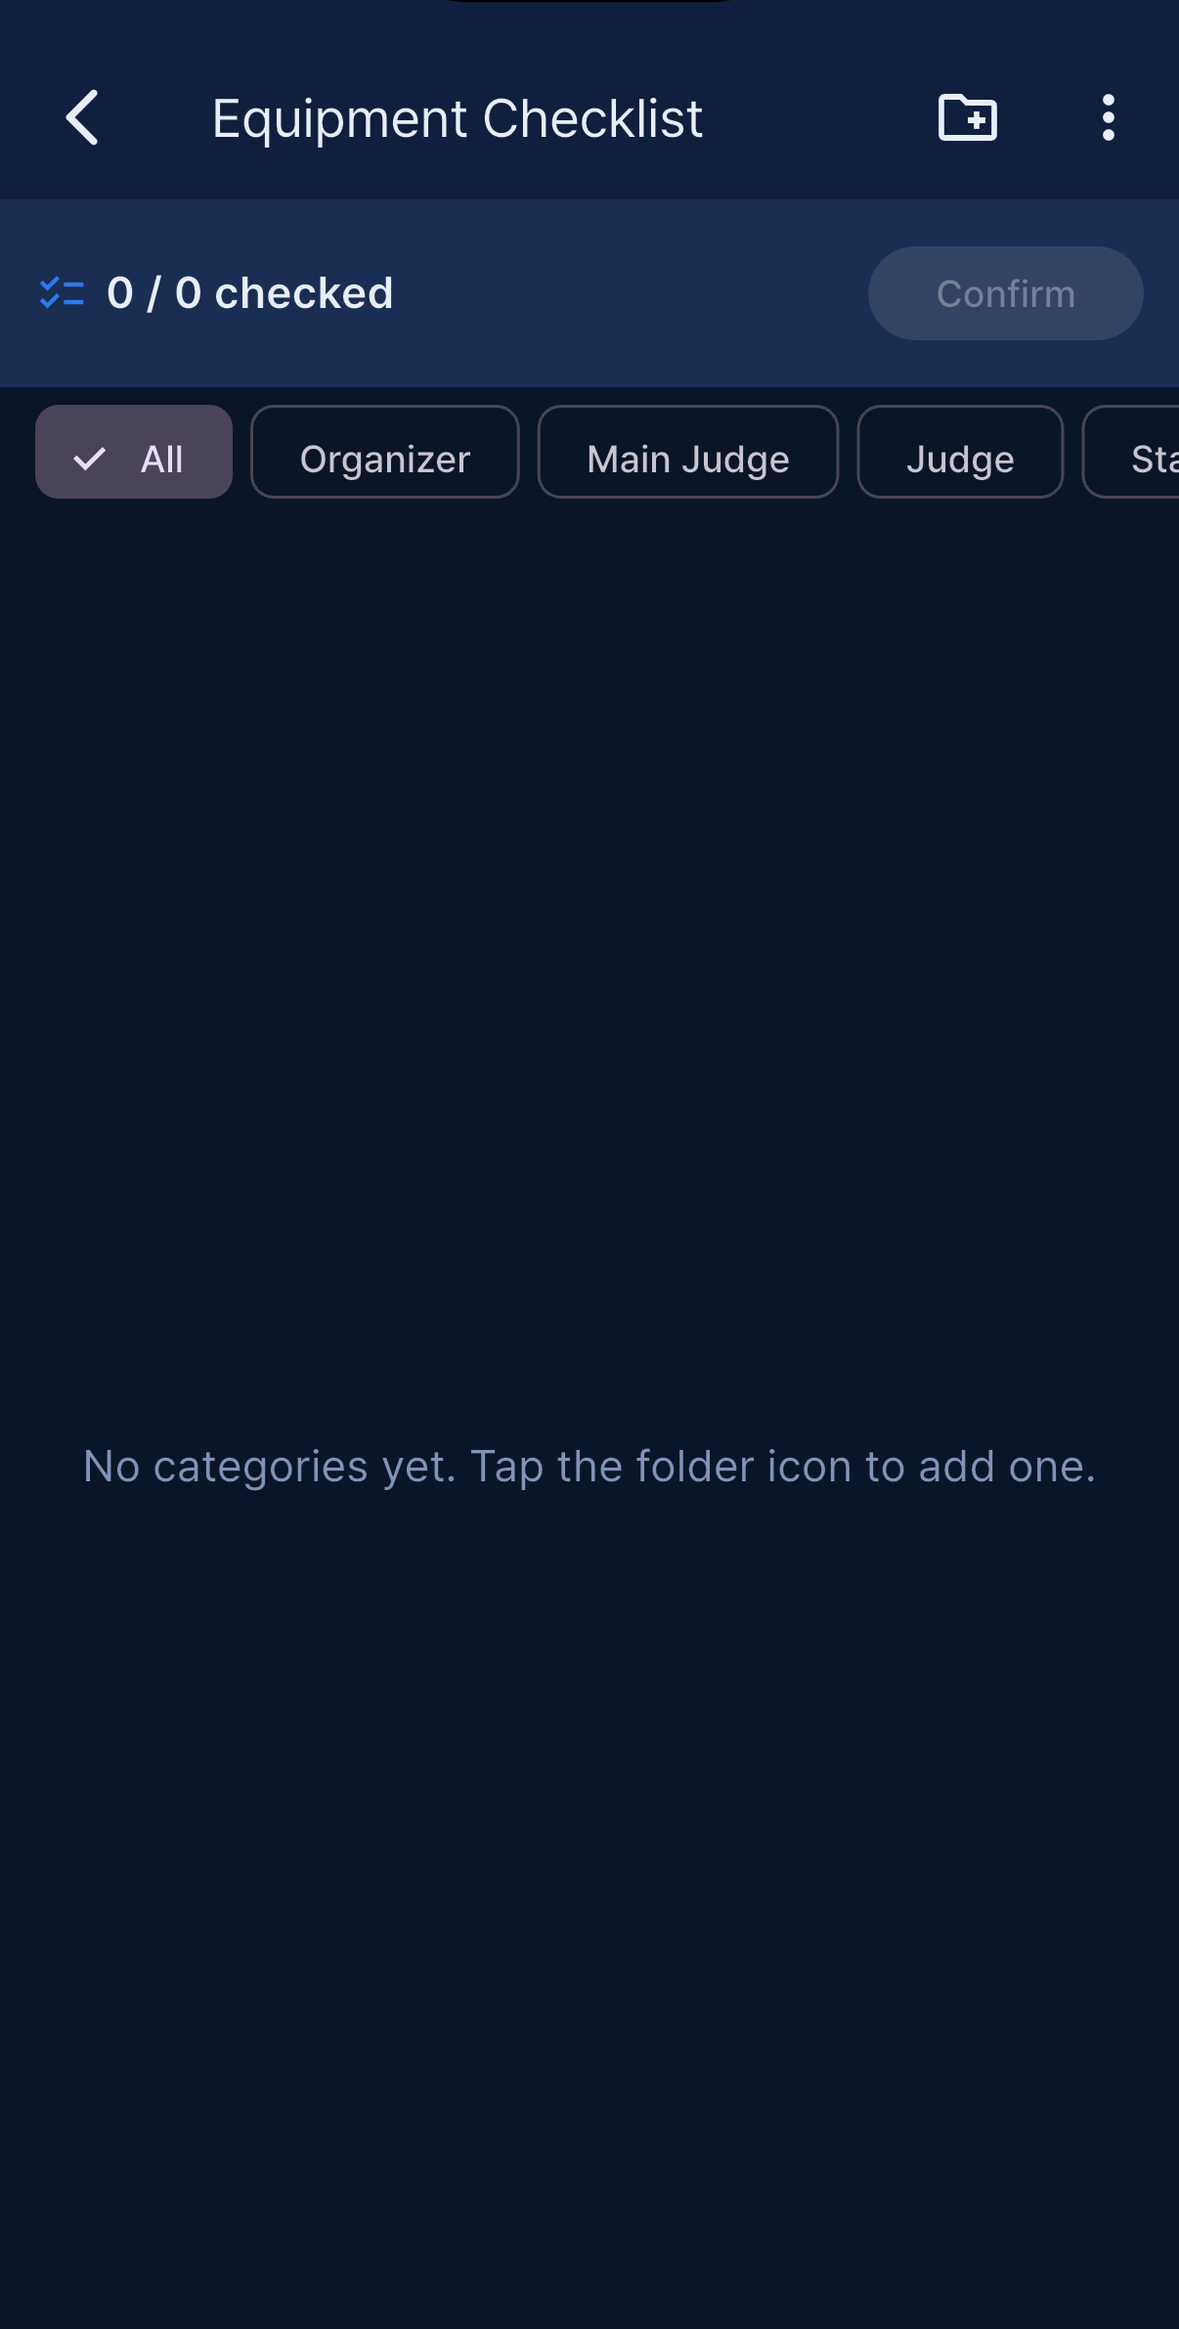
The ⋮ menu offers Export CSV to everyone, and Save as template / Load template for Organizer and Main Judge. Templates are saved to your account rather than as a file on the device, and they keep the role tags — build the list once and load it into next season’s events.
Photo Marking
More → Photo Marking appears only for the Photo role. The first time you open it, register your photographer name and pick a colour; colours already taken by another photographer at this event are disabled.
Filter by line, then tap athletes to mark or clear the ones you are covering. Each athlete row shows up to five photographers’ colour dots, so the team can see at a glance who is uncovered. Your own assignments are highlighted in your colour on your Apple Watch — see Apple Watch companion.
Athletes (search)
More → Athletes is open to everyone. Unlike the Start List and the Judge tab, it loads athletes from all Days of the event, merges duplicates by name and nationality, and lets you search by name or nationality.
Tap an athlete to see every Day and discipline they are entered in, together with the AIDA sync status of each result (AIDA or AIDA Failed). This is the fastest way to answer “when does she dive?” for someone who is not on today’s list, or to check whether yesterday’s result ever reached AIDA.
Multi-day events
A competition that runs over several days is a single event in the app with one Day block per competition day.
There is no field where you type the number of days. The Days come from AIDA: connect the event, then Setup → Load Days creates one block per AIDA competition day, each labelled with its date. To mark a day on which nobody competes, long press its block — the hint under the blocks reads Long press to mark a day as Rest Day.
Whenever an event has more than one Day, a Day selector appears just under the AppBar. Tap it to switch; Setup, Start List, Check-in, Judge, Results and Send Push all follow the Day you have selected.
Each Day keeps its own start list, check-in state, results, OTs, break times and rope calibration. Data does not carry between Days: moving an athlete in Day 2 does not touch Day 1, and OTs are calculated per Day. Totals across the whole competition are computed in Rewards, where the Day chips let you switch between Total and a single Day.
Two things do reach across Days:
- Blackouts. An athlete who blacked out on an earlier Day must be cleared before checking in on a later one, and unresolved follow-ups hold up start-list publishing. See Blackout follow-up and medical clearance.
- The AIDA start list. If AIDA regenerates the competition’s start list, Days that no longer exist on AIDA’s side are cleaned up automatically so the Day selector matches AIDA. Days that already hold results, openers or re-swims are never removed.
Offline operation
The app is designed to keep working when the internet drops mid-day, which is common at pool / depth venues.
What happens when you lose connection
A red bar “You are offline” appears at the top. You can still:
- ✅ Save Judge results (stored locally, synced later)
- ✅ Check-in athletes (stored locally, synced later)
- ❌ Load new athlete lists from AIDA
- ❌ Receive push notifications (delivered when reconnected)
One extra step appears at the check-in desk: the document lookup needs the server, so while you are offline every athlete you check in raises a Document status unknown dialog and you have to tap Check in anyway to continue. The check-in itself is saved normally. If you know the day’s paperwork is complete, this is safe; if you are not sure, note the name and verify it when the connection returns. See Check-in.
The Offline badge

When you save a result while offline, the athlete card shows a small ⛔ Offline badge instead of the AIDA sync badge. This means:
- The result is safe in your device’s memory.
- It has not yet reached the server.
- The app will retry automatically every 5 seconds in the background.
When the internet returns, the badge changes to ✅ AIDA automatically. No manual action needed.
Manual sync
If for some reason auto-retry has not caught up, open Results:
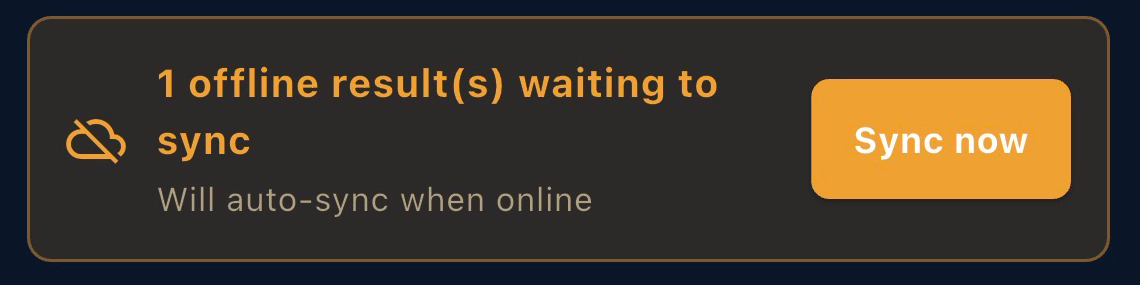
If anything is pending you will see an orange banner:
- “N offline result(s) waiting to sync” with a Sync now button — tap to retry immediately.
- “M results not synced to AIDA” with a Resync button — for AIDA-side failures (token, server error, …).
Important
Offline results live in your device memory until they sync. Do not force-close the app or reboot the phone while you have offline items pending — they would be lost. Wait for the ⛔ badges to clear, or tap Sync now before quitting.
If you are unsure, open Results and look for the orange banner. No banner = nothing pending.
AIDA integration
Connecting the event to AIDA International is what turns the app from a local scoreboard into the official scoring tool: the start list comes down from AIDA, and every judged result goes back up.
Getting your credentials
Log in to your AIDA International admin account at https://www.aidainternational.org and open the competition you registered. In the API / integration section you will find the two values the app needs:
- AIDA Event ID — a number, usually 4–6 digits.
- AIDA API key — a long string of letters and digits.
If you do not see these, the AIDA admin who registered the competition has to share them with you, or your account permissions need updating. AIDA API keys are short-lived — typically a few hours — so expect to reconnect during a long competition.
Connecting in the app
The Connect to AIDA sheet opens by itself right after Event created!, and you can open it again at any time from Setup → AIDA API Connection → Connect.
Enter the AIDA Event ID and the AIDA API key (the eye icon reveals what you typed) and tap Connect. That single button validates the credentials, saves them and refreshes the server-side cache; on success the card shows Connected. If it fails you get Could not connect. Check the Event ID and API key. There is no Test Connection button and no separate Save step, and Edit Event contains no AIDA fields at all.
Once connected, the same place on the Setup card becomes Load Days, and after a Day is selected, Load List.
Reopening the sheet pre-fills the values you are using now — this is where you replace an expired key. Only the Organizer and Main Judge can do it; other roles have to ask.
What syncs and when
- Read — Load Days fetches the competition days, and Load List pulls the selected Day’s start list: names, AP, PB, DT and discipline.
- Write — every Save Result in the Judge tab sends RP, card, penalty reasons, REMARKS and start offset in the background. Marking an athlete DNS or Late Check-in is also sent, as a RED card with 0 points and the reason in REMARKS.
Connecting, or tapping Load Days, also overwrites the event date with AIDA’s first competition day. That is deliberate — it keeps the app’s date in step with AIDA — but it means the event card date can change under you, and if AIDA’s first day is already in the past the event immediately becomes read-only for staff other than the Organizer and Main Judge. See Creating an event (Organizer).
When sync fails
- Key expired or invalid → a red bar appears for the Organizer and Main Judge reading AIDA token invalid — reconnect in Setup → Connect; everyone else sees AIDA token invalid — ask the Organizer to reconnect it. Fix it in Setup → AIDA API Connection → Connect, then open Results and tap Resync. On the Results banner, the Organizer and Main Judge can also tap Update token, which opens the same Connect sheet.
- Event locked on AIDA (403) → the result records Event locked on AIDA (403) — results are final or token/event mismatch; auto-retry stopped. This happens when the competition has been finalised on AIDA, or when the key belongs to a different event. Those results are permanently dropped from the 15-second auto-retry and from bulk Resync, so the message on the card is the only sign — read it before assuming the network is at fault. Reconnect with the right key, or have AIDA reopen the competition, and save the result again.
- Network error → a 🔁 Retry badge on the card. Tap it for the error message and retry, or use Results → Resync to do all at once. Requests give up after 15 seconds rather than spinning forever.
- Offline → ⛔ Offline badge. Auto-retries when online; see Offline operation.
Mock mode
Leaving the AIDA fields blank does not start mock mode. An event with no credentials simply shows Not connected on the Setup card, with no Load buttons and no way to fetch athletes.
Mock mode runs only when the key you type into the Connect sheet is literally test or demo. It generates a sample start list, sends nothing to AIDA and ignores real-world dates so countdowns work immediately. For training and dry runs the demo competitions described in Quick Start are the better option — they need no credentials at all and never touch the server.
Display, language and accessibility
Theme and Language both live in the avatar menu at the top right, and apply instantly across the app.
Theme
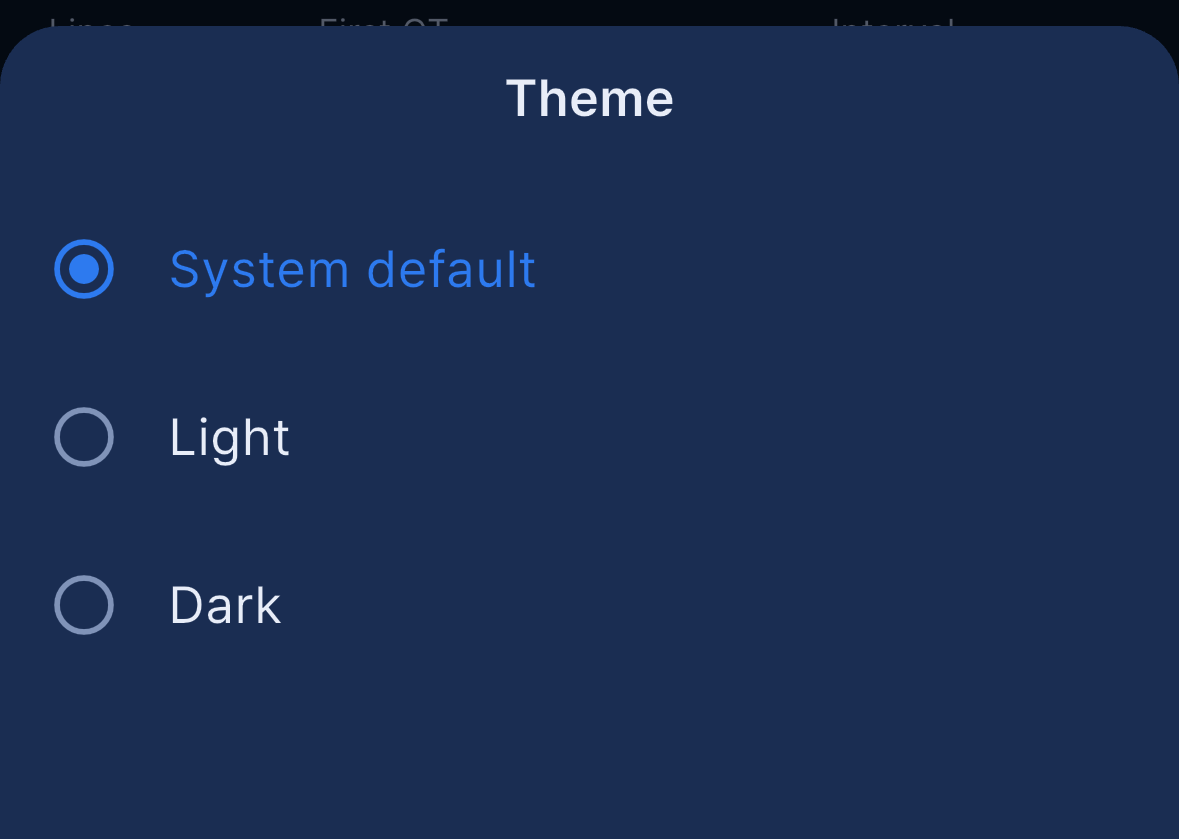
Tap your avatar → Theme → choose System default, Light or Dark.
Inside an event the same sheet also carries a High contrast (outdoor) switch — Bolder grey text for sunlight / waterproof case. Turn it on for poolside and boat work, where the default grey secondary text is hard to read in sunlight or through a waterproof case. The switch is stored on the device, so each phone can be set to suit where it is used. It is not offered on the My Events screens, only in the avatar menu inside an event.
Language
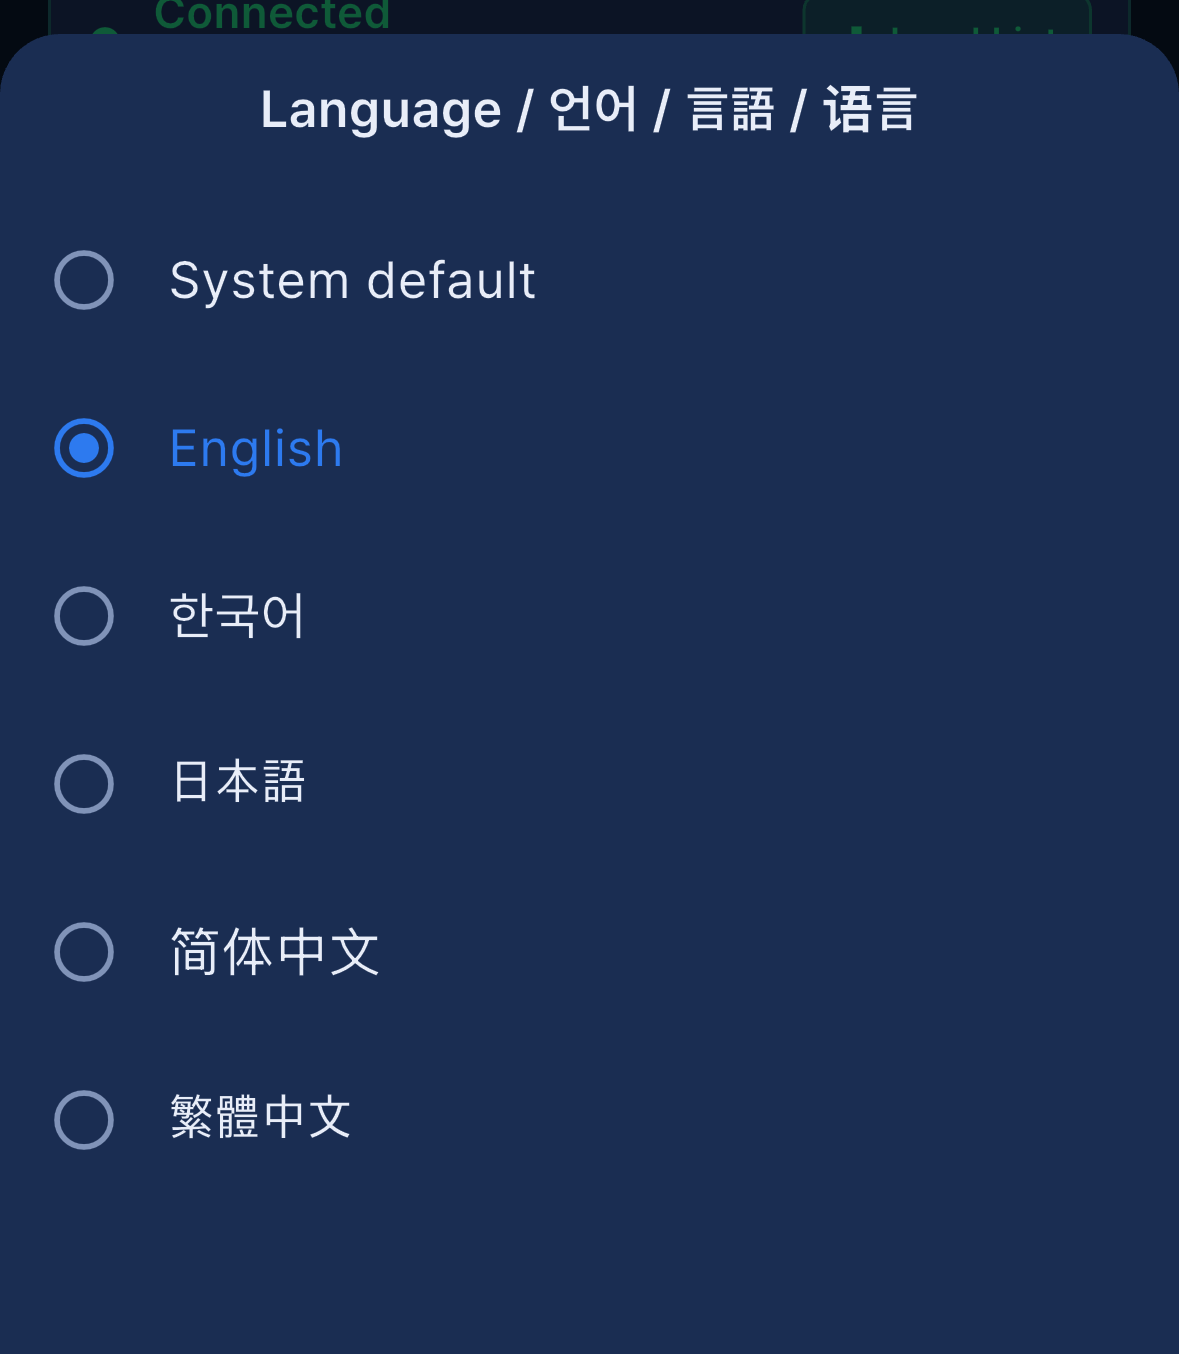
Tap your avatar → Language → choose System default, English, 한국어, 日本語, 简体中文 or 繁體中文. The app switches immediately and remembers your choice.
Two things to know about where this setting does and does not apply:
- Language is only available after sign-in. The sign-in screen and the “How will you use Apnea Comp today?” mode screen follow your device language, and Apnea Comp, AIDA Competition Management System, Continue with Apple / Continue with Google and the Staff / Athlete card titles stay in English in every language.
- Push notifications follow your device language, not this setting. Two exceptions arrive in English for everyone: the OT Delay notice and the check-in reminders. See Push notifications.
Competition-standard terms stay in English in every language — OT, AP, RP, PB, DT, discipline codes (STA, DYN, CWT, …), WHITE / YELLOW / RED, DNS, Late Check-in, Pool / Depth / Lane, AIDA, and the role names (Organizer, Main Judge, Judge, Staff, Safety, Photo, Athlete) — so staff from different countries read the same labels off each other’s screens.
Your profile and account
Edit Profile
Tap your avatar → Edit Profile. The screen holds everything that belongs to you rather than to an event:
- Name — your display name. Saving it also updates your name in the member list of every event you belong to, so correcting a typo here fixes it everywhere.
- Profile picture — shown to other members of your events and next to your entries in the event Log.
- AIDA athlete details — Find me on AIDA searches the AIDA athlete directory and links your account to your AIDA athlete record; you can also type first name, last name, nationality and gender and tap Save AIDA Info. See Joining as an athlete.
- Change Password — set a new password without leaving the app. Not applicable if you sign in with Apple or Google.
- Medical Certificate — the copy stored on your own profile, valid for one year and reusable across events. If an organizer has revoked it, a red warning is shown here too and you have to submit a new one. See Documents (consent forms).
Event documents other than the stored medical statement are not listed here; they belong to each event and are managed from the athlete’s My Info screen.
Post Events
The main My Events list shows only events that are running or still to come. Finished events move to the avatar menu → Post Events, which carries a count badge.
Inside, events are split into 🛠 As Staff and 🏊 As Athlete, and each section can be collapsed. A past event opens READ ONLY — you can look up results, the Log and documents, but nothing can be changed. Organizer and Main Judge can swipe an event to the left and confirm to delete it; deletion is permanent, as described in Creating an event (Organizer).
Deleting your account
You can delete your account from inside the app — no email required.
- Tap your avatar (top corner) → Edit Profile.
- Scroll to the bottom and tap Delete Account.
- Confirm in the dialog.
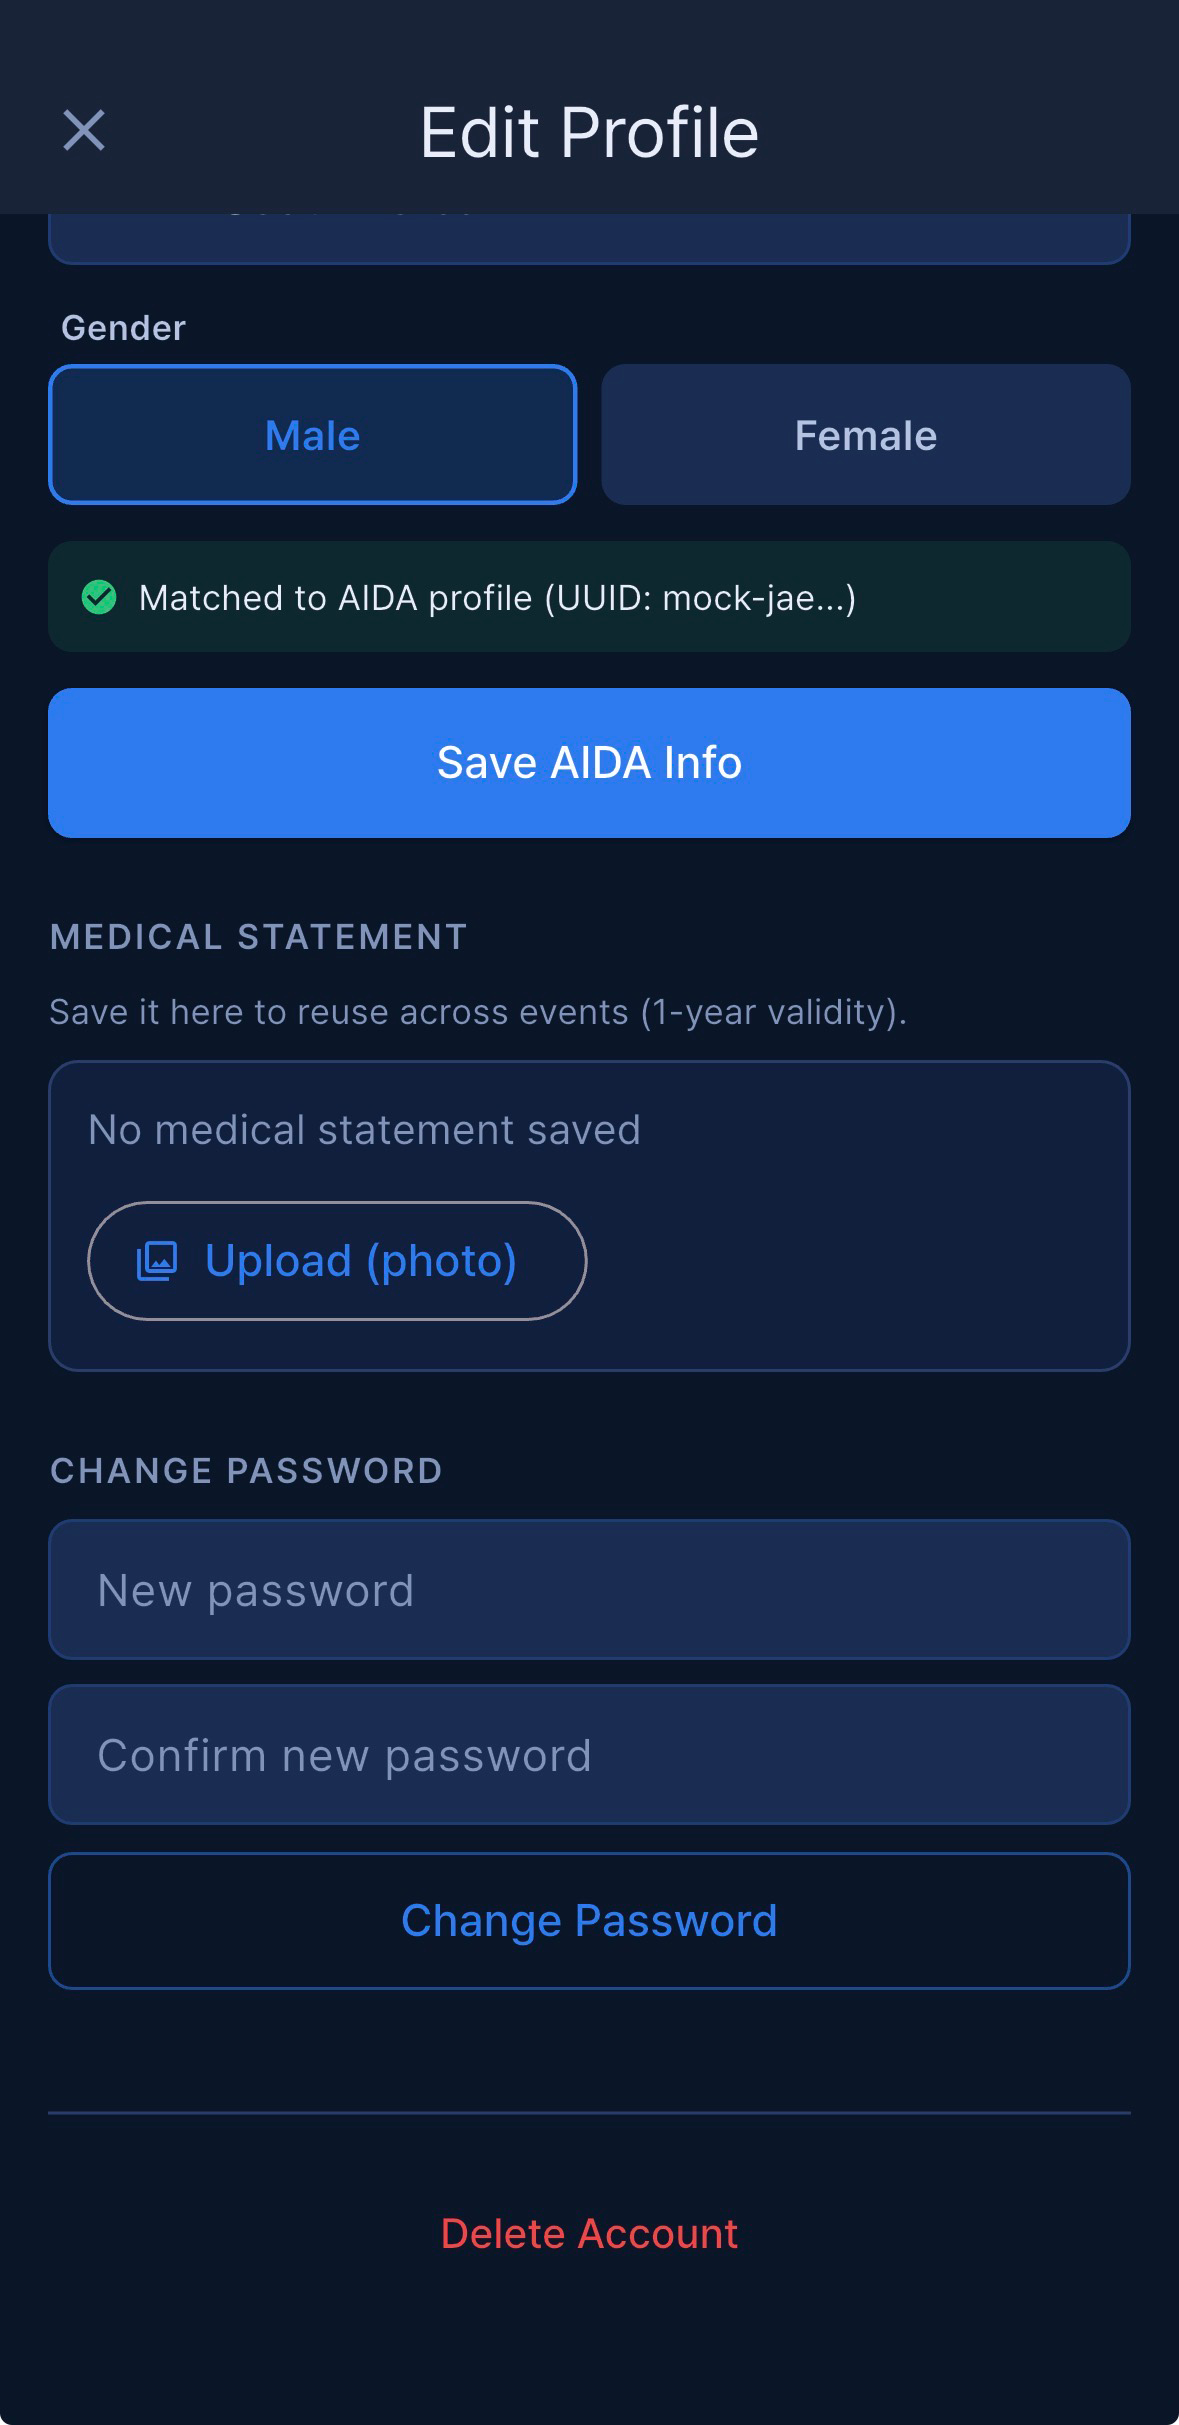
This permanently removes your account and profile. It does not delete competition records that identify you by email address — your event membership, your entries in an organizer’s start list and results, submitted documents and medical statements, protest signatures, Log entries and any exclusion record stay part of that event’s records and are removed on their own schedule.
Three things to know before you do it:
- Your Apnea Comp account is a shared ELfreediving account. Deleting it removes your sign-in for the other ELfreediving apps as well.
- If you own a dive centre in the companion education app the deletion is refused: You own a dive center, so your account can’t be deleted yet. Please transfer or remove the center first.
- Deleting the account does not clear a password saved on that device with Remember password. Sign out from the My Events screen first if you want the device cleaned as well — see Signing in.
FAQ
A staff member’s phone runs out of battery — do I lose their entries?
No. As soon as they save a result, it is stored on the server (or on their device if offline). Other devices in the same event see the result immediately. Even if their phone is permanently lost, only their unsynced offline results would be at risk — and only if they had any pending at the moment of failure.
Two people are looking at the same athlete and saving different results
Last save wins, and the app does not warn about concurrent edits. Coordinate verbally — normally only one judge enters a given result. If it does happen, both values are visible in More → Log (Organizer and Main Judge) with the name of the person who saved each one and the date, so a wrong correction can be traced and put right.
An athlete shows AP / PB but no startId — why?
Likely they were added in Mock mode or imported manually outside AIDA. AIDA sync requires a startId; results for those athletes will not be sent to AIDA (no badge shown). They still appear in Results.
I changed the AIDA API key and old results are still failing
Replace the key in Setup → AIDA API Connection → Connect — that is the only screen that stores it, and a successful Connect also refreshes the server-side cache, so no app restart is needed. Then open Results and tap Resync to re-send everything that failed. If a card says the event is locked on AIDA (403), see AIDA integration — those results are not retried automatically.
What happens if internet drops during check-in?
The check-in is saved on the device and syncs automatically within a few seconds of the connection returning; the athlete does not have to sign again, and the signature drawing itself is never stored. While you are offline the app cannot look up document status, so each athlete raises a Document status unknown dialog and you must tap Check in anyway to continue.
Why can’t I load the start list for this day?
Load List replaces that Day’s athletes, so it is blocked while the Day still has open protests or pending re-swim data — deleting the rows would delete the protest with them. Resolve or delete the protests, or place the re-swims, then load again. Pull-to-refresh always works and is enough to pick up other devices’ changes.
An athlete is not receiving push notifications
Work down this list:
- Start-list, results and notice pushes go to everyone approved in the event. If the athlete is still pending in More → Users, approve them.
- Targeted pushes — OT Delay, protest notices and check-in reminders — additionally need the athlete to be linked to their AIDA athlete record. Without the link the system does not know which athlete they are.
- The device must have accepted Turn on notifications on the Get competition alerts prompt, and notifications must be on at OS level (iPhone: Settings → Apnea Comp → Notifications; Android: Settings → Apps → Apnea Comp → Notifications).
- Only the last device that signed in with that account receives notifications. If they signed in on a second phone, the first one goes quiet.
- Check-in reminders stop once the athlete is checked in, DNS or Late Check-in — that is intentional.
Can I delete an event?
Yes — an Organizer or a Main Judge can. Open Setup → the pencil icon (Edit Event) → Danger Zone → Delete Event. The main My Events list has no swipe-to-delete; past events can be swiped away from avatar → Post Events.
Deletion is permanent and removes all of that event’s data: athletes, results, logs, check-in status and protests. Generated protest PDFs are removed automatically 30 days after they are created.
An athlete I removed cannot rejoin
That is by design. Remove from Event is an exclusion, not a reset: the same email is refused when it tries the Athlete code again and is never re-registered automatically, and another account using the same AIDA athlete ID or the same name and nationality can register but stays pending. The only way back in is a personal activation code issued after the removal — codes handed out before it are rejected as Invalid or expired code. See Joining as an athlete.
Why did my Speaker Mode phone sign itself out?
Five minutes after the Day’s last OT, a device in Speaker Mode leaves Speaker Mode and signs out, with the message The competition ended 5 minutes ago — this Speaker Mode device has been signed out. It is a safety net so a PA phone left on a table does not keep holding the account overnight. Sign in again to carry on.
Can I run a competition that crosses midnight?
Yes. OTs are stored as a time of day, and the Start List detects the rollover: when the times stop increasing — 23:34 STA followed by 00:04 DYN — the athletes after the turn are treated as the next day, so the waiting list, the countdown and the voice cues stay correct.
Why is a re-swim athlete missing from Rewards?
Openers and the original entry of an athlete who re-swam are excluded from rankings on purpose, so the same performance is not counted twice. They still appear in Results with their card and RP. See Re-swim & Opener.
What is the OBSERVER chip?
A member whose card shows OBSERVER is a platform operator watching the event for support purposes. They take no part in judging or scoring.
Does the app collect crash reports?
Yes, anonymised. Released builds send automatic crash and error diagnostics so defects in safety-related features can be found and fixed. No screenshots, account details or tracking identifiers are included. See Privacy and data.
The app shows an “Update required” screen and won’t let me in
Your installed version is below the minimum set for live use. Tap Update now to open the App Store / Play Store, install the update, then tap I’ve updated — retry. Back navigation is blocked until the check passes.
Do I need to keep the app open during the day?
Yes, on the device(s) used for judging or check-in. The app does not run in the background — automatic Late check-in and the AIDA retry timer only run on a device that has the event open, so leave at least one staff phone sitting in the event.
The app prevents the screen from auto-locking on every screen, so you can leave the device on a table without it going dark. The battery drains faster than normal because of this — keep the device plugged in for full-day events.
Push notifications themselves do not require the app to be open — iOS / Android deliver them even when the app is closed, as long as you have permitted notifications.
A protest is stuck on “Awaiting signature” and the athlete can’t sign
This happens with old protests created before the current signature flow. An Organizer or Main Judge can open More → Protests → the protest → 🗑 and delete it. See Protests.
What devices are supported?
iPhone on iOS 15.6 or newer and Android 7.0 or newer. A tablet works, but the layout is tuned for phones. The optional Apple Watch companion needs watchOS 26.5 or newer and an iPhone.
Troubleshooting
“Could not save” red SnackBar in Judge
The app could not even store the result on the device — usually because the athlete list on screen has drifted out of step with the event. Pull down to refresh the screen; if that does not help, re-run Setup → Load List for that Day and enter the result again. The error message includes the athlete ID and the current count, which is useful if you need to report it.
“AIDA token invalid” keeps appearing
- Open Setup → AIDA API Connection → Connect. The sheet opens with your current values filled in; the eye icon reveals the key so you can check for a stray space.
- Paste a fresh key from AIDA and tap Connect. You should see Connected.
- Open Results and tap Resync to re-send everything that failed while the key was expired.
Only the Organizer and Main Judge can do this — other roles see AIDA token invalid — ask the Organizer to reconnect it. If the connection succeeds but individual results still fail, read the message on the card: a 403 means the competition is finalised on AIDA or the key belongs to another event.
App shows “You are offline” but I am clearly online
The connectivity check pings the server. If the server is briefly unreachable (rare) or your network blocks the app’s URLs (unusual on hotel / public wifi), the indicator may stay red. Try saving a result anyway — if it succeeds, the indicator clears within a few seconds.
OT Delay icon is missing
Check:
- You are on the Start List tab — the 🕒 icon is only there, not on Judge or any other tab.
- Your role is Organizer or Main Judge; no other role can see it.
- Look on the right side of the AppBar, just before the role badge.
Schedule looks wrong after Line Assignment
Nothing in Setup is stored until you tap Save Configuration — that is when OTs are recalculated. If you reordered athletes or changed lines and the times look wrong, scroll down and save. Watch for the orange Staged — tap Save Configuration below to apply line: Custom Intervals and order or line regeneration stay staged until you save.
A team member is stuck on Pending
Users is in the More menu, not a tab. Open More → Users, find them under Pending Approval and tap Approve to accept the role they asked for, or Change Role to give them a different one. Approval is per event and does not carry between events. A pending athlete can only be approved after the Day’s start list has been loaded.
Results screen is blank but I have judged athletes
Entering an event shows a brief loading overlay while data is fetched, so an empty screen for a moment is normal. Pull down to refresh. If it is still blank, switch to another tab and back. If the issue persists, please screenshot and contact us — this should not happen.
Push notifications stopped working after I switched phones
Sign in on the new phone and accept Turn on notifications when the Get competition alerts prompt appears. The new device takes over the account’s notifications, and the old phone stops receiving them. If you dismissed the prompt with Not now, it will be offered again the next time you launch the app.
An athlete cannot submit a document
Two gates usually explain it:
- The Submission window is closed. Check the Open / Closed badge in More → Documents and adjust the window if needed.
- For a depth Competition Form, the athlete’s announced performance exceeds the allowed limit above their PB. They have to lower the AP on AIDA or correct the PB. See Documents (consent forms).
Check-in keeps asking “Document status unknown”
Either the device cannot reach the server (check the offline bar), or the athlete has no AIDA athlete record to look documents up against — manually added athletes and openers always ask. Tap Check in anyway once you have confirmed the paperwork by eye.
Everyone was marked Late Check-in
The first OT was set less than an hour ahead. Check-in closes one hour before OT, so if the first OT is too close the deadline has already passed and every athlete is marked Late automatically. Set the first OT at least 1 hour 30 minutes ahead, then put the affected athletes back to checked in from More → Check-in (Organizer or Main Judge). See Setup: days, lines and OTs.
The watch shows no depth
Depth needs all of the following: Motion & Fitness permission granted to the watch app, Auto-Launch When Submerged enabled in the watch’s settings, and an Apple Watch Ultra — the dive screen and its depth sensor do not exist on other models. The reading is also limited to shallow water. See Apple Watch companion for the full checklist.
Privacy and data
For full details on what data the App collects, how it is processed, and your rights, see the Privacy Policy.
Quick summary:
- What is stored — your account email, display name and profile picture; your AIDA athlete UUID if you linked one; your push notification subscription ID if notifications are enabled; and the competition data entered in the app: athlete results, check-in status, activity logs, protests (reason, signatures, decision and the generated PDF), submitted documents, medical-statement revocation reasons, blackout follow-up decisions and medic notes, risk marks, Board posts and Dispatch messages together with their sender and recipients, and the list of accounts an organizer has excluded from an event. It also stores the identifier of the device you are signed in on (used to keep one active device per account) and a record of who changed a judged result and when. When you open an athlete profile, the App looks up that athlete’s public AIDA profile by UUID; the result is only displayed and is not stored.
- Documents — forms you fill in inside the app store what you type into them, including your date of birth and country of birth on the Competition Form form, and a medical statement stores the examination date and the physician’s name, phone number and signature. If you submit a photo or scan of a signed paper form instead, that image file is stored.
- Signatures — the athlete, witness and physician signatures on documents, and the signatures on a protest, are stored as part of the official record. The check-in signature is the only signature that is never stored: the pad is visual confirmation, and only the fact that a signature happened is recorded.
- What is not stored — athletes’ email addresses (other than their own account email), phone numbers, postal addresses, location data, tracking identifiers, browsing history or contacts from your device. We do not build a collection of athletes’ face images, but a profile picture you upload is stored, and a photo or scan you attach to a document is stored with that submission.
- Where — Supabase, in the Seoul region (ap-northeast-2) only, encrypted at rest and reachable only through Row-Level Security policies that scope data to each event’s approved members, with the app deciding per role which of it is shown to you. Push notifications transit through OneSignal, which forwards them to APNs (iOS) and FCM (Android) and may process delivery metadata outside that region.
- Retention — event data is deleted when the organizer deletes the event. Submitted event documents are deleted 15 days after the event ends; generated protest PDFs and the protest ZIP archives 30 days after they are created, while a bulk document ZIP is deleted one day after it is built. A medical statement saved to your own profile is kept for its one-year validity and can be withdrawn at any time.
- Crash reporting — released builds send anonymised crash and error diagnostics so defects can be found and fixed, which matters most for the safety-related parts of the app. The reports carry the error, the code location, the app version and the device model — no screenshots, no account information, no usage tracking. Email addresses and long encoded values such as signature images are masked in the report’s message and breadcrumbs, and the user and request context is removed; if that processing cannot complete, the report is discarded instead of sent. The same masking is applied to the exception’s type and message. There is no in-app toggle.
- AIDA API keys — stored encrypted on the server, settable only by the Organizer and Main Judge, and never exposed in URLs.
- Offline buffering — judge results saved while offline live in the app’s memory only and sync within seconds of reconnecting.
- Local device storage — Remember email saves your address to standard local storage. Remember password, if you enable it, saves your password to the device’s secure keystore (iOS Keychain / Android EncryptedSharedPreferences), never to our servers. Your theme, high-contrast and language choices are also stored on the device. Signing out from the My Events screen clears the saved password; see Signing in for exactly what each exit clears.
- Apple Watch — depth and water temperature are shown on the watch only. They are not sent to the phone, the server or AIDA.
- Your account — sign-in is shared across ELfreediving apps, so your email, display name and profile picture identify you in all of them. Competition data stays inside Apnea Comp.
Contact
For bugs, questions, or feedback:
- Email: lee33179@gmail.com
When reporting a problem, please include:
- Device model and OS version
- App version (More → About)
- A screenshot if relevant
- Approximate time the problem occurred (so we can match it with logs)
Manual 1.1.0 — last updated 2026-09-16. App version covered: 1.2.1.